

General Settings
Overview
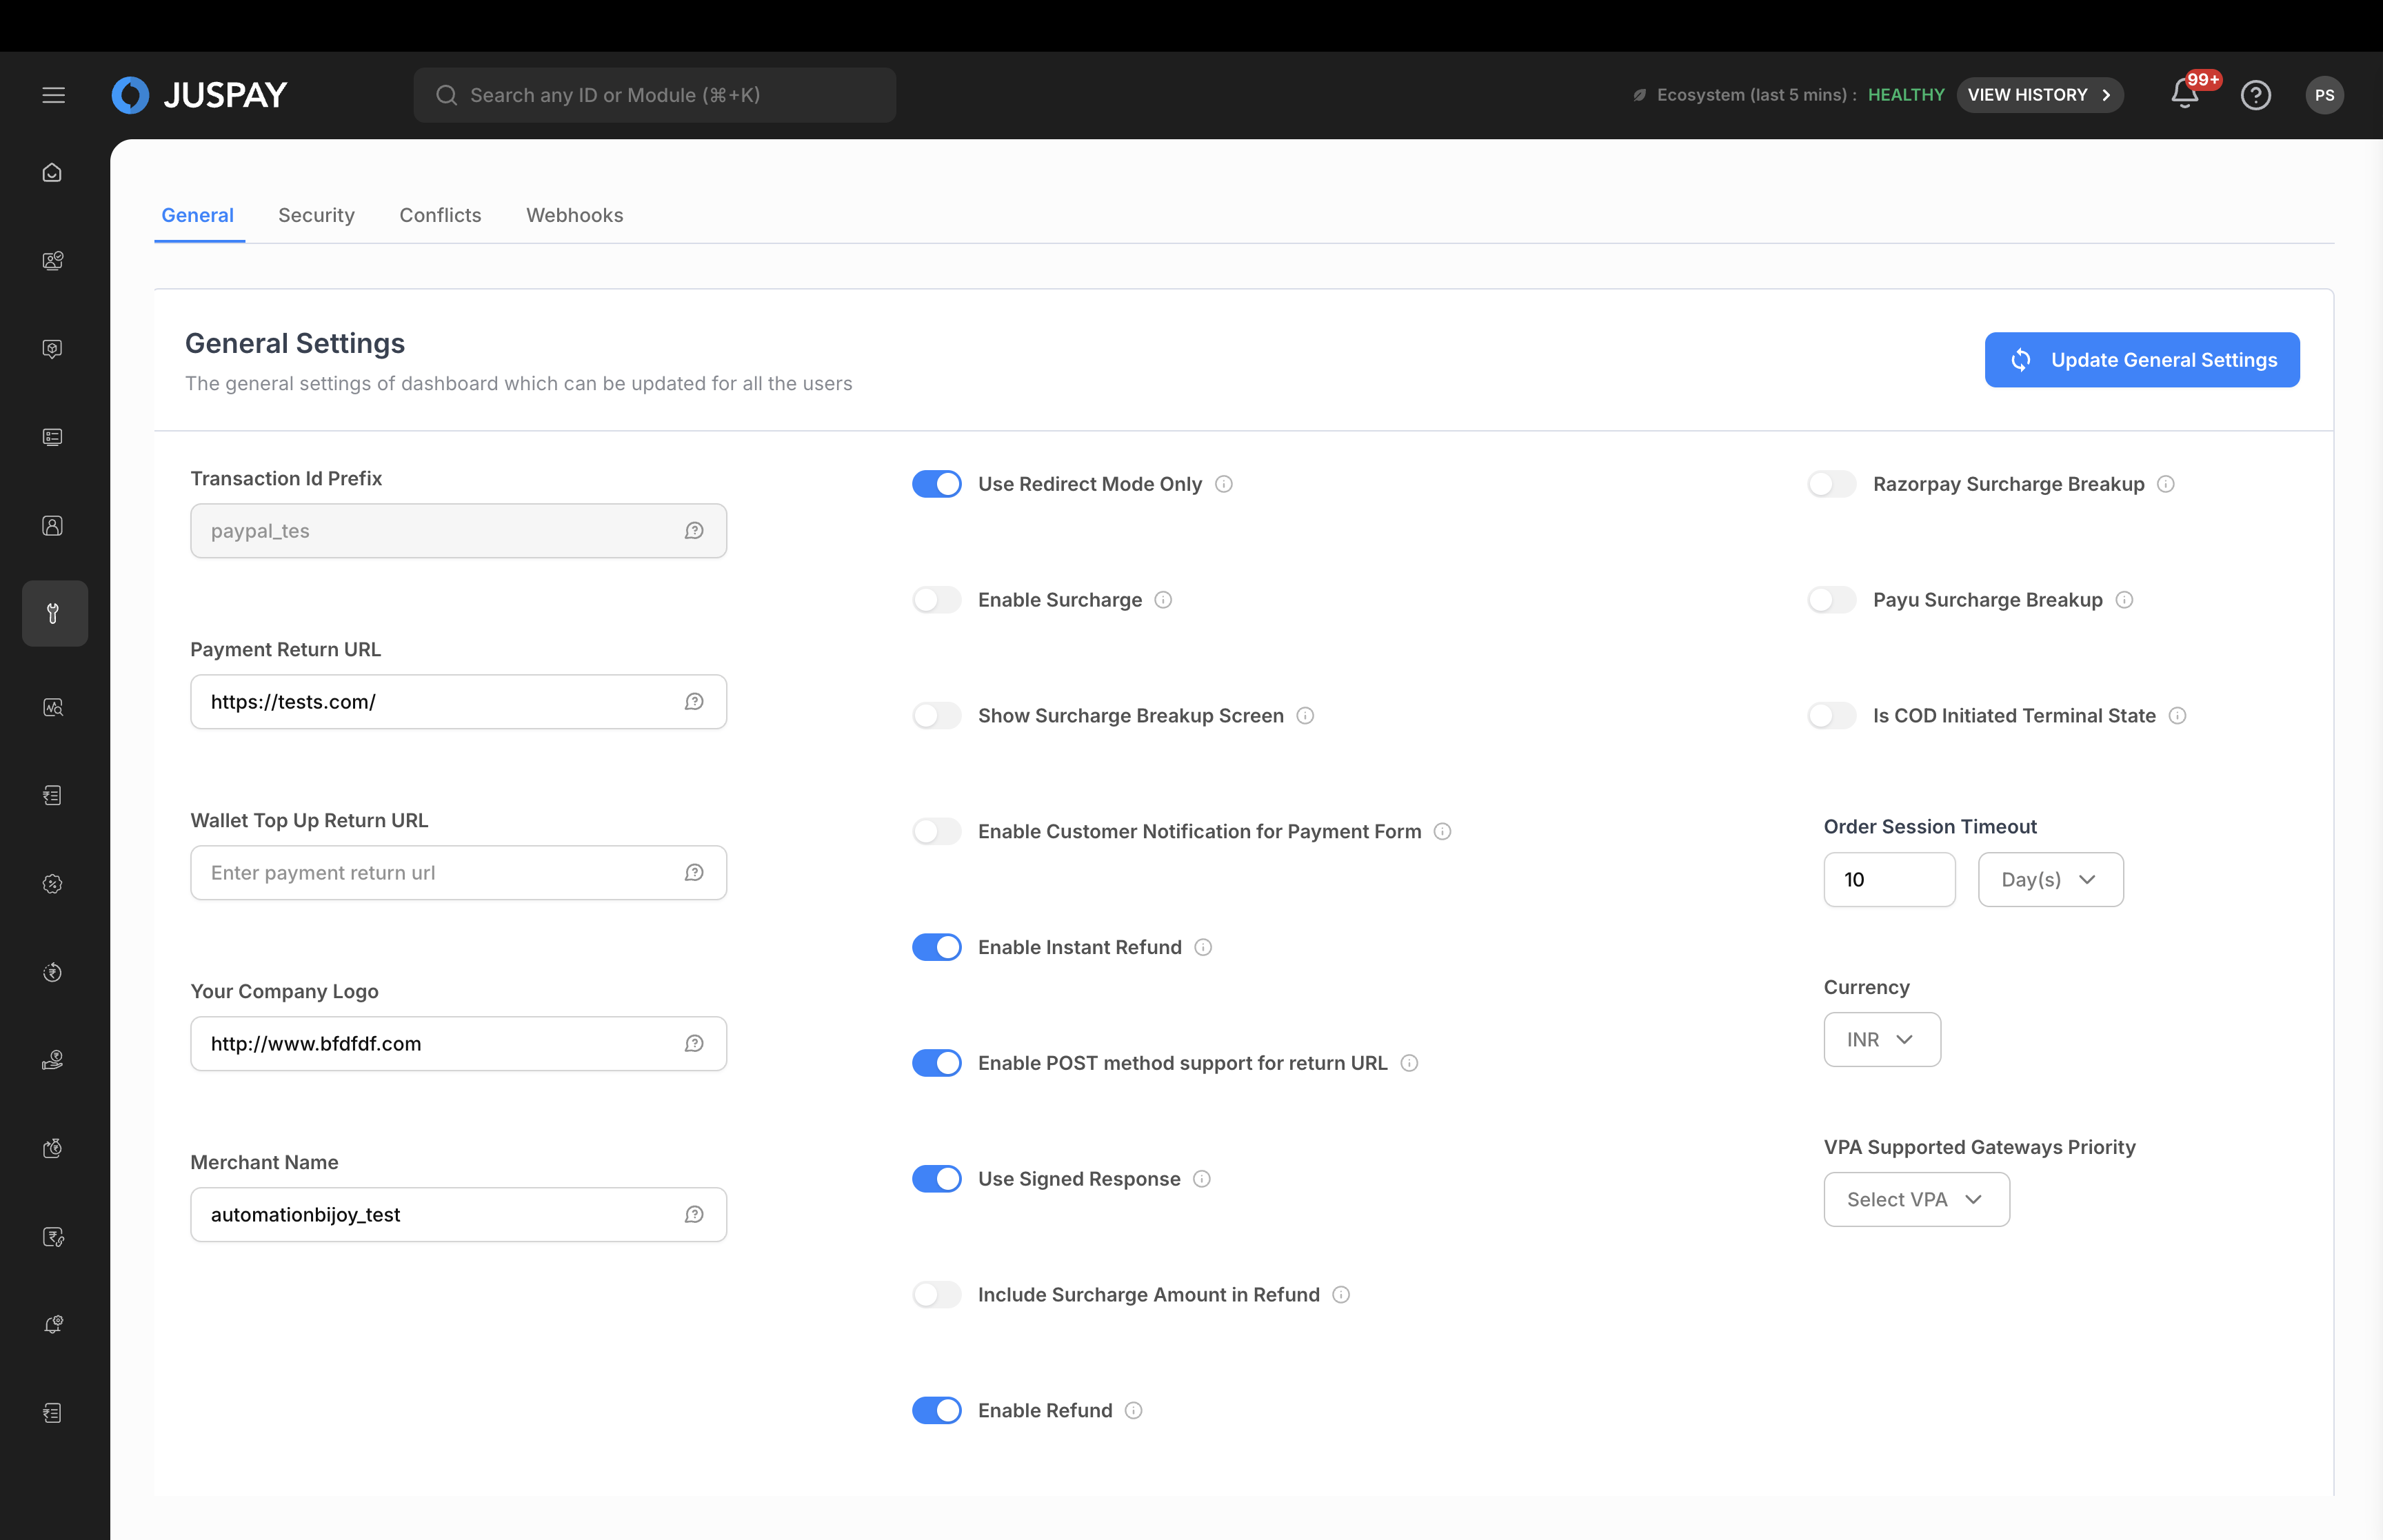
The General Settings feature allows administrators to configure the core settings of the dashboard. This includes customizing various aspects of the application, such as payment processing, URL configurations, feature toggles, and appearance. This feature is primarily intended for system administrators and users with the appropriate permissions to manage the dashboard's configuration.
Accessing the Feature
To access the General Settings feature, follow these steps:
1. Log in to the dashboard.
2. Navigate to the "Settings" section from the main menu.
3. Click on "General Settings" to open the feature.
4. The navigation URL for this feature is https://portal.juspay.in/settings![]()
Step-by-Step Usage Instructions
The General Settings page is divided into several sections, each containing a set of related settings. Below is a breakdown of each section and the settings within it.
URL Settings
This section allows you to configure the various URLs used in the application.
Payment Return URL: The URL to which the user will be redirected after a transaction is completed.
Wallet Top Up Return URL: The URL to which the user will be redirected after a wallet top-up transaction is completed.
Appearance Settings
This section allows you to customize the appearance of the application.
Your Company Logo: The logo that will be displayed on payment pages. Ideal size for the logo is 180 x 75.
Merchant Name: The "Doing Business As" (DBA) name used by the business.
Merchant Legal Name: The legal name under which a business operates for legal and regulatory purposes.
Transaction Id Prefix: This prefix will be added to the transaction ID generated by us at the time of the transaction. The default value is the merchant ID.
Feature Toggles
This section allows you to enable or disable specific features.
Use Redirect Mode Only: If enabled, 3D secure authentication will always happen through browser redirection.
Enable POST method support for return URL: If enabled, the HTTP POST method will be used for the return URL.
Use Signed Response: If enabled, the payment response will have an HMAC signature.
Must use given order id for transaction: If enabled, the order ID provided by the merchant will be used for the transaction.
Enable Customer Notification for Payment Form: If enabled, we will send SUCCESS/FAILURE notifications to customers when payment is done using the Payment Form.
Should Retarget One Shot Payment: Enable Retargeting Module in the dashboard (for one-time payments) to recover failed transactions by keeping orders in a PENDING state and initiating targeted communication with customers.
Payment Settings
This section allows you to configure various payment-related settings.
Enable Surcharge: If enabled, a surcharge will be added to transactions.
Show Surcharge Breakup Screen: If enabled, the surcharge breakup screen will be shown during the transaction.
Razorpay Surcharge Breakup: Enable if Surcharge is enabled at Razorpay's end. Razorpay would require us to pass the surcharge breakup individually.
Enable Refund: If enabled, refunds can be processed.
Enable Instant Refund: If enabled, instant refunds can be processed.
Include Surcharge Amount in Refund: If enabled, the surcharge amount will be included in the refund.
Should Block Surcharge Calculation: If enabled, the surcharge calculation will be blocked.
Payu Surcharge Breakup: Enable if Surcharge is enabled at Payu’s end.Payu would require us to pass the surcharge breakup individually.
Get split refund details in order status: Enabling this will send Split Block in Refund if any.
Is COD Initiated Terminal State: If this flag is enabled, we will not retry COD orders and COD will be considered as a terminal state.
Default Currency: The default currency for transactions.
VPA Supported Gateways Priority: The priority of VPA supported gateways.
Order Session Timeout: The timeout for an order session.
Order Session Timeout Unit: The unit for the order session timeout (Minutes, Hours, Days).
UPI Collect Timer Settings
This section allows you to configure the settings for the UPI Collect timer.
Header Text: This text will be shown in the header of the UPI Collect Request.
Note Text: This text will be shown as the note of the UPI Collect Request.
Show Cancel Button: If enabled, a cancel button will be shown on the UPI Collect Request.
Font Type: The font type to be used in the UPI Collect Request.
Font Color: The font color to be used in the UPI Collect Request.
Progress Bar Color: The color of the progress bar in the UPI Collect Request.
PIX QR Settings
This section allows you to configure the settings for the PIX QR code.
PIX Timer (in seconds): The configured PIX timer represents a maximum limit, and actual expiration may be shorter based on gateway-specific constraints.
Button Color: The color of the button in the PIX QR code.
Button Font Color: The font color of the button in the PIX QR code.
Secondary Button Font Color: The font color of the secondary button in the PIX QR code.
Background Color: The background color of the PIX QR code.
Permissions or Roles
The General Settings feature is accessible to users with administrative privileges. The following roles have access to this feature:
System Administrator: Has full access to all settings and can make any changes.
Merchant (with appropriate permissions): May have limited access to certain settings, depending on the configuration.
To access this feature, the user must have the settings_general ACL with ReadWrite permission. If the user has only Read permission, they will be able to view the settings but not make any changes.