

Encryption for API’s
AES Encryption Integration Guide
This guide contains step-by-step integration instructions, required actions in the Developer Console, how to call encrypted APIs, and a visual flow diagram. Use this document to test and validate encrypted API calls with LotusPay.
What’s New
Support for AES encryption in API communication.
Ability to generate, upload, and manage encryption keys directly from the Developer Console.
Improved security compliance and alignment with industry best practices.
1. Understand the Encryption Flow (High-Level)
The encryption process involves both LotusPay Keys and your Merchant Keys. The process is as follows:
Step 1: Generate Merchant Keys (Public and Private).
Step 2: Upload your Merchant Public Key to LotusPay.
Step 3: LotusPay generates its own key and shares its Public Key with you.
Step 4: You encrypt the payload using LotusPay's Public Key.
Step 5: You send the encrypted payload to LotusPay via the /enc endpoint.
Step 6: LotusPay decrypts the payload using its Private Key.
2. Action Required in the Developer Console
You need to perform two key-related actions in the Developer Console to get started.
A. Generate LotusPay Keys
Go to the "LotusPay Keys" section in the Developer Console.
If no keys have been generated, the "Key Status" will show: "No Keys Generated" and a "Generate Keys" button will be visible.
Click Generate Keys. This will produce LotusPay's key pair and provide LotusPay's public key, which is required for AES encryption.
After keys are generated, the "Key Status" will change to "Keys Available" and you will see a LotusPay Key ID (LotusPay KID).
You will have the option to Rotate Keys or Revoke Keys from this UI.
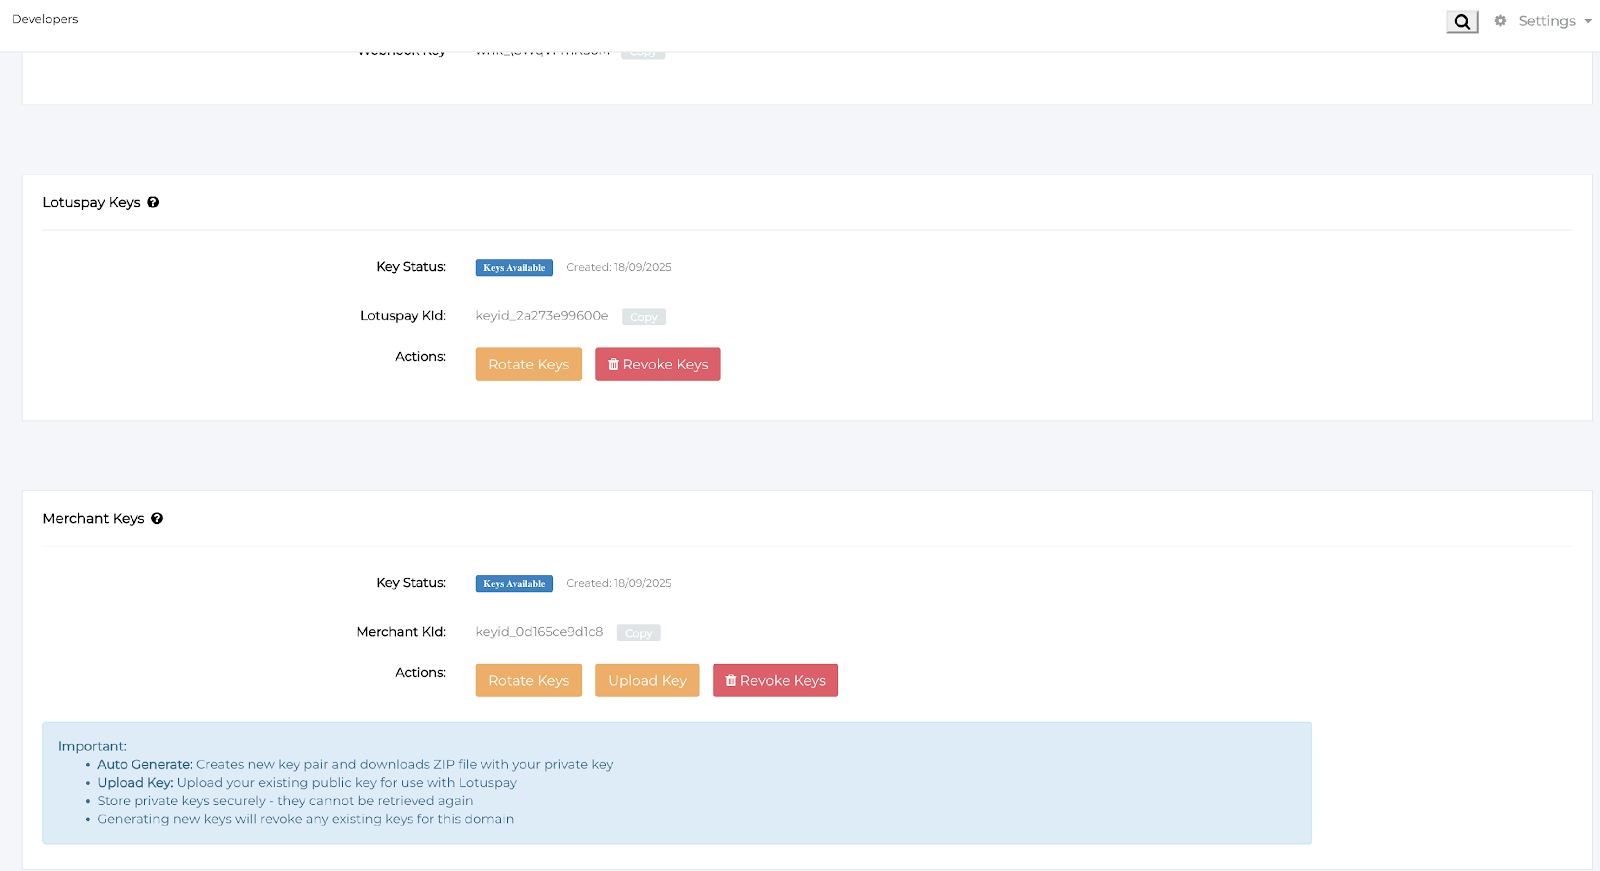
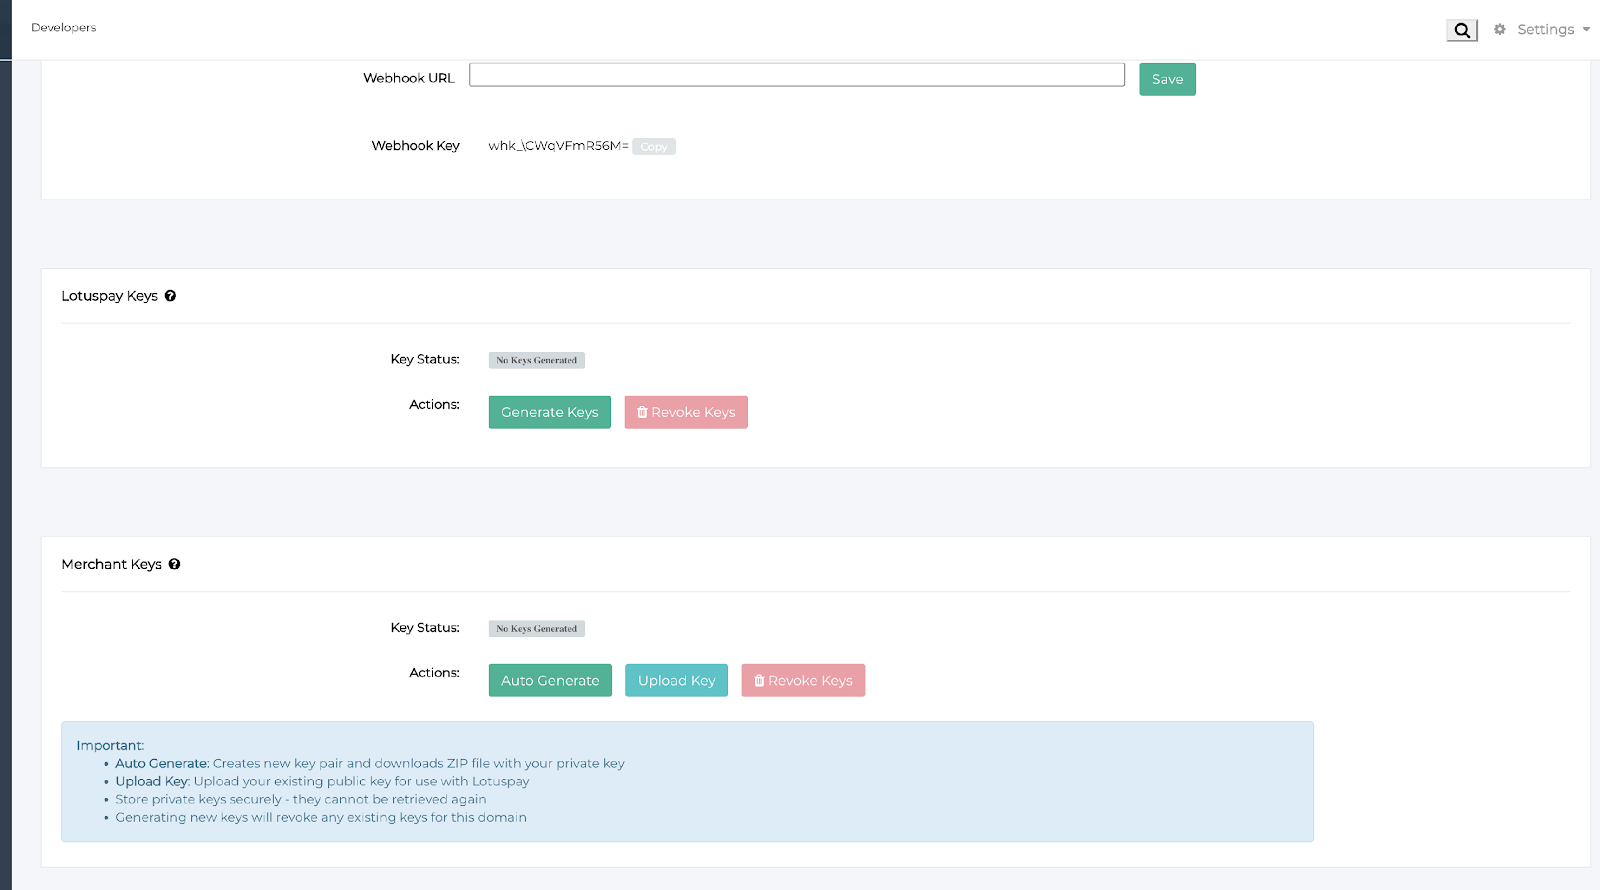
B. Generate/Upload Your Merchant Keys
Go to the "Merchant Keys" section in the Developer Console.
You have two options:
• Auto Generate: Click the Auto Generate button to create a new key pair and download a ZIP file with your private key.
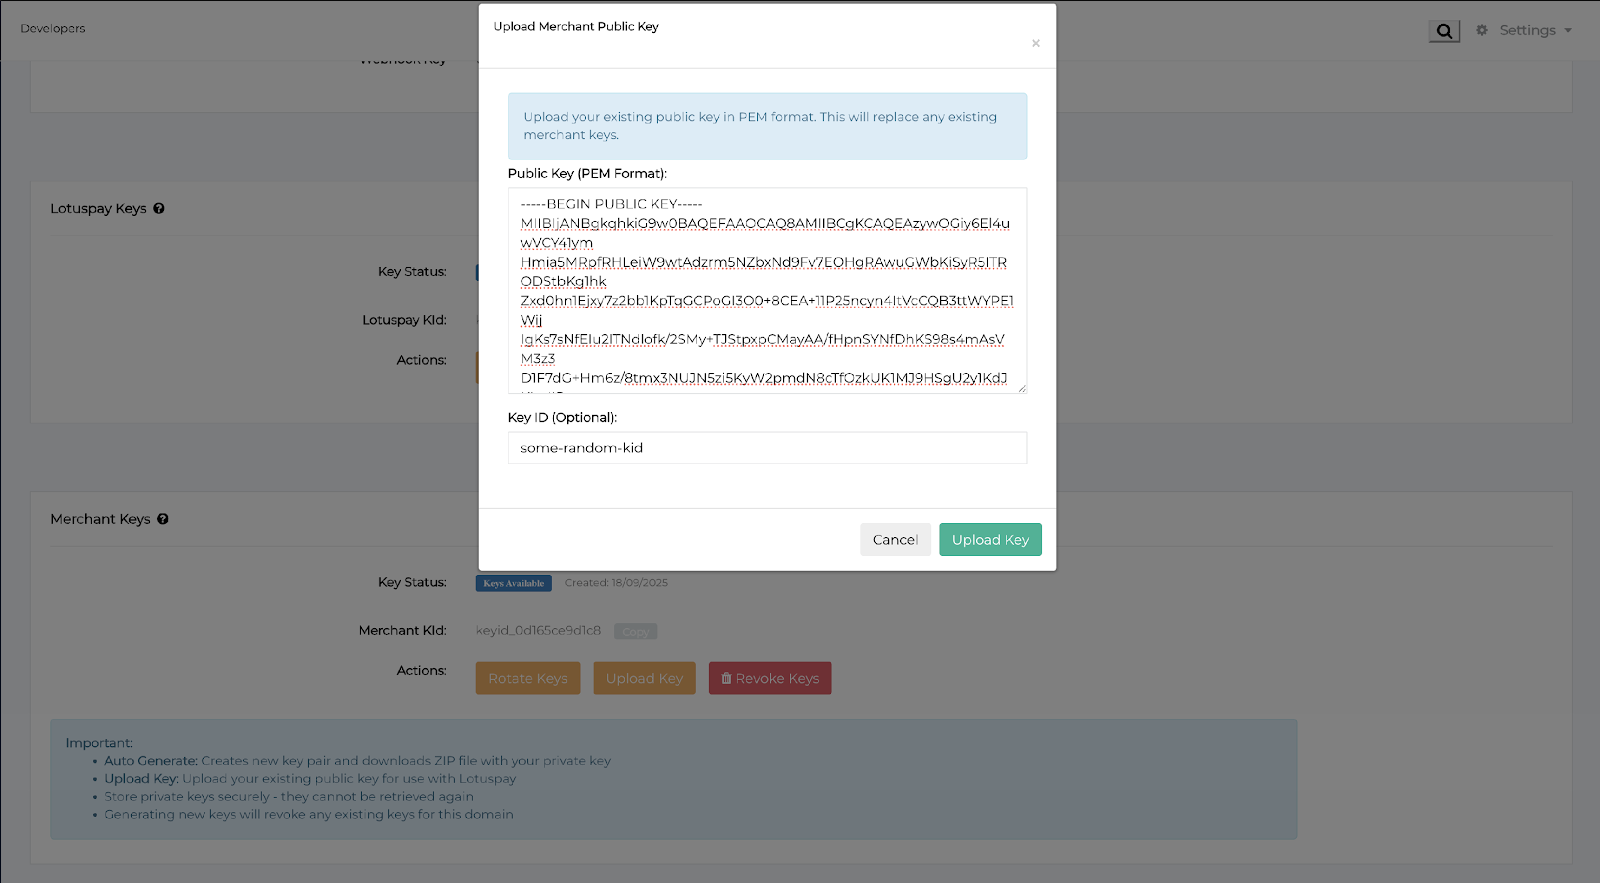
• Upload Key: Click the Upload Key button if you already have an existing key pair.If you choose to upload, a pop-up titled "Upload Merchant Public Key" will appear. Paste your public key in PEM format into the provided text box. Optionally enter a Key ID.
After generating or uploading your keys, the "Key Status" will be "Keys Available" and you will see the Merchant Key ID (Merchant KID).
You can then use Rotate Keys, Upload Key, or Revoke Keys actions as required.
3. Summary
Generate LotusPay Keys in Developer Console and retrieve LotusPay's Public Key.
Generate or upload your Merchant Public Key (PEM) in Developer Console.
Implement AES payload encryption using LotusPay's Public Key.
Prefix API endpoints with /enc when sending encrypted payloads.
Test end-to-end encrypted calls in Sandbox and validate responses.
Rotate or revoke keys as per your security policy during testing.
JOSE API ENCRYPTION
This specification outlines the steps required for a merchant to integrate with the encrypted LotusPay API endpoints.
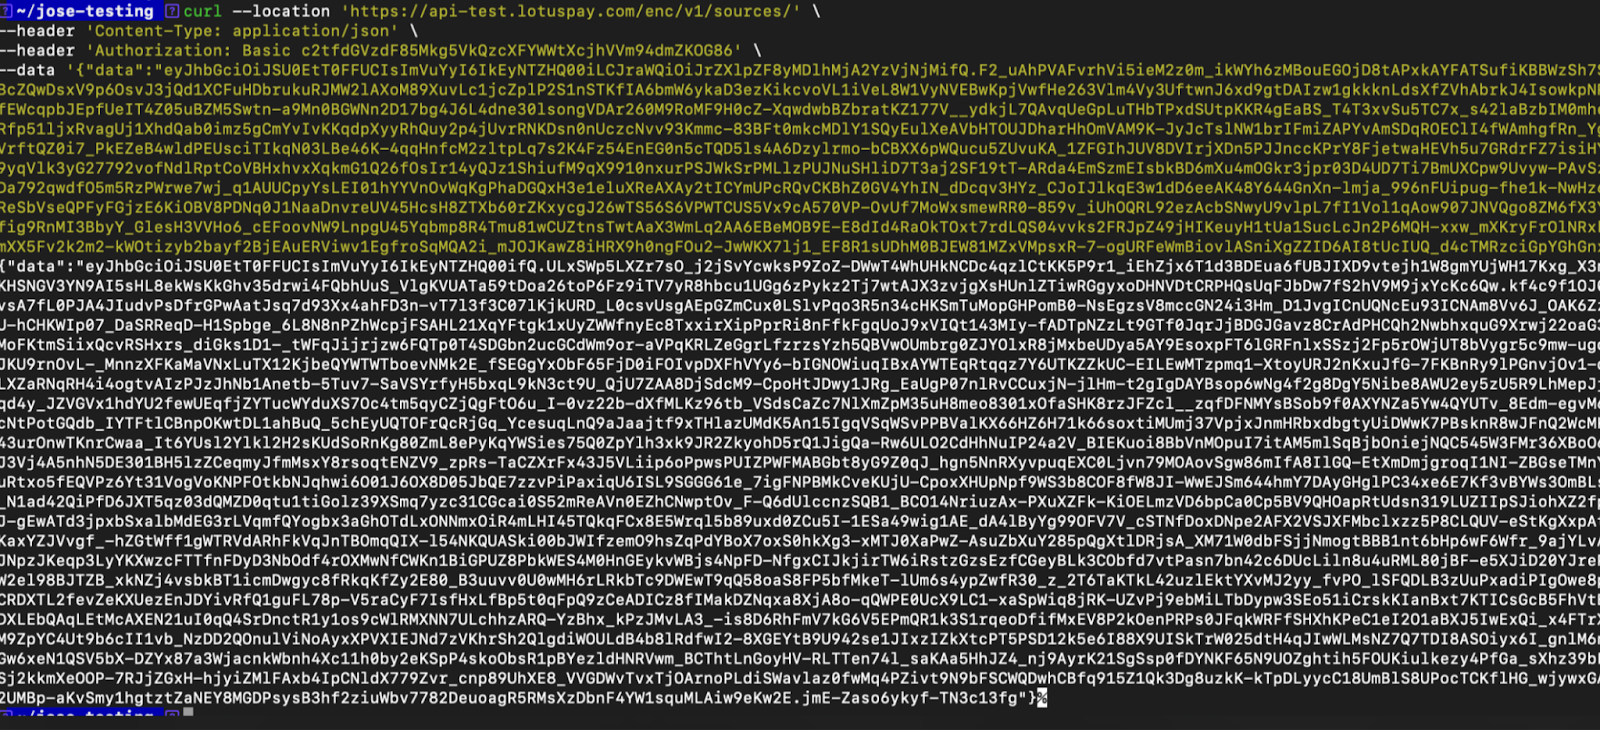
1.Access the Encrypted Endpoint
To route the request through the encryption layer, prepend /enc to the standard API endpoint.
Example (Unencrypted): https://api.lotuspay.com/v1/sources

Example (Encrypted): https://api.lotuspay.com/enc/v1/sources
2.Key Management Setup.
Two key pairs are required to secure the end-to-end request: one for the Merchant and one for LotusPay. The Merchant, using an Admin account, must download LotusPay's key pair and set up their own key pair within the Developers section of the LotusPay dashboard. A separate, detailed step-by-step document for this setup is provided.
3.Sign the payload
The merchant must sign the JSON payload prior to encryption.
Algorithm: RSA with SHA-256 (RS256) must be used.
Key Usage: The Merchant's Private key is used for signing the request payload.
Header: The corresponding Key ID (kid) must be included in the JWS header (found in the Merchant Key sub-section on the dashboard).
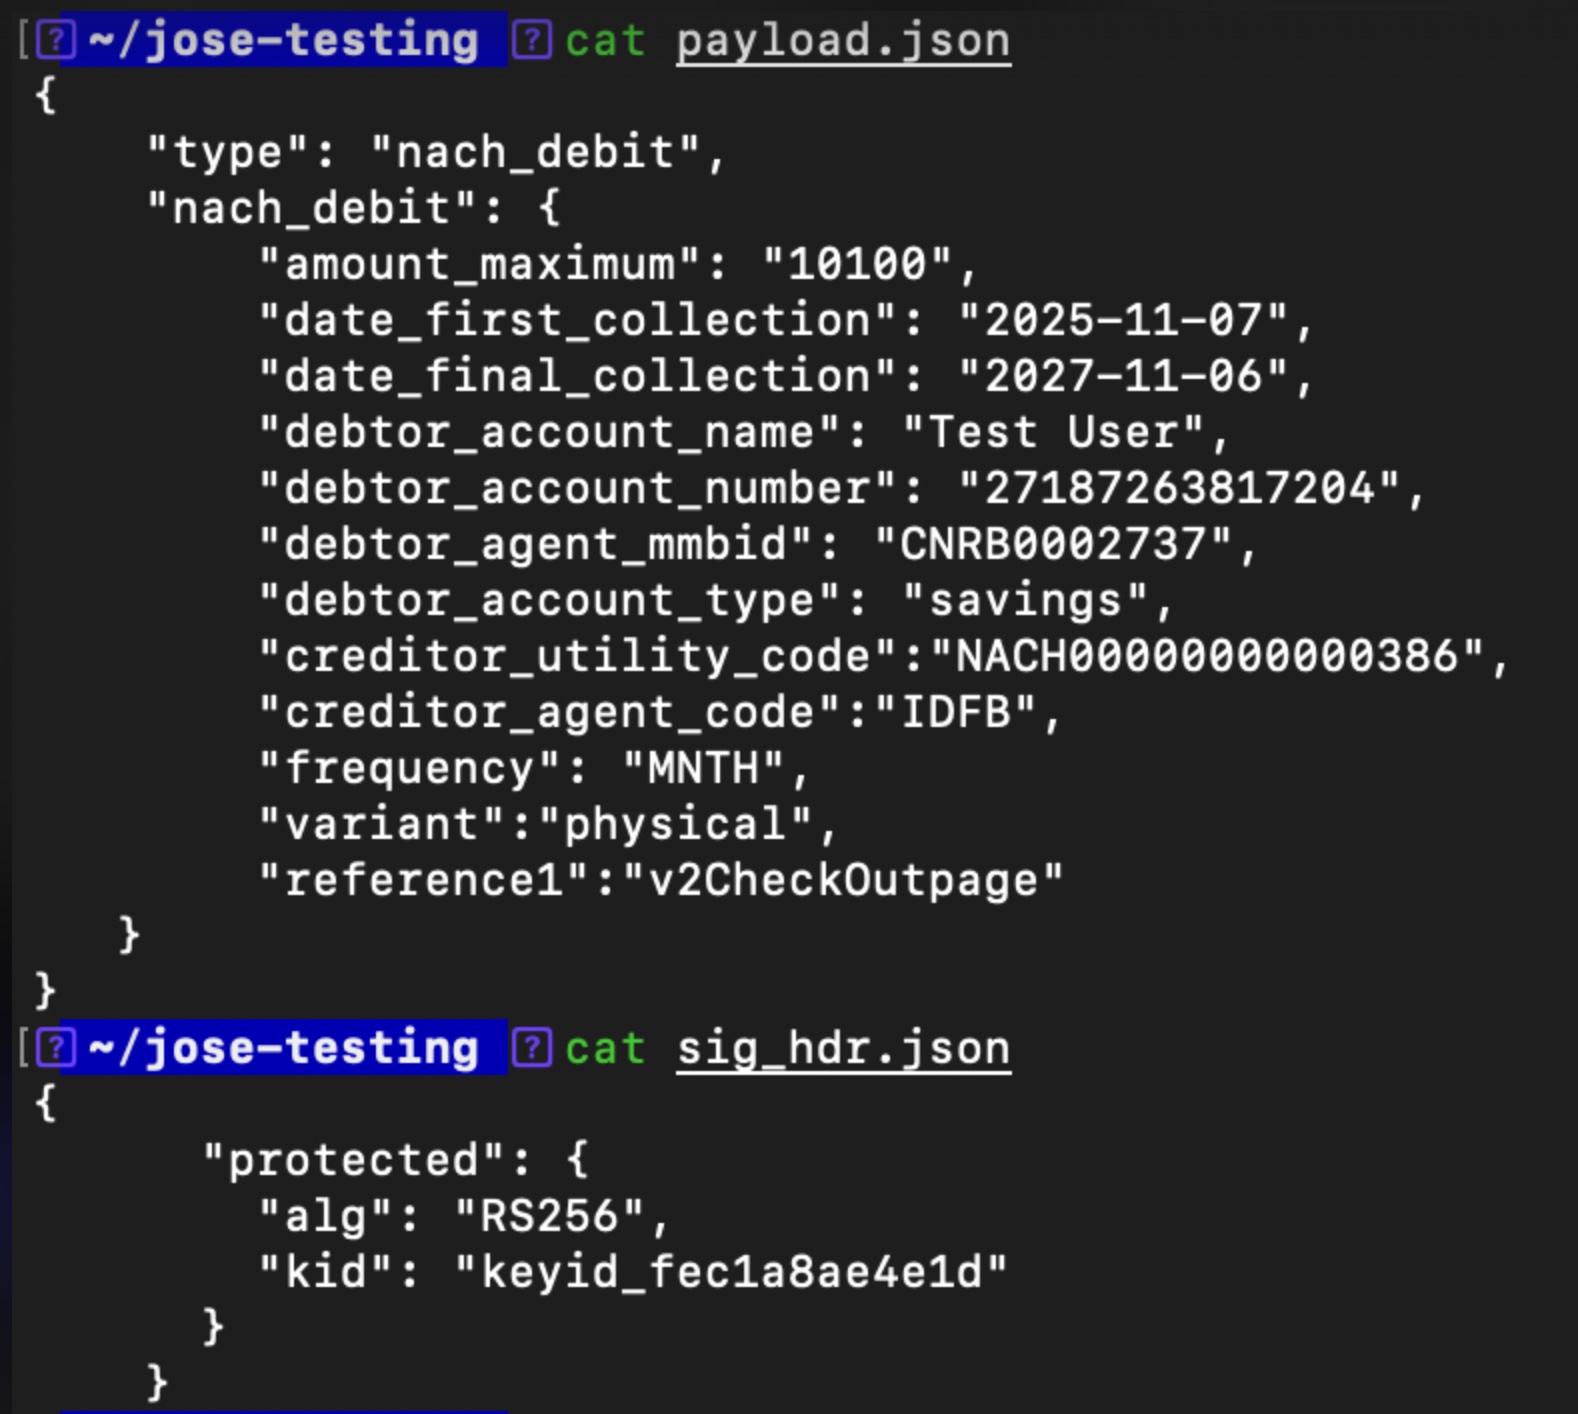
The result of this step is a Signed JSON Web Token (JWT).

Note: Please use the standard JOSE library for your technology stack to perform this and other JOSE-related steps. The jose CLI tool (https://formulae.brew.sh/formula/jose![]() ) is used in this document for demonstration purposes.
) is used in this document for demonstration purposes.
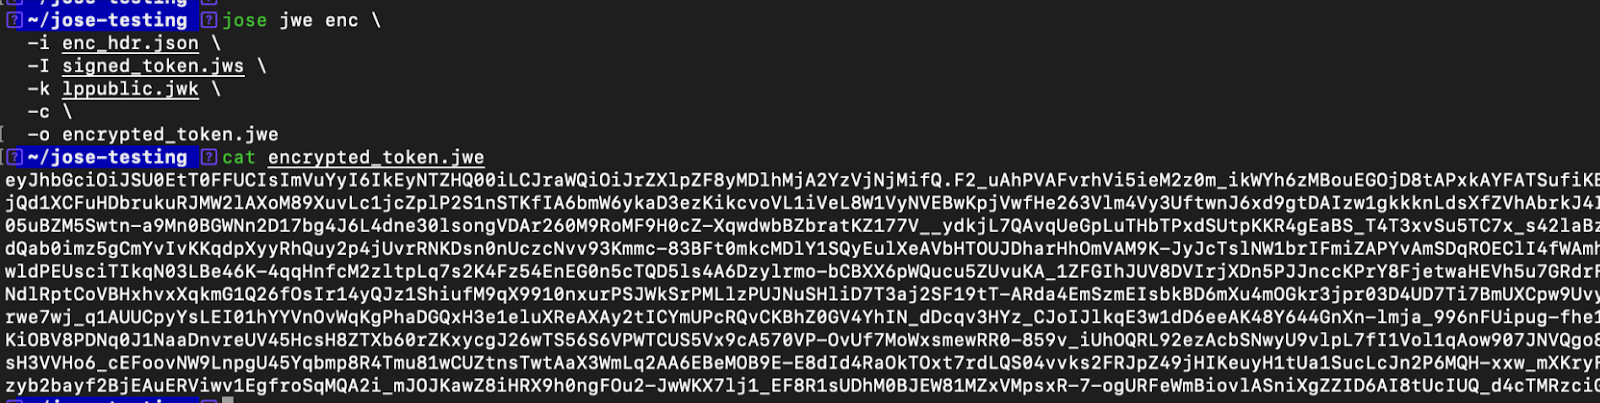
4. Encrypt the Signed Token
The Signed JWT must be encrypted using LotusPay’s Public key (available in the LotusPay Keys sub-section of the Developers dashboard).
CEK Encryption Algorithm: RSA-OAEP
Payload Encryption Algorithm: AES256 - GCM
Header: The relevant Key ID (kid) must be set in the JWE header.
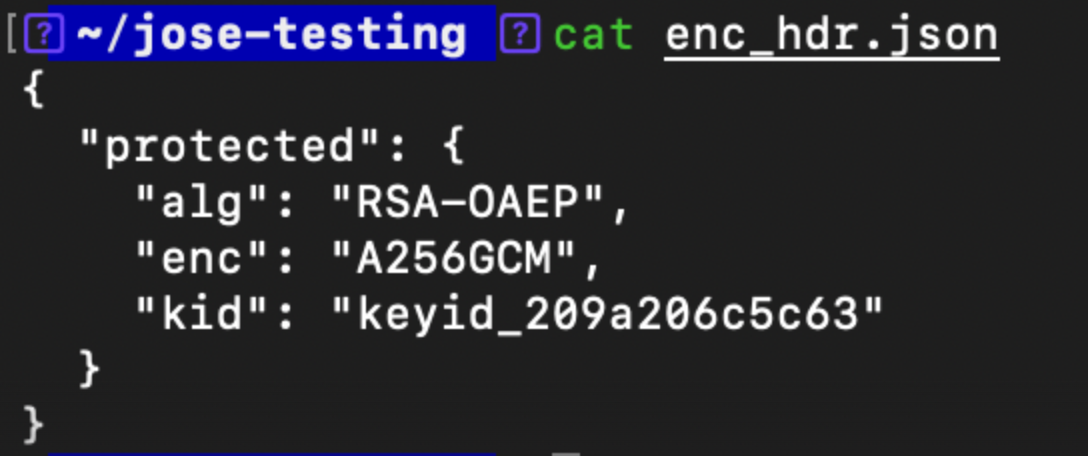
This process yields an Encrypted JSON Web Token (JWT).
Send the API request
The encrypted JWT generated in the previous step must be sent in the body of the API request. The Content-Type must be application/json, and the token must be sent as a string associated with the data key, as illustrated in the example below.
Decrypt the response
Decrypt the response string using the Merchant's Private key to obtain the JWT signed by LotusPay.

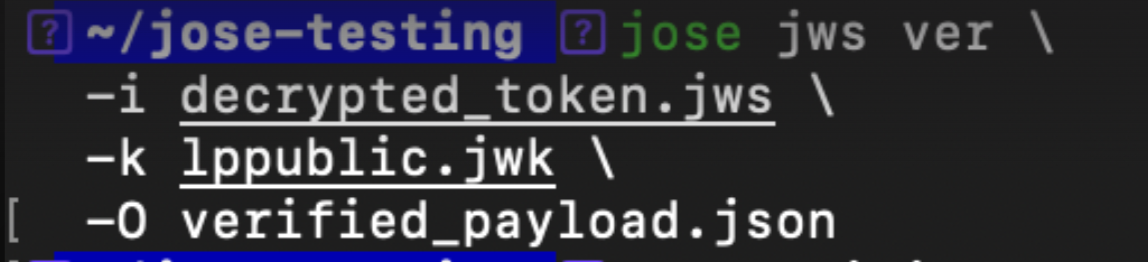
Verify the response
Verify the signature of the signed JWT using LotusPay's Public key to extract the original JSON payload.

Annexure
Online Resources
Javascript Object Signing and Encryption (JOSE) (Official Doc)
https://jose.readthedocs.io/en/latest/#id8 Demystifying JOSE, the JWT Family: JWS, JWE, JWA, and JWK Explained https://auth0.com/blog/demystifying-jose-jwt-family/
cURL for testing
1. Unencrypted API
2. Encrypted API
Important Notes
Keys generated in the Sandbox are for testing purposes only.
When you move to the Production environment, you will need to generate or upload new keys separately.
Store your private keys securely, as they cannot be retrieved again after generation.
Generating new keys will revoke any existing keys for that domain.