
You can locate your client_id and merchant_id in the Welcome email you received, with the subject "Juspay Dashboard: Welcome {your merchant_id}." We suggest reviewing that email for the necessary information. Furthermore, it's important to know that the value of client_id is identical to the merchant_id.
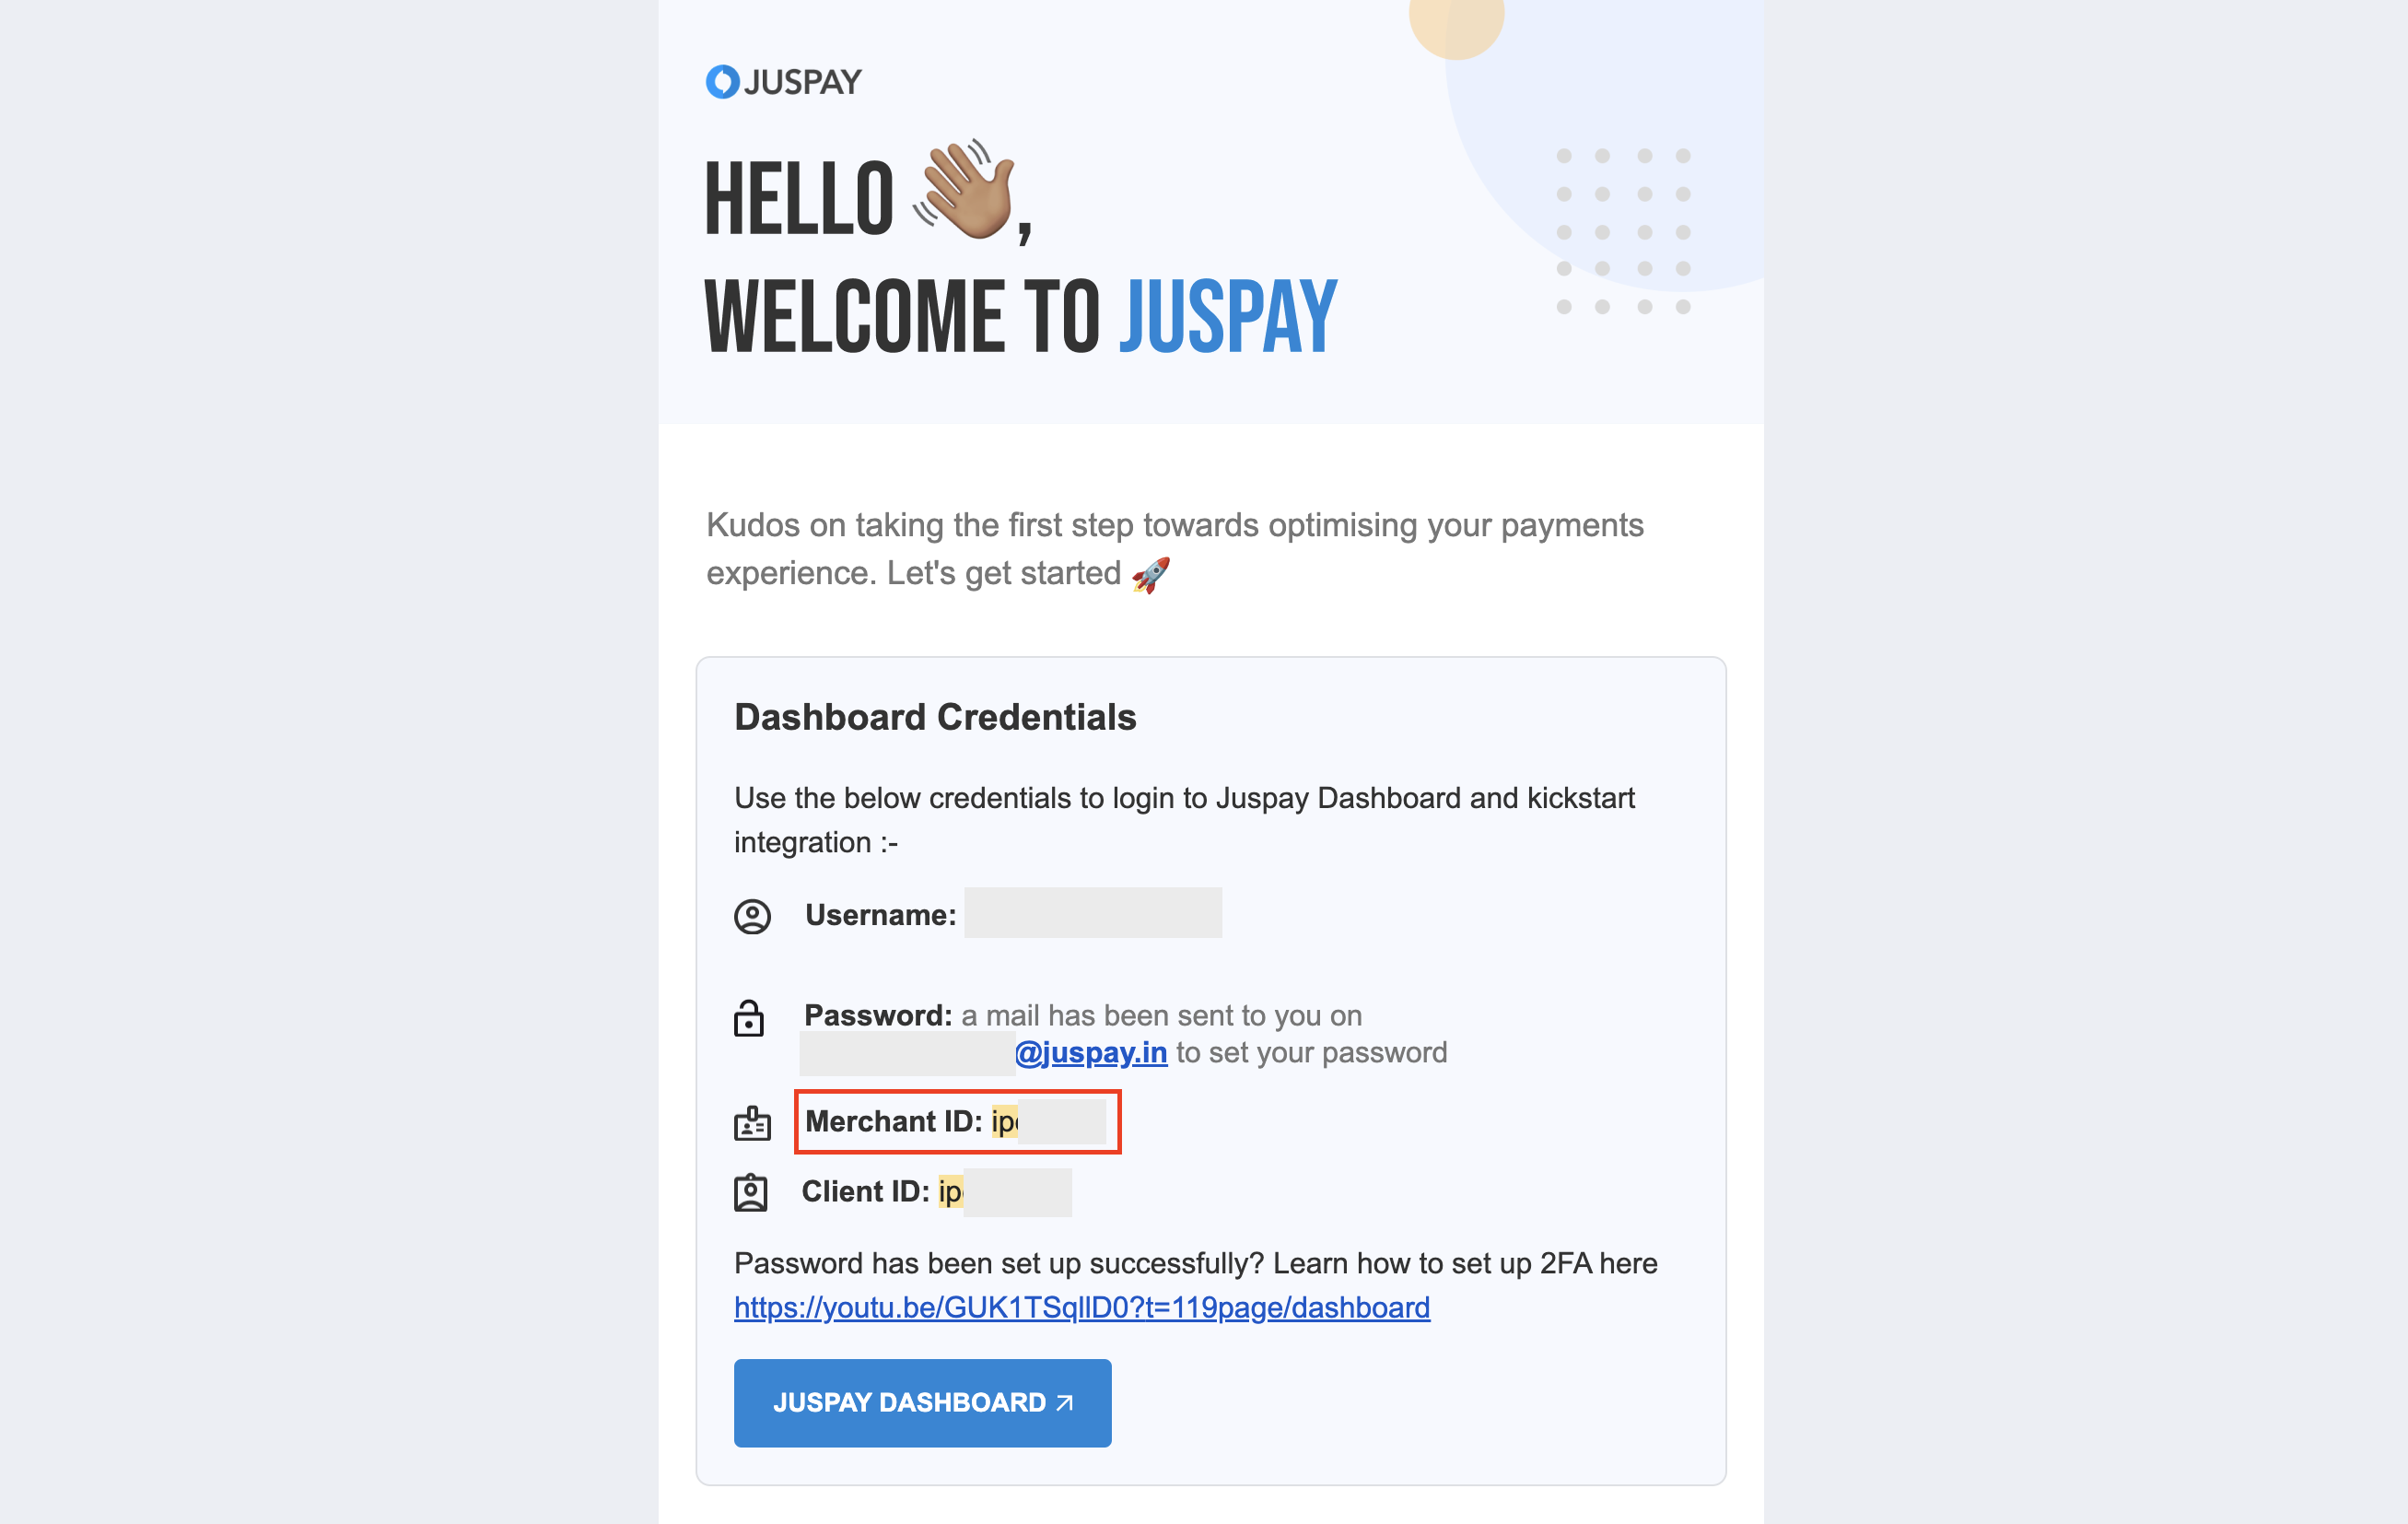
Make sure you're entering the right Username, Password, and OTP during login. Remember, your username matches the Merchant ID (MID) you received in your welcome email, not your email address. Should you need to update your password or reconfigure your two-factor authentication (2FA), simply select the "forgot password" or “forgot two-factor authentication” link to receive a password reset email at your admin email.
For reference, you can watch the video tutorial here: Video Tutorial![]()
Enabling 2FA (Two-Factor Authentication) is mandatory for security reasons, and it cannot be disabled.
It's important to know that the value of client_id is identical to the merchant_id.
However -
MID (Merchant ID): This identifier is utilized in the backend implementation for making backend API calls. It serves as a unique merchant identifier within the Juspay systems and is used in all API and SDK calls.
Client ID: On the other hand, the Client ID is employed in frontend implementation within scripts. It is also used in most of our API and SDK calls. Client ID is also required for us to load the UI designed in our Studio.
Both the MID and Client ID can be located in the welcome email that you received.
The username and password for the webhook section are set by the merchant, and it's strongly recommended to have this level of authentication for enhanced security. These credentials can be configured within the Juspay Dashboard and are specifically used for authentication to ensure the security of the webhook.
For more detailed information, you can refer to the documentation here: Documentation Link![]() .
.
Dummy PG is a feature offered by Juspay, designed to assist merchants in testing various payment method flows (except UPI) and completing their development process. When using the DUMMY PG, a simulator page is provided for testing purposes. It's important to note that in the DUMMY PG, only one-time transactions can be tested. The test credentials for different payment methods are as follows:
Card: 4242424242424242 (any future expiry date, any CVV)
Wallets: Dummy Wallet
Net Banking: Dummy Bank
This feature is particularly valuable for conducting tests and ensuring the functionality of your payment system before going live with actual transactions. For live transactions, you will need to use real payment gateway credentials and test in a real-time environment
Yes, to carry out payment testing with a payment gateway's test credentials, you should:
Obtain the test credentials from your chosen payment gateway.
Input these test credentials into the Juspay Dashboard to set them up for use. After setting up, you can conduct tests using the payment gateway's test credentials.
Make use of the payment gateway's test instruments to run through different payment situations. These test cards and tools are created solely for testing and can emulate various outcomes such as successful or declined transactions.
Go through the entire transaction process by executing transactions with the test credentials. Confirm the outcomes and responses to ensure the integration works as intended.
Bear in mind that each payment gateway has its unique set of test tools and credentials, so it's critical to consult their specific guidance for the most current and correct information.
For a comprehensive guide on various test instruments, you can refer to the Test Resources Documentation![]() .
.
It’s also key to remember that test instruments are incompatible with production payment gateway configurations. Real cards and UPI IDs are necessary for any testing in a production environment.
An "Order Fulfillment Window" refers to the designated time frame in which payment for an order will be accepted. This window's length can vary based on the nature of the product or service provided by the business.
For businesses that deliver services instantly like Swiggy, the order fulfillment window might typically be less than 5 minutes. On the other hand, for businesses offering digital products like online courses, the window could extend up to a full day or more.
Please note that the appropriate duration for an order fulfillment window will differ for each business. We advise you to select an order fulfillment window that best aligns with the operational needs of your specific business model.
Juspay triggers two types of webhooks: one at the order level and another at the transaction level. It is important to understand that for any given order, Juspay will only activate a single Order-Level Event. However, if there are several transactions tied to a single order ID, Juspay will initiate multiple Transaction-Level Webhooks, with each one corresponding to an individual transaction linked to that order.
While the Juspay Dashboard is designed to accept only a single webhook URL configuration, you can still utilize multiple webhooks for distinct functions by including them as 'metadata.webhook_url: <webhook-url>' in the Session API. This method allows you to assign a unique webhook URL for each specific order, bypassing the restriction of having one webhook per Merchant ID.
To integrate Juspay's Hypercheckout for web platforms, you need to call the Session API from your backend system and then open the generated link in your frontend interface. Detailed instructions and guidelines for this integration process can be found in the Juspay Hypercheckout web integration documentation, available at Juspay Hypercheckout Web Integration Documentation.![]() This resource will provide you with the necessary steps to seamlessly incorporate Hypercheckout into your web platform.
This resource will provide you with the necessary steps to seamlessly incorporate Hypercheckout into your web platform.
Encountering this issue is common when Juspay webhooks are not set up on the respective payment gateway (PG) end. Ensure that you configure the Juspay webhook URL at the PG end.
A sample URL format is as follows: https://api.juspay.in/v2/pay/webhooks/<mid>/<payment-gateway>
<mid>: Insert your Juspay mid.
<payment-gateway>: Include the gateway name (e.g., razorpay, easebuzz, billdesk, payu, phonepe, etc.).
For further clarification, feel free to contact the Juspay team.
To set up 2FA on your new phone, initiate the reset through our Dashboard Login Page. Once you receive the reset email to your registered email, proceed to scan the 2FA code on your new mobile device using Authenticator app and enter the OTP. Once, the 2FA is setup, you should be good to go ahead with the login.
To Enable Cash on Delivery (COD) on your Hypercheckout page, first, set up 'Cash' Payment Gateway in the Juspay dashboard under PG control centre. After configuring the ‘Cash‘ PG, make sure to enable COD in Juspay Studio under payment options and push the studio changes to release. Following these steps, COD payment option should become available on your Hypercheckout page.
To enable any payment method on Hyper Checkout (Juspay’s payment page), you need to ensure that the payment method is enabled in both PG Control Centre as well as Studio. For example, in order to enable UPI Intent, you need to enable UPI Intent under a gateway in PGCC then also go into Studio → Update Design → Options & Features → UPI and Enable UPI Intent Apps there as well.
NEW orders can be grouped and ignored during reconciliation.
If you are using Juspay’s Hypercheckout integration and you want to close the order, then Cancel API ![]() can be used. Once this API is called, then status will move from NEW to JUSPAY_DECLINED and no further transaction can be done.
can be used. Once this API is called, then status will move from NEW to JUSPAY_DECLINED and no further transaction can be done.
Please make sure that you are using ‘Basic Authentication’ and passing a correct/ valid API key in the request header while making the API call.
Please make sure that you are using correct API key and endpoint URL -
If the API key is generated on production dashboard (https://portal.juspay.in) then please use production endpoint URL - https://api.juspay.in/![]()
If the API key is generated on sandbox dashboard (https://sandbox.portal.juspay.in) then please use sandbox endpoint URL - https://sandbox.juspay.in/![]()
Also ensure to encode the API key to Base64 format before passing it in the header while making the API call.
If you get HTTP response code: 403 while integrating SDK then please make sure to open Juspay studio and select hypercheckout UI design template and save the changes before building the app. After selecting the UI template in Juspay studio you can try rebuilding the app.
If you still face the issue then please ensure that you have entered correct value of client ID in your gradle file (for Android) or merchantconfig.txt file (for iOS).
This could happen if the Juspay’s webhook URL is not configured at PG’s end or Juspay is not getting any response from the underlying PG.
You will have to configure Juspay��s webhook URL at your PG’s end in order to receive callbacks for UPI transactions, the format of the webhook URL is → https://api.juspay.in/v2/pay/webhooks/{your_juspay_mid}/{pg_name}
For example if your Merchant ID is JUSPAY and you need to configure webhook URL for Paytm V2 and PayU PG. Below would be your Juspay webhook URLs for respective PGs.
Paytm_v2 - https://api.juspay.in/v2/pay/webhooks/juspay/paytm_v2![]()
PayU- https://api.juspay.in/v2/pay/webhooks/juspay/payu![]()
Please note that some PGs might not support multiple webhook URL configurations at their end (e.g CCAvenue and Billdesk ), please make sure to get dedicated MID for Juspay integration if you are already live with such PGs via direct integration and consuming their webhook response.
