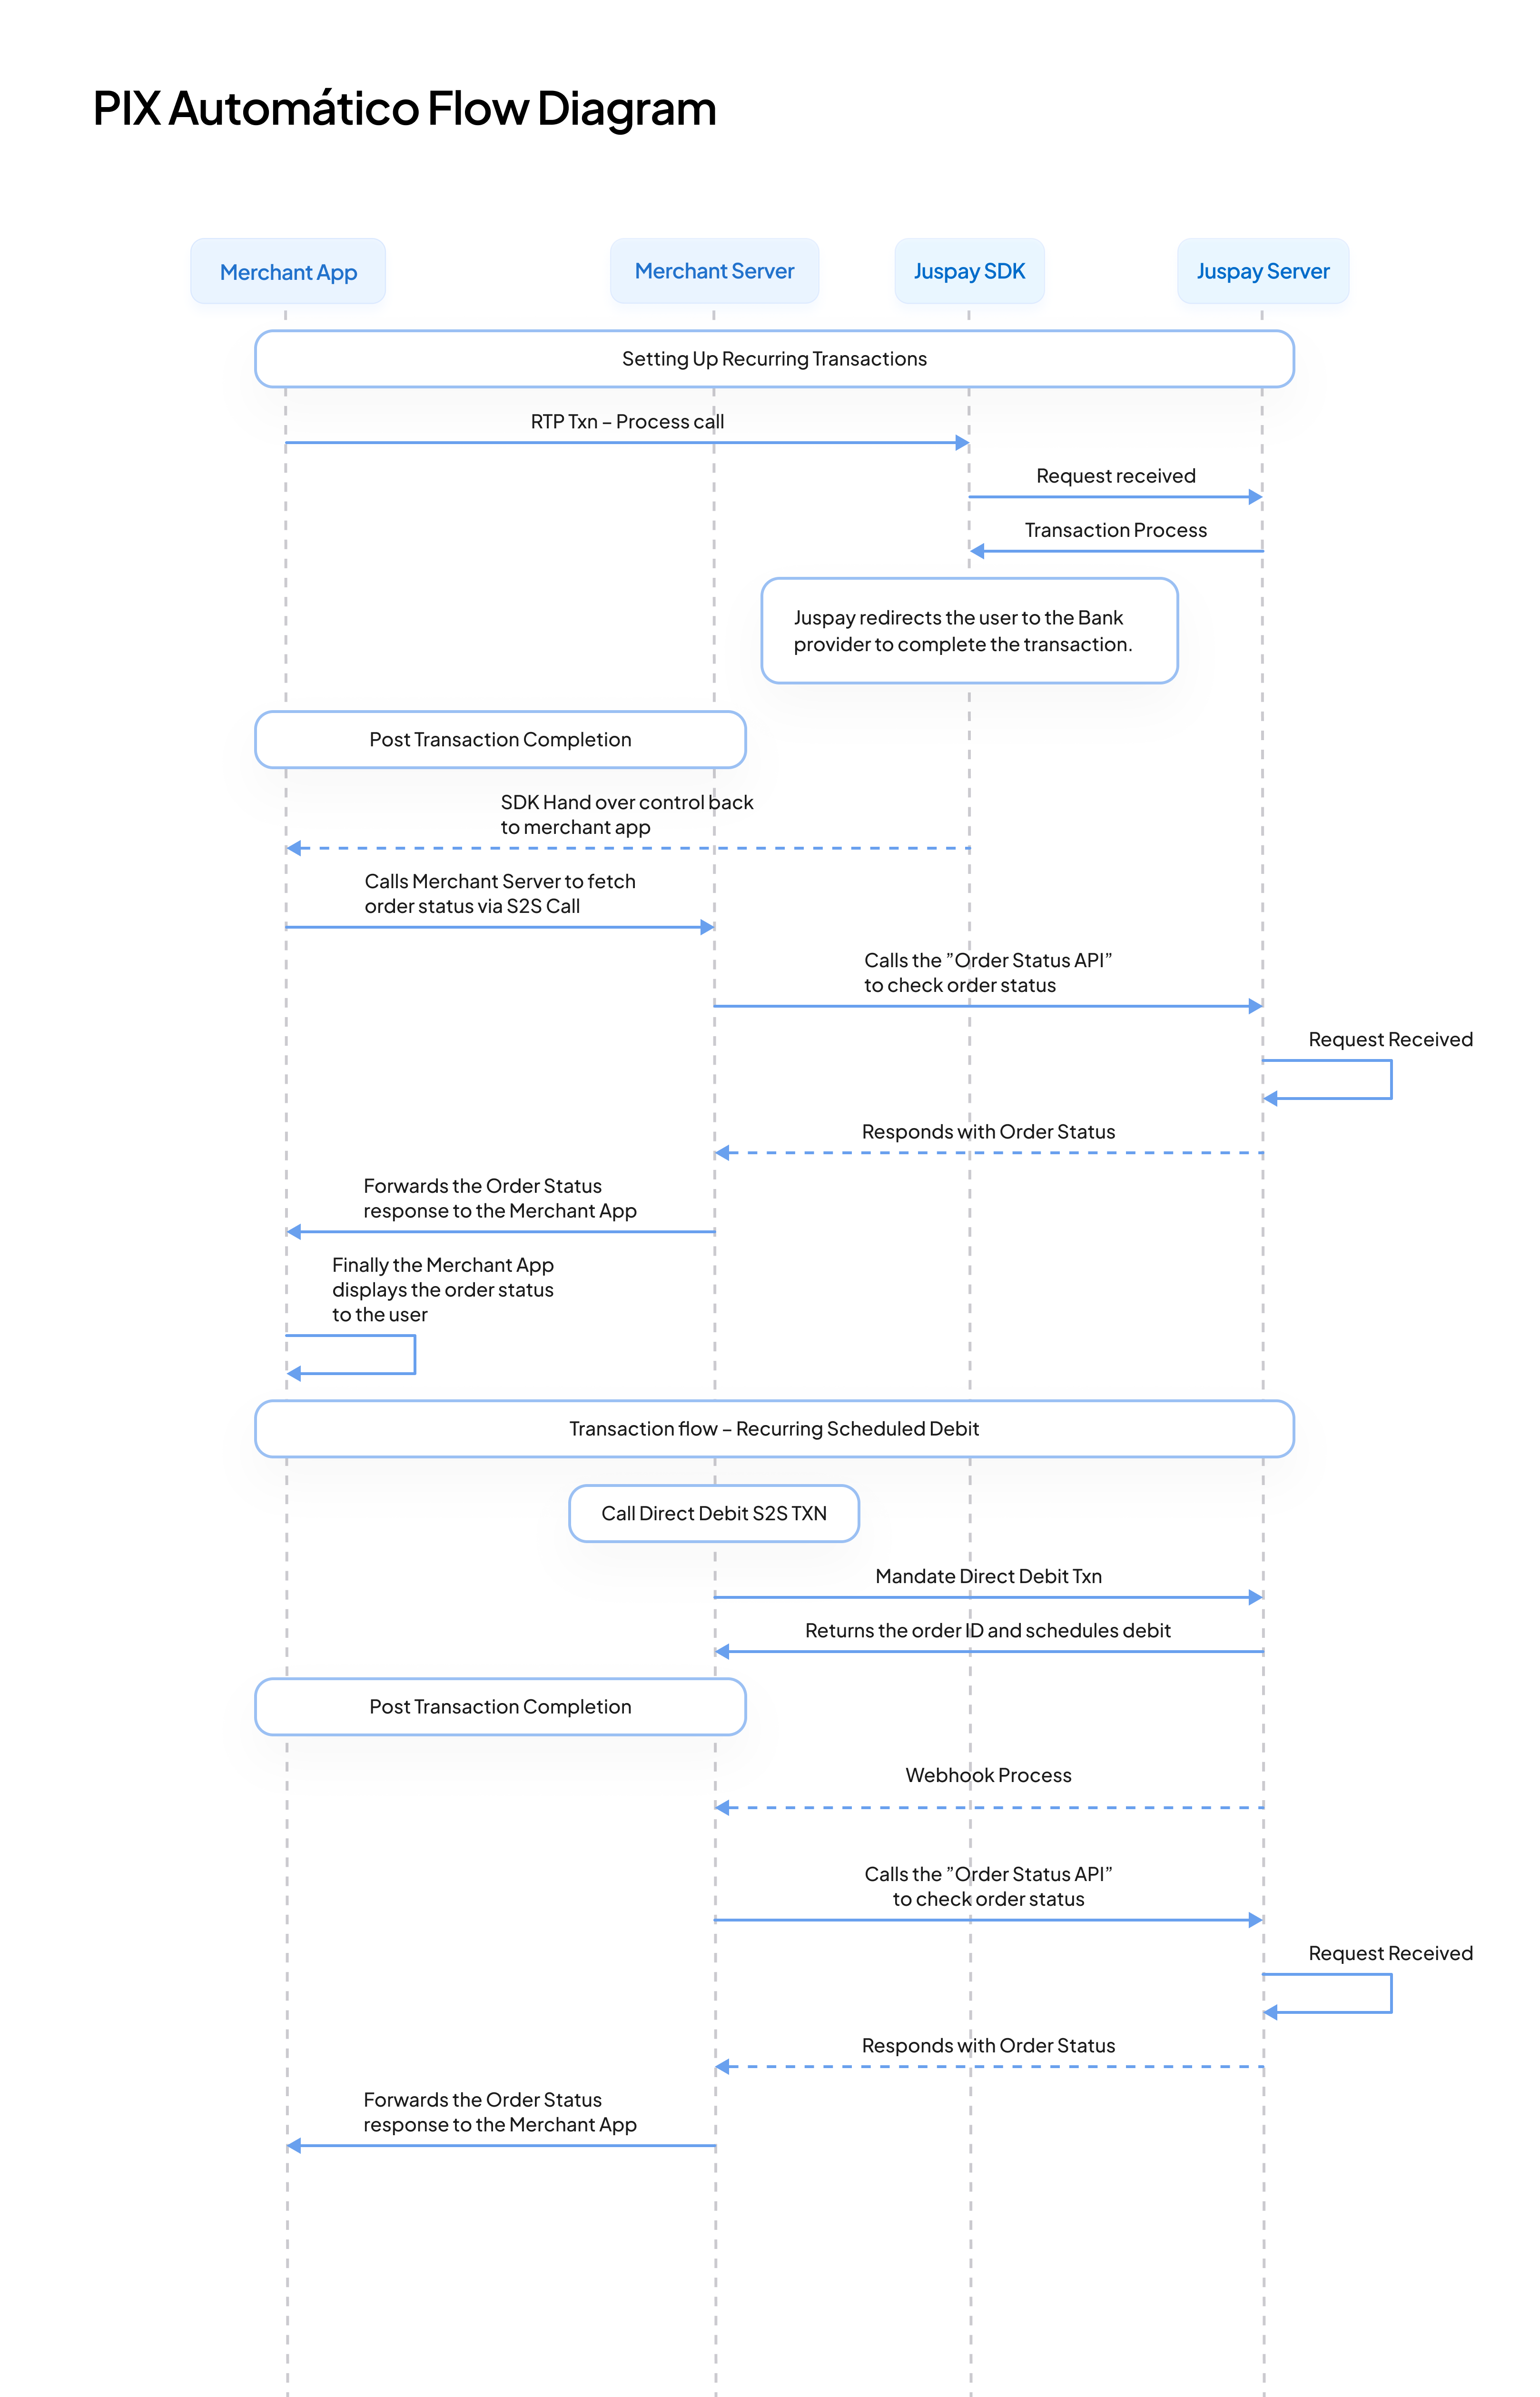
Brand logo Developer Docs
Pix Payment Flows
arrow-icon
Overview
Overview___pix-payment-flows-br___android
Integration Architecture
Pre-Requisites
arrow-icon
Getting Started
Getting Started___pix-payment-flows-br___android
arrow-icon
Client Side Integration
1. Getting SDK
2. Initialize SDK
3. Rendering the Checkout Screen
4. Making a Payment
5. Handling Payment Response
6. Life Cycle Events
arrow-icon
Server Side Integration
Create Customer API
Get Customer API
Create Order API
Order Status API
Refund Order API
Webhooks
arrow-icon
PIX Biométrico
PIX Biométrico___pix-payment-flows-br___android
Overview
Step 1: Create Customer
Step 2: Create Order API
Step 3: Initialize SDK
arrow-icon
Step 4: Process Transaction
Enroll & Process Transaction
Repeat User - Process Transaction
arrow-icon
Step 5: Order Status
Order Status API
arrow-icon
Pix Iniciação
Pix Iniciação___pix-payment-flows-br___android
Overview
Step 1: Create Order API
Step 2: Initialize SDK
Step 3: Process Transaction
Step 4: Order Status API
arrow-icon
PIX QR
PIX QR___pix-payment-flows-br___android
Step 1: Create Order API
Step 2: Initialize SDK
Step 3: Process Transaction
Step 4: Order Status API
arrow-icon
Pix Automático
Pix Automático___pix-payment-flows-br___android
Overview
arrow-icon
Resources
Resources___pix-payment-flows-br___android
Webhooks
Error Codes
Transaction Status
Refunds
Multi-activity Integration
Prefetch
Terminate
FAQs
Gateway Reference ID
Webhook Events and Sample Payloads
Integrations List
Apple Pay Account Creation
Juspay Studio
Mandatory Gateway Params
Pix Payment Flows
/
Android
/
Pix Automático

Pix Automático

Pix Automatico Flow
Pix Automatico Flow
Last updated 9 months ago