

Dispute Management
This module is designed with the primary objective of facilitating the resolution of customer-raised disputes. It empowers merchants with a comprehensive suite of options to take judicious actions, allowing them to select appropriate reasons and codes for acceptance or rejection in each case.
Below is the homepage interface of the Dispute Management Module:
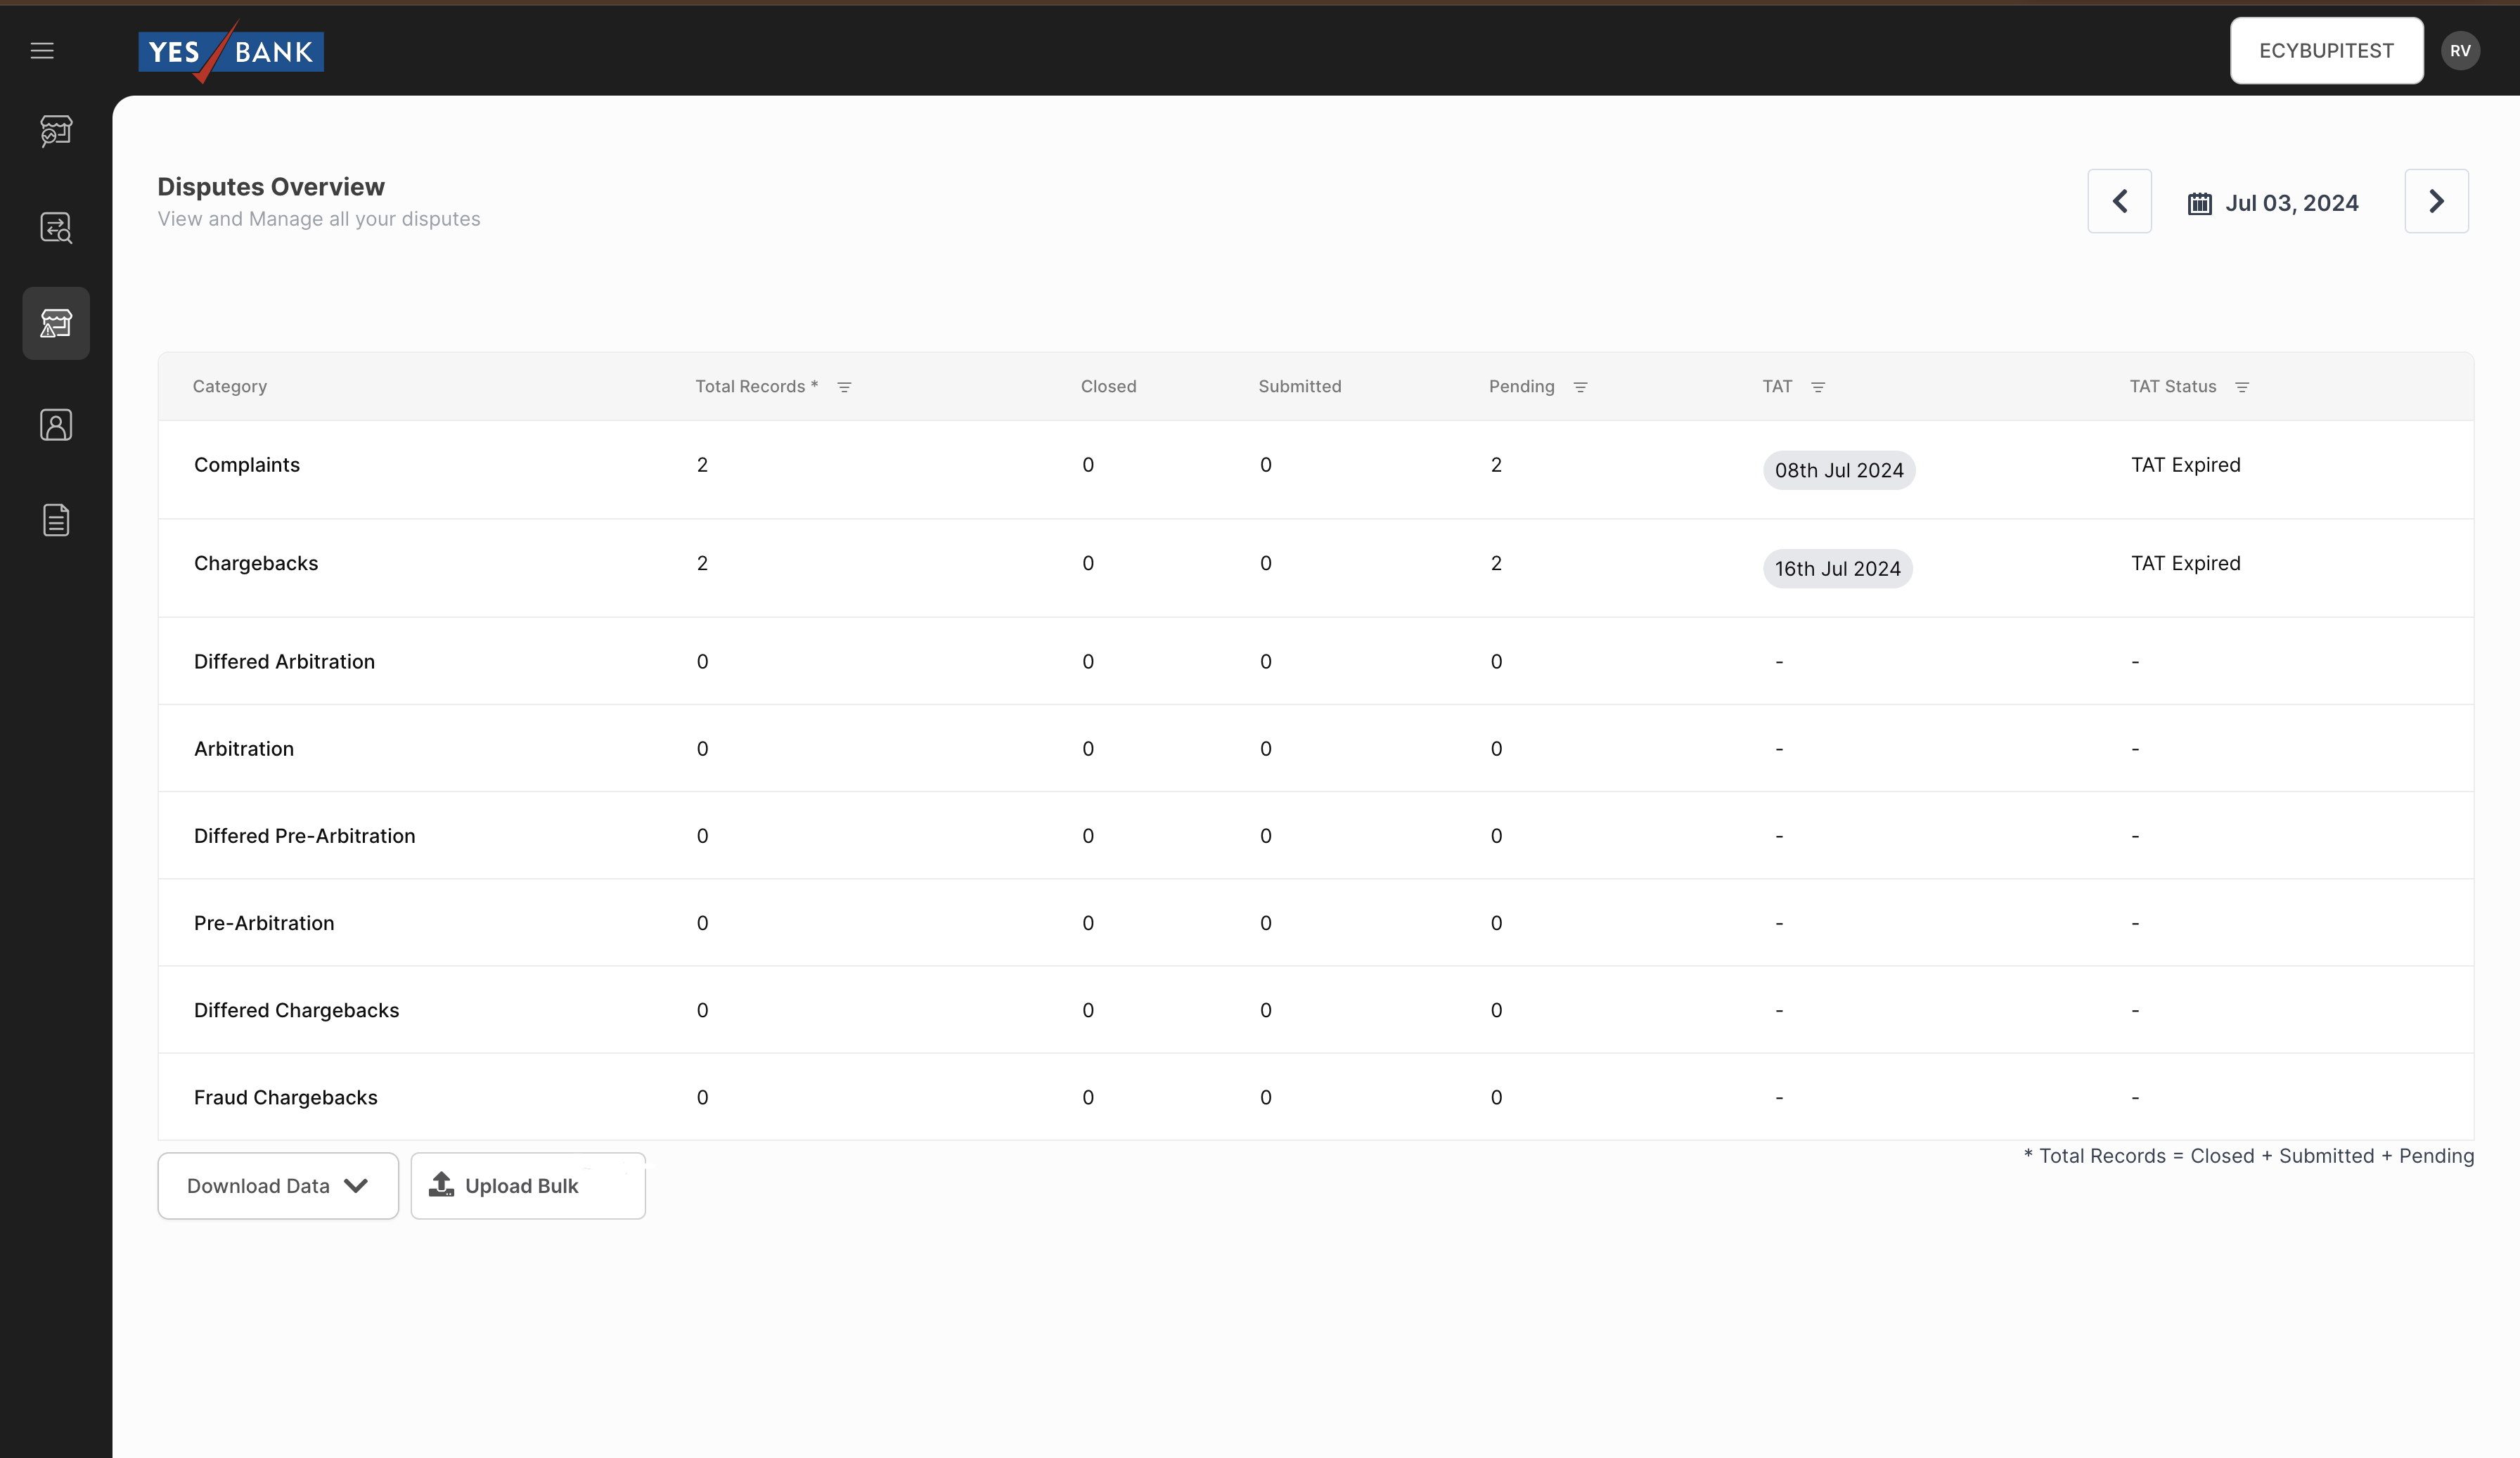
To the upper-right section of the landing page, users can easily access the MID and date.
The additional contents within the interface includes:
Category - Types of Dispute
Total Records - Total dispute raised for each category
Closed - Disputes that are Closed by Juspay at NPCI based on Merchant response.
Submitted - Disputes actioned by merchants and are Submitted.
Pending - Disputes that are open to merchants to take action including Saved.
TAT - Date before which the dispute has to be actioned upon.
TAT Status - Highlights number of days in which TAT will expire
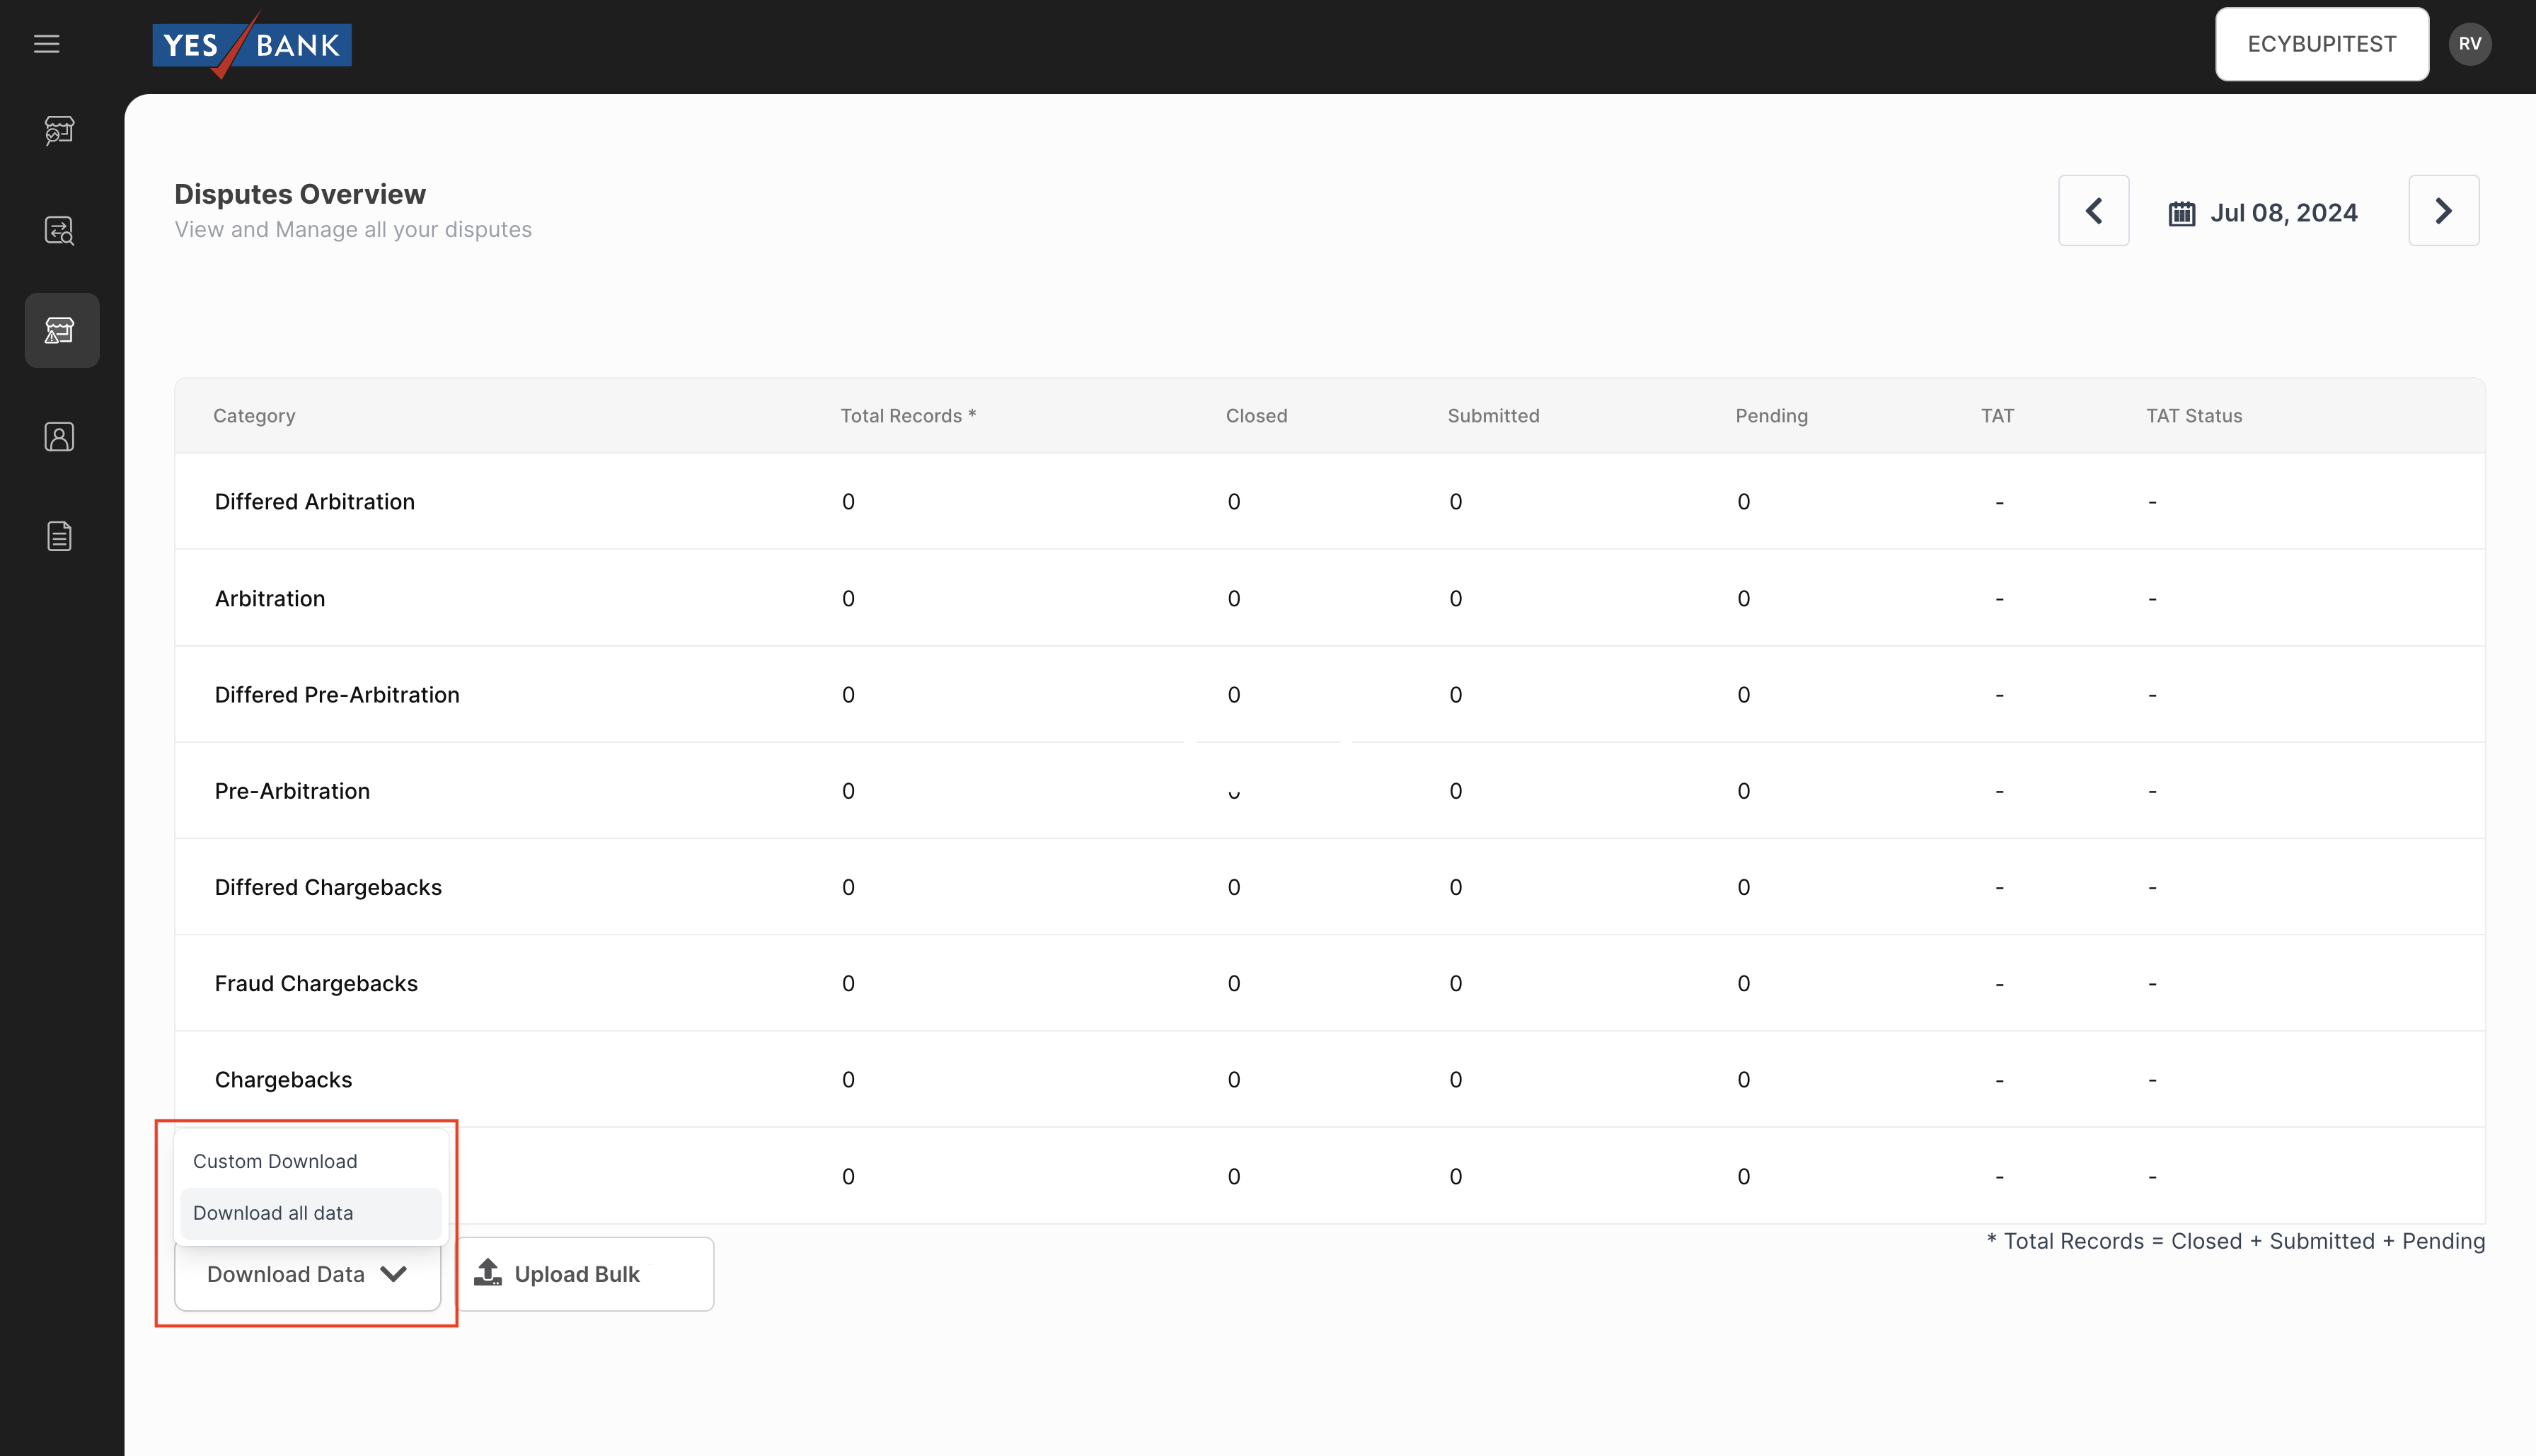
Reports Download Options
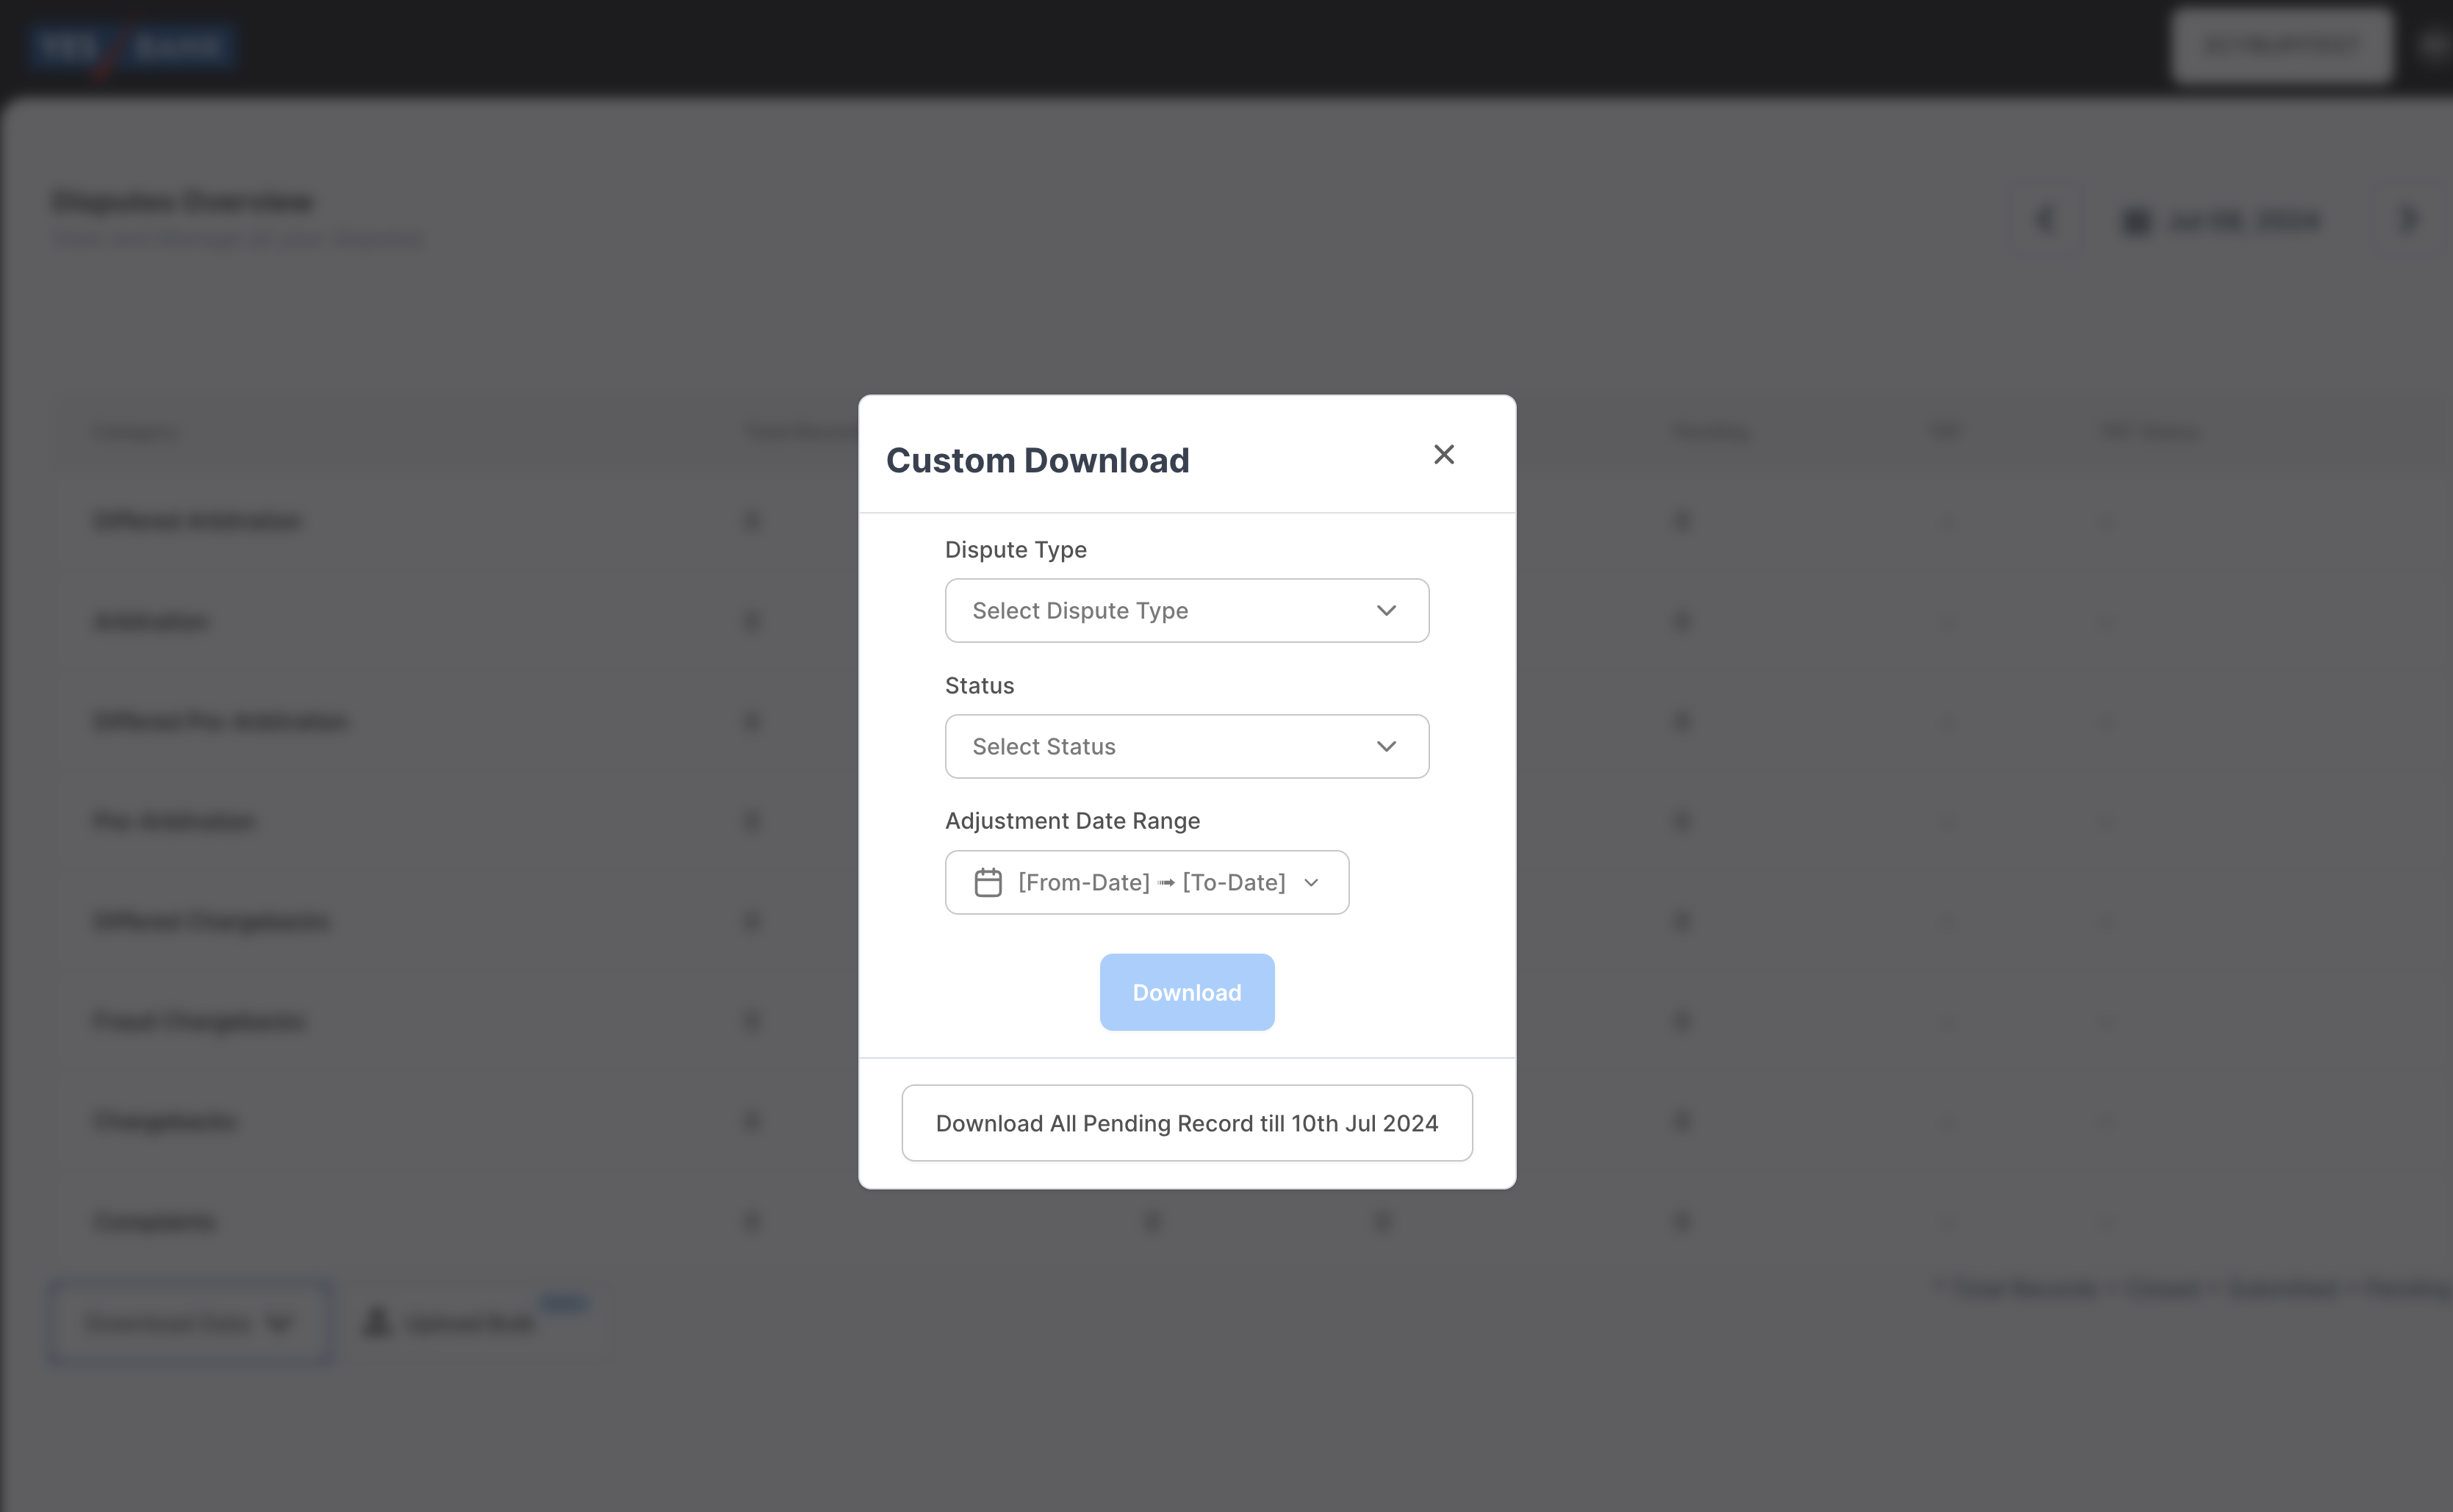
The Download Data option provides a bulk download functionality. Here the users can use either of the following option to download the file:
Custom Download
Merchants can customize the report by selecting the required category of dispute, status of response and date range and get the required file.
Merchants can also get all the pending records for the last 33 days without any customization using the “Download all pending till current date” option.
Default Download
This will download all available data without any customization for the selected date in the landing page.
Response to Disputes
Transaction level
Merchants should take decisive action on every dispute across all categories. The approach could be Accept or Reject based on the following scenarios:
If service provided: Reject
If transaction is failed and refund is processed: Reject
If transaction is failed and refund is not processed: Accept
Ultimately, a dispute should be accepted only if the amount is yet to be refunded to the customer. The acceptance amount will be debited from the merchant in the upcoming settlement and credited to the customer.
Following are the steps to take action in the dispute dashboard:
In the landing page, select the date as T-1 to see and take action on disputes of previous day.
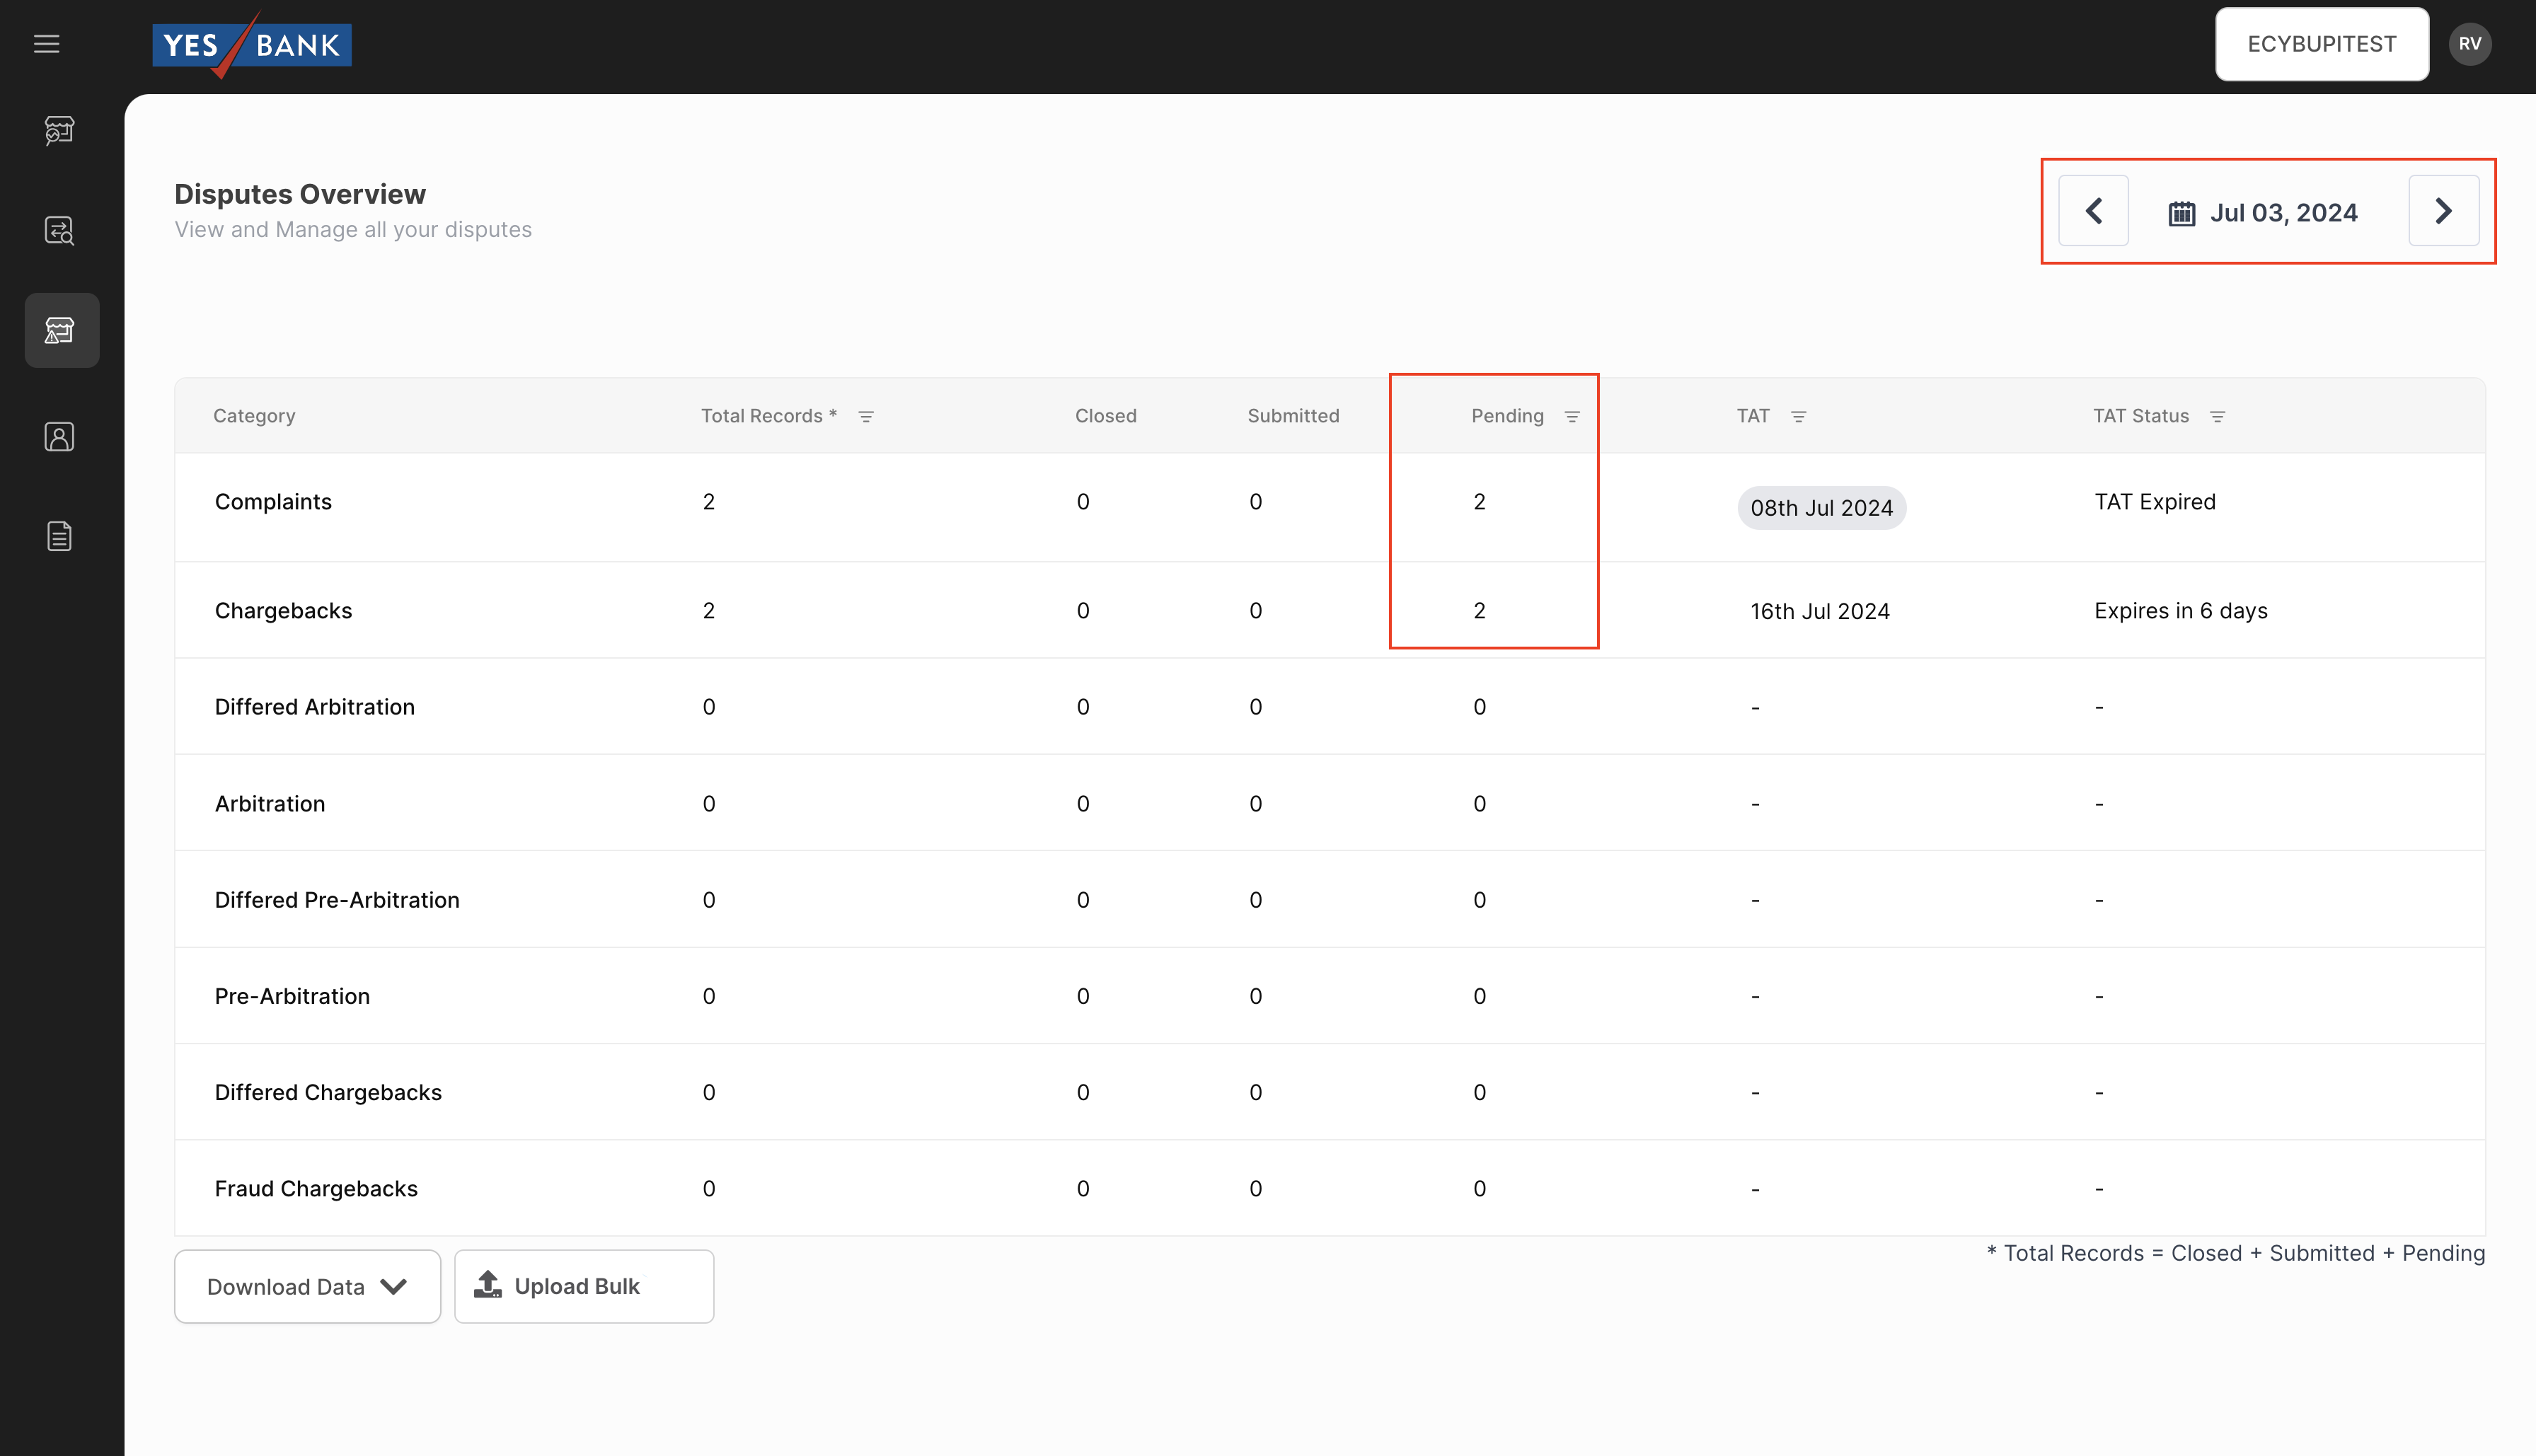
Clicking on the pending count of a category will display all the pending disputes of that particular category.
Further by clicking on an individual transaction, a detailed tab encompassing all essential information of the disputed transaction will be open to the right. This includes:
Accept/Reject option
Reason code dropdown
Proof upload option
Refund details: Gives details of refund if done.
Transaction details: All relevant details like UPI ID, Amount, Date, etc. will be displayed here.
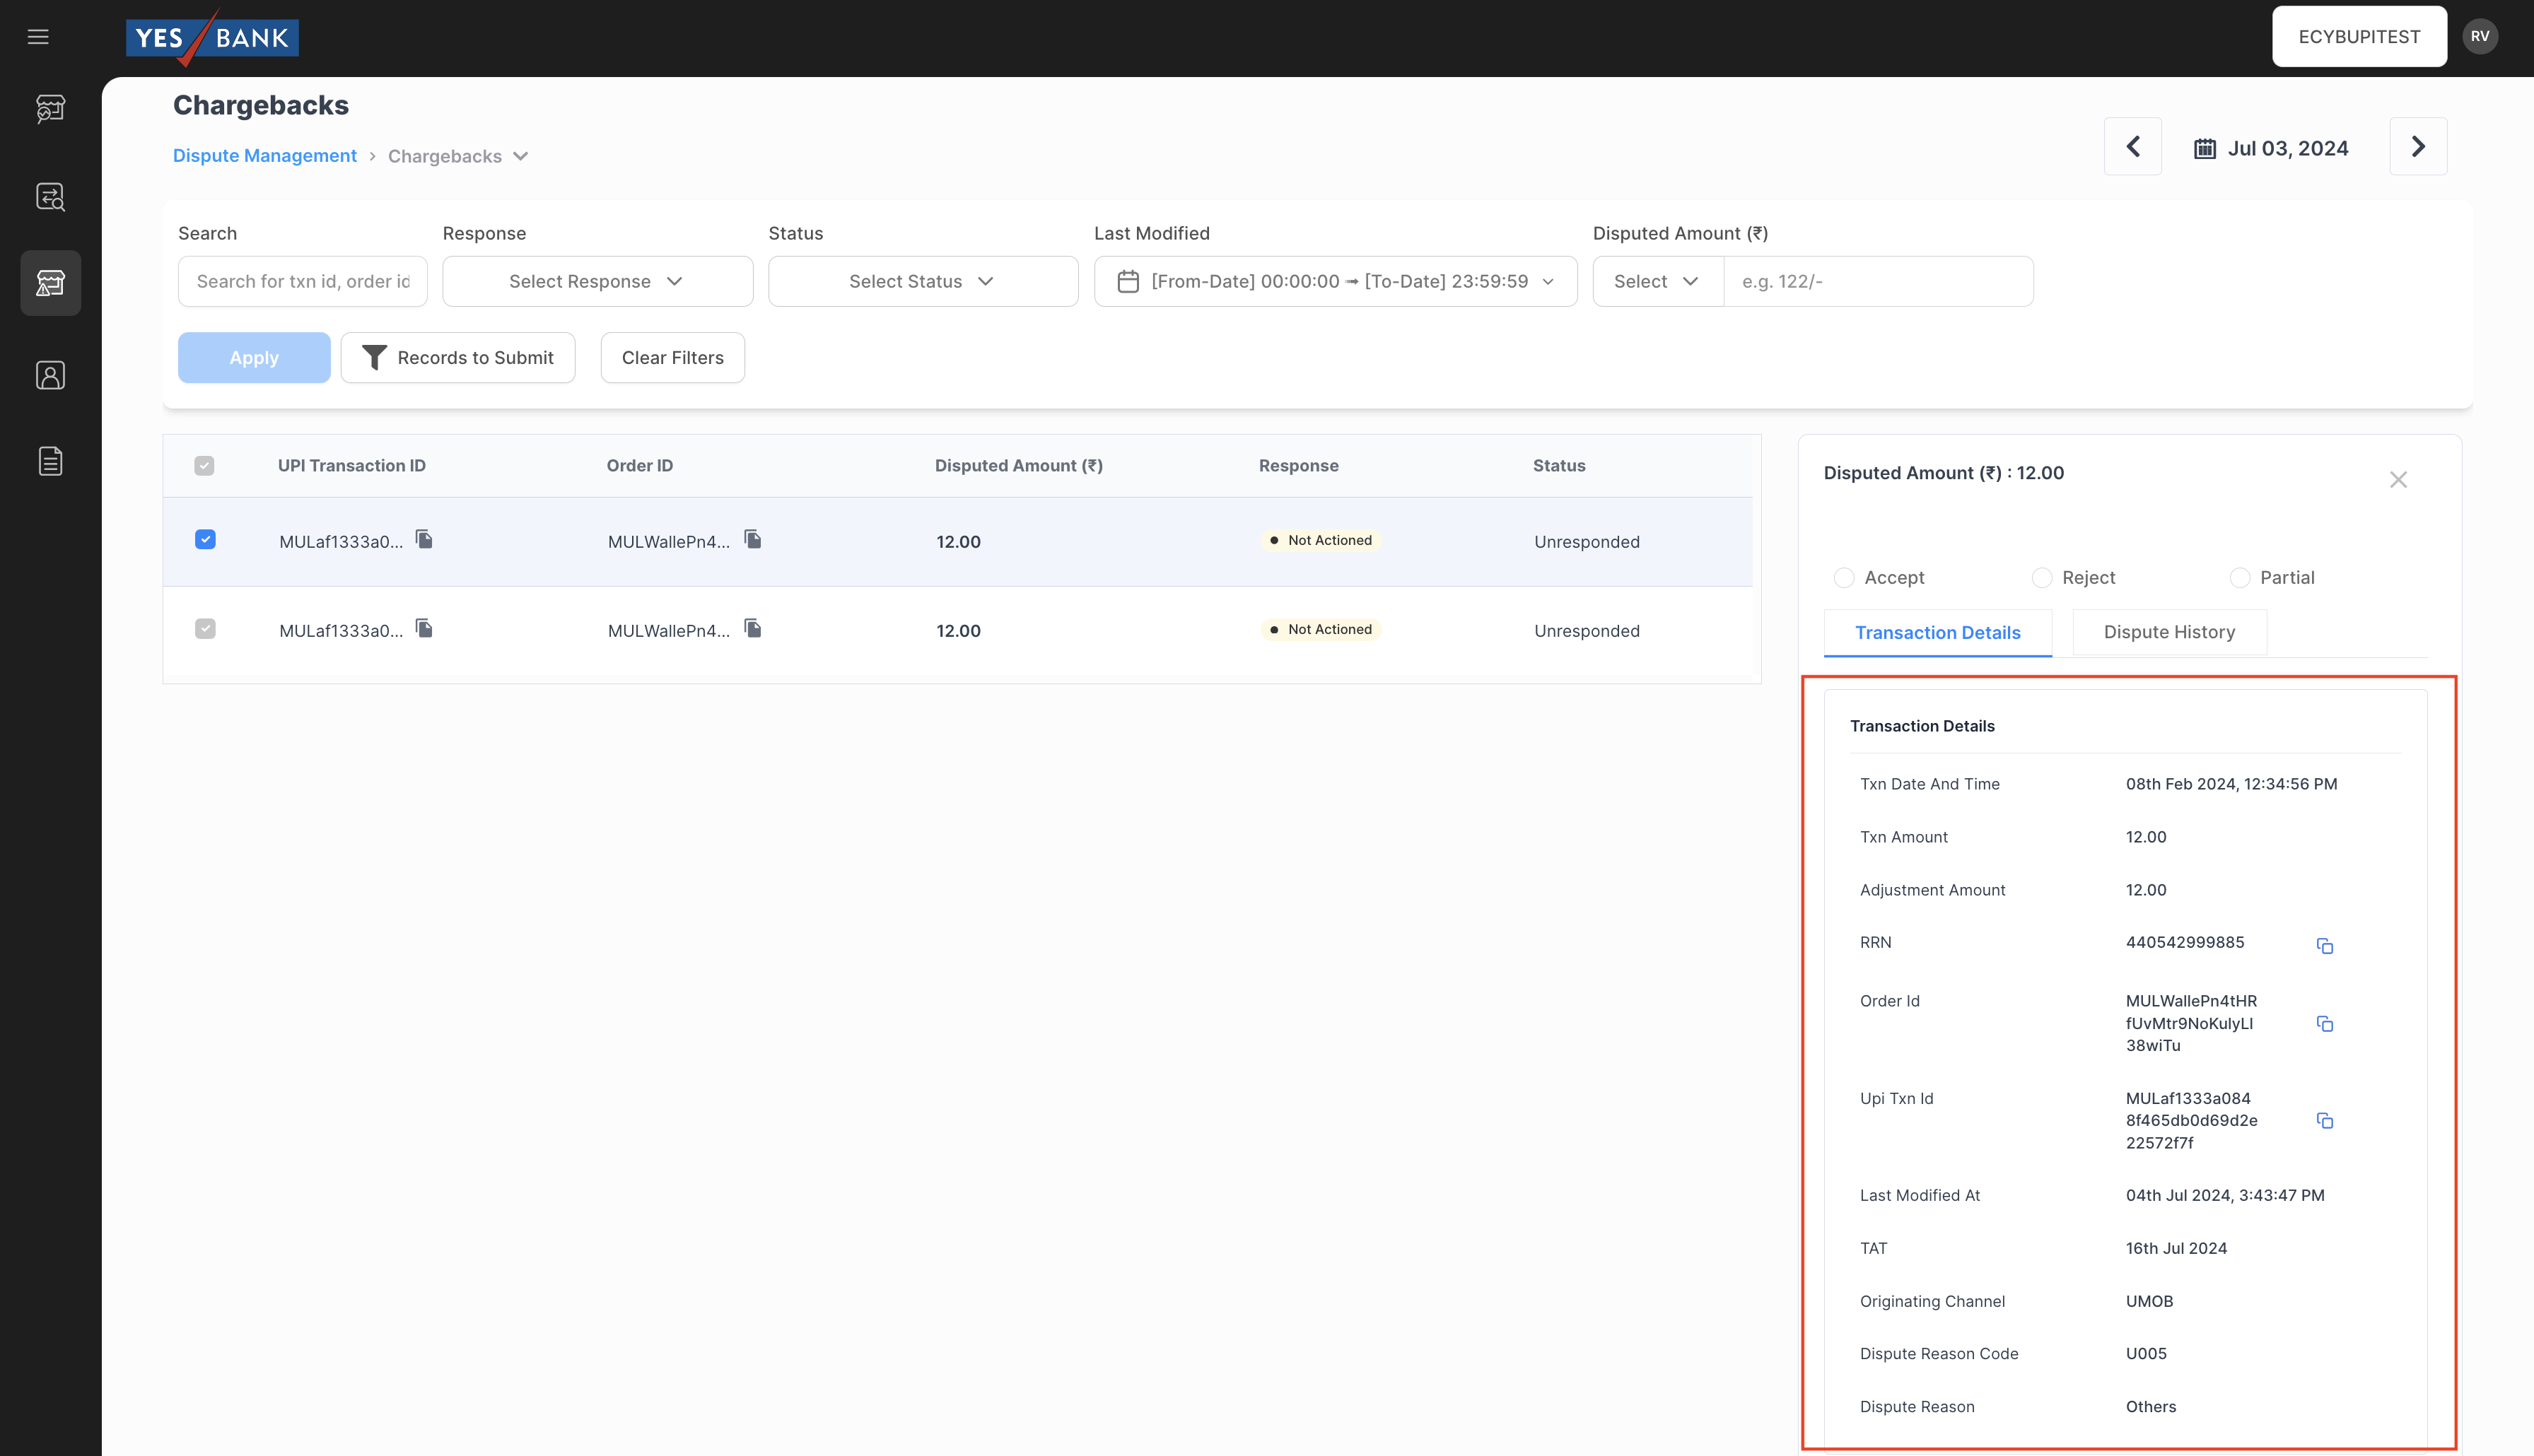
Transactions Details Dispute history: Provides details on any previous dispute that was raised on the same transaction.

Dispute History
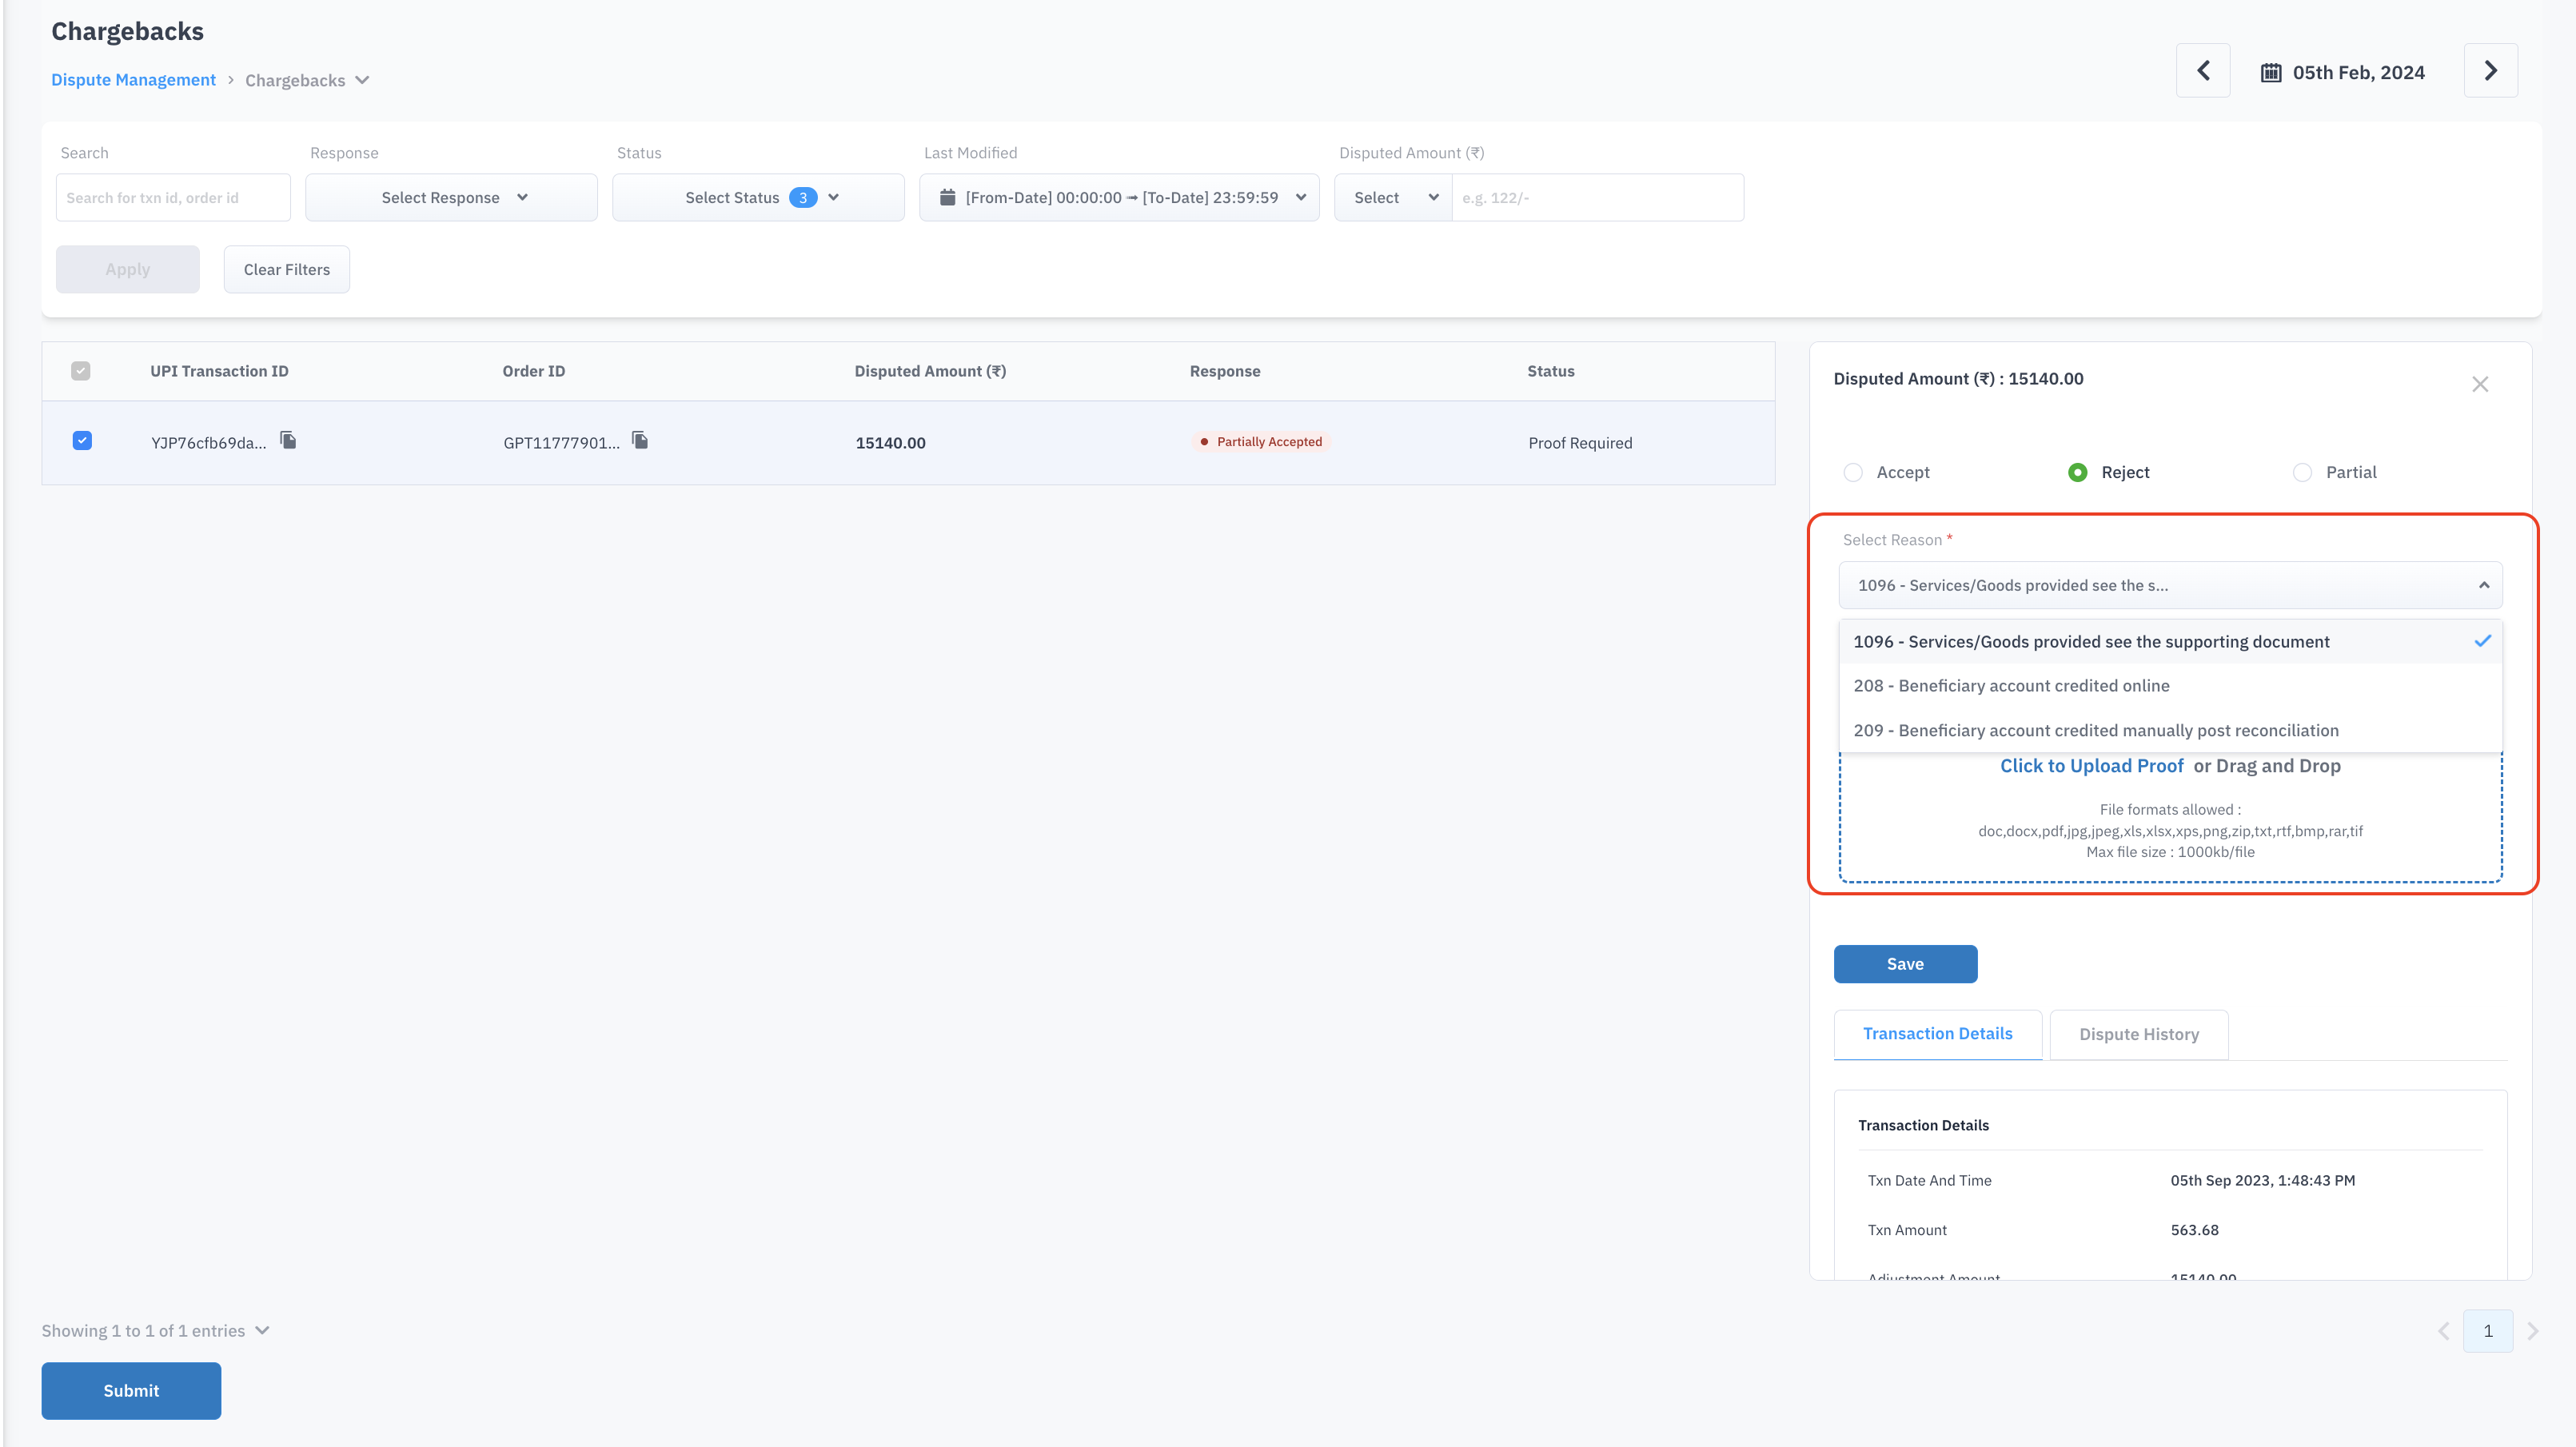
Reason Codes
Click on Accept/Reject and select the reason code best suitable to the scenario. The below table can be referred to understand the reason codes across all categories:
|
Category
|
Reject
|
Accept
|
|---|---|---|
Chargebacks
| (a)1060 - Service Provided (b)209 - Refund successful
| AC - Attributing to customer
|
Pre Arbitration
| 1098 - Services provided later see supporting documents
| AC - Attributing to customer
|
Arbitration
| 1102 - Customer has still not received the service
| AC - Attributing to customer
|
Fraud Chargebacks
| 132 - Others
| 129 - Amount has been recovered successfully from the fraudulent customer account
|
Differed Chargebacks
| 123 - Customer a/c is credited successfully and TCC raised accordingly
| AC - Attributing to customer
|
Differed Pre Arbitration
| 126 - Customer a/c is credited successfully and TCC and Re-Presentment raised accordingly
| 125 - Customer a/c is not credited, TCC and Re-Presentment raised inadvertently
|
Differed Arbitration
| 1102 - Customer has still not received the service
| AC - Attributing to customer
|
Complaints
| (a)105 - Goods/Service not provided (b)107 - Refund successful
| 106 - Goods/Service not provided (Merchant should initiate a refund for failed transaction)
|
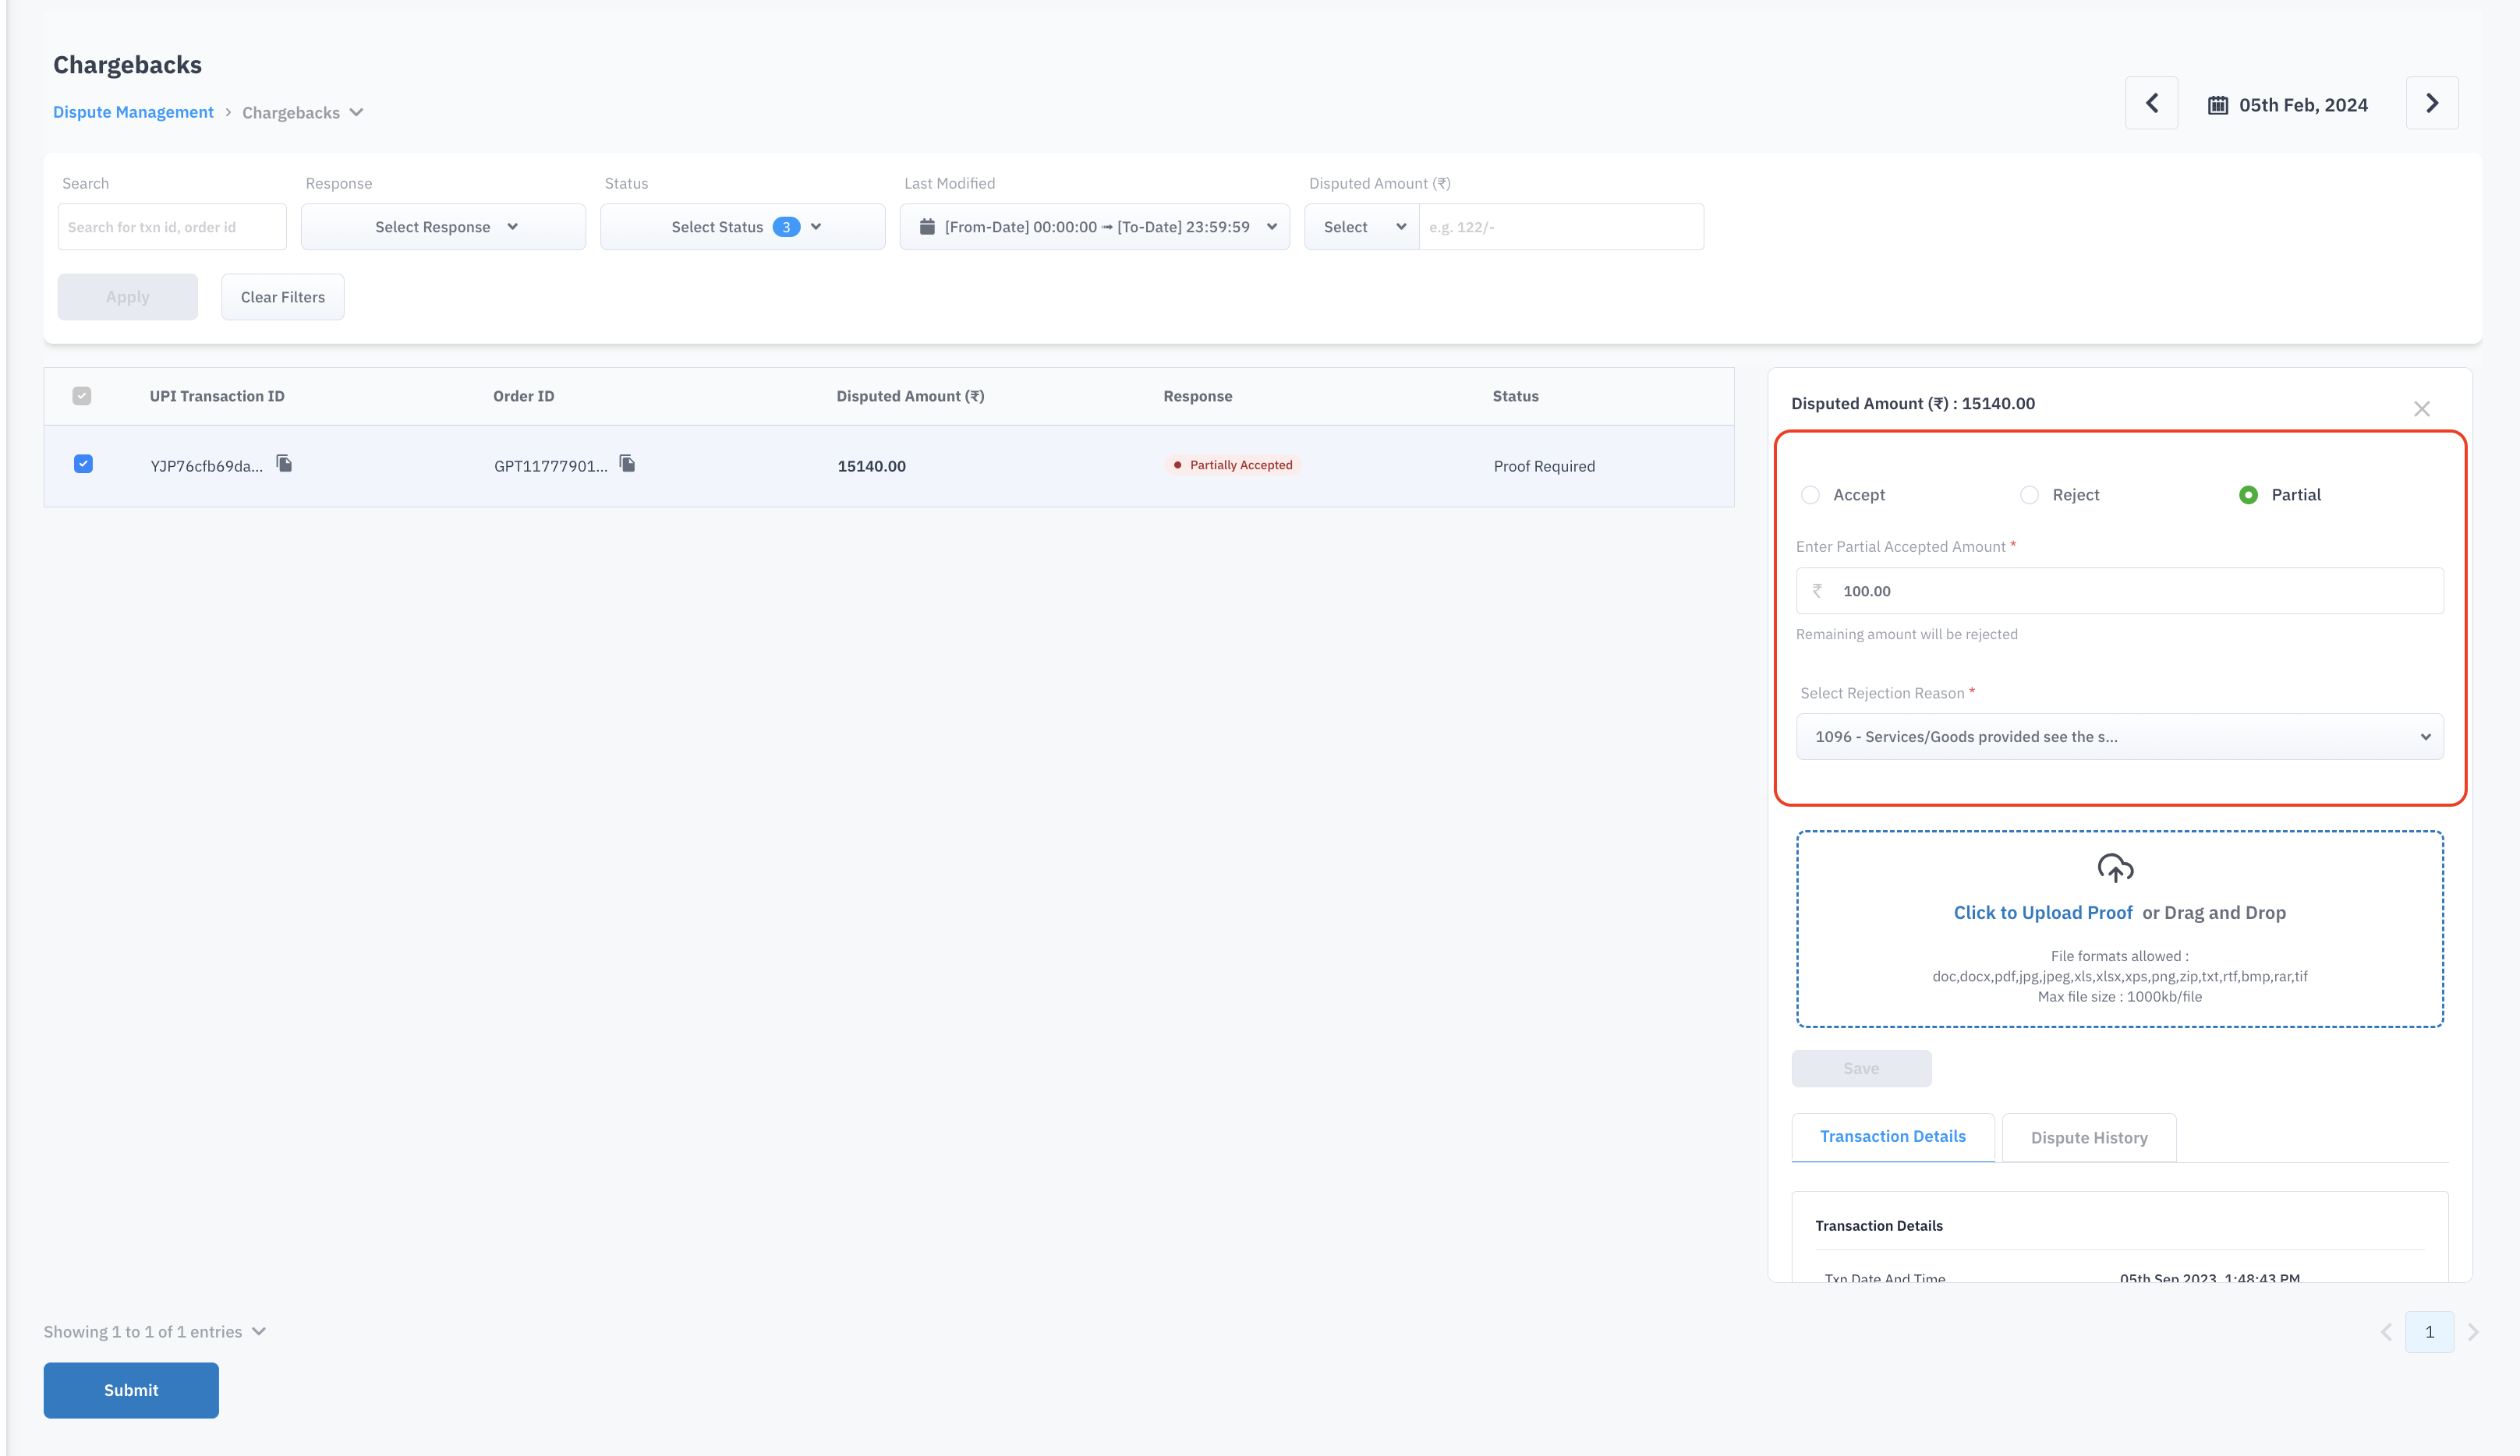
Partial Acceptance
Merchants can also accept the amount in partial. This is allowed for the below two categories Chargeback and Deferred chargebacks only. In this case, merchants need to enter the acceptance amount and need to select the reason code for partial rejection.
After selecting the code, a proof of service provided or refund done will have to be uploaded. Mandatory proof submissions are required for the below categories:
Pre-Arbitrations
Arbitrations
Differed Pre-Arbitrations
Differed Arbitrations
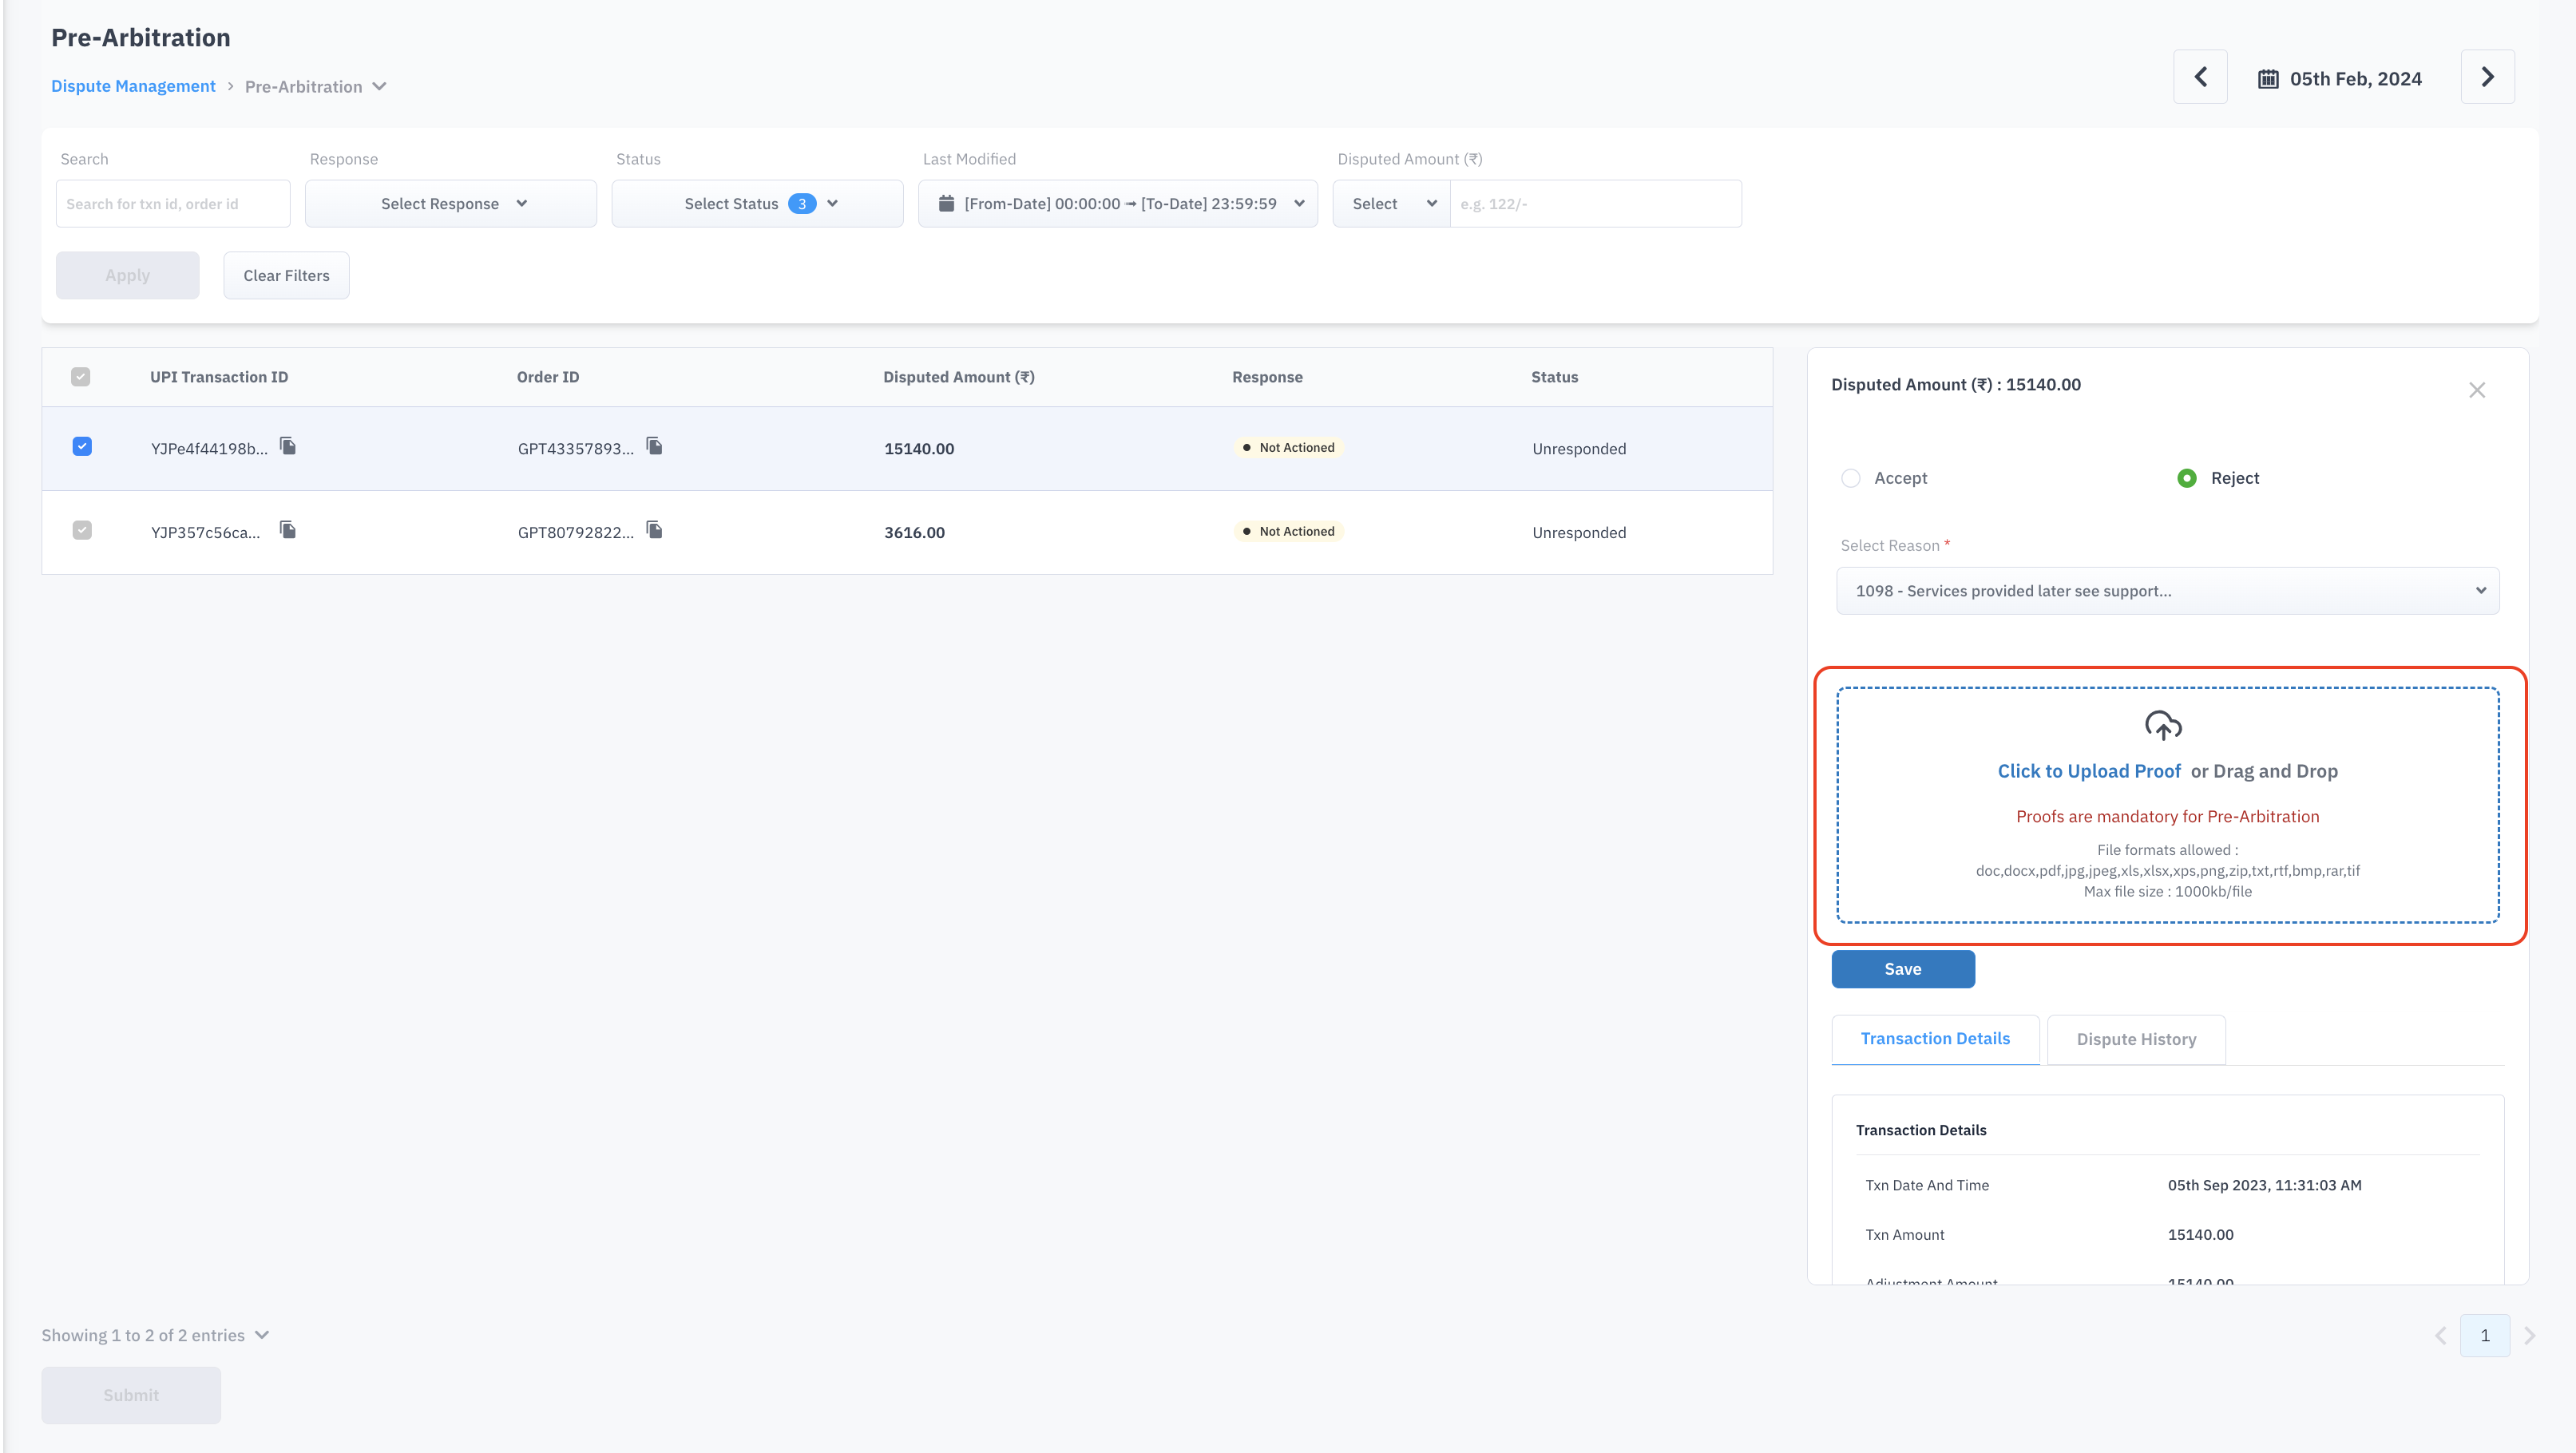
Acceptable formats for Proof
Upon completion, proceed to click 'Save.' This action will transition the dispute status from 'Unresponded' to 'Saved/Proof Required’. Similarly, all other disputes can be closed.
Once all disputes are saved, select all and click on ‘Submit’. A confirmation pop-up will prompt the user to affirm their decision before final submission as this action cannot be undone.
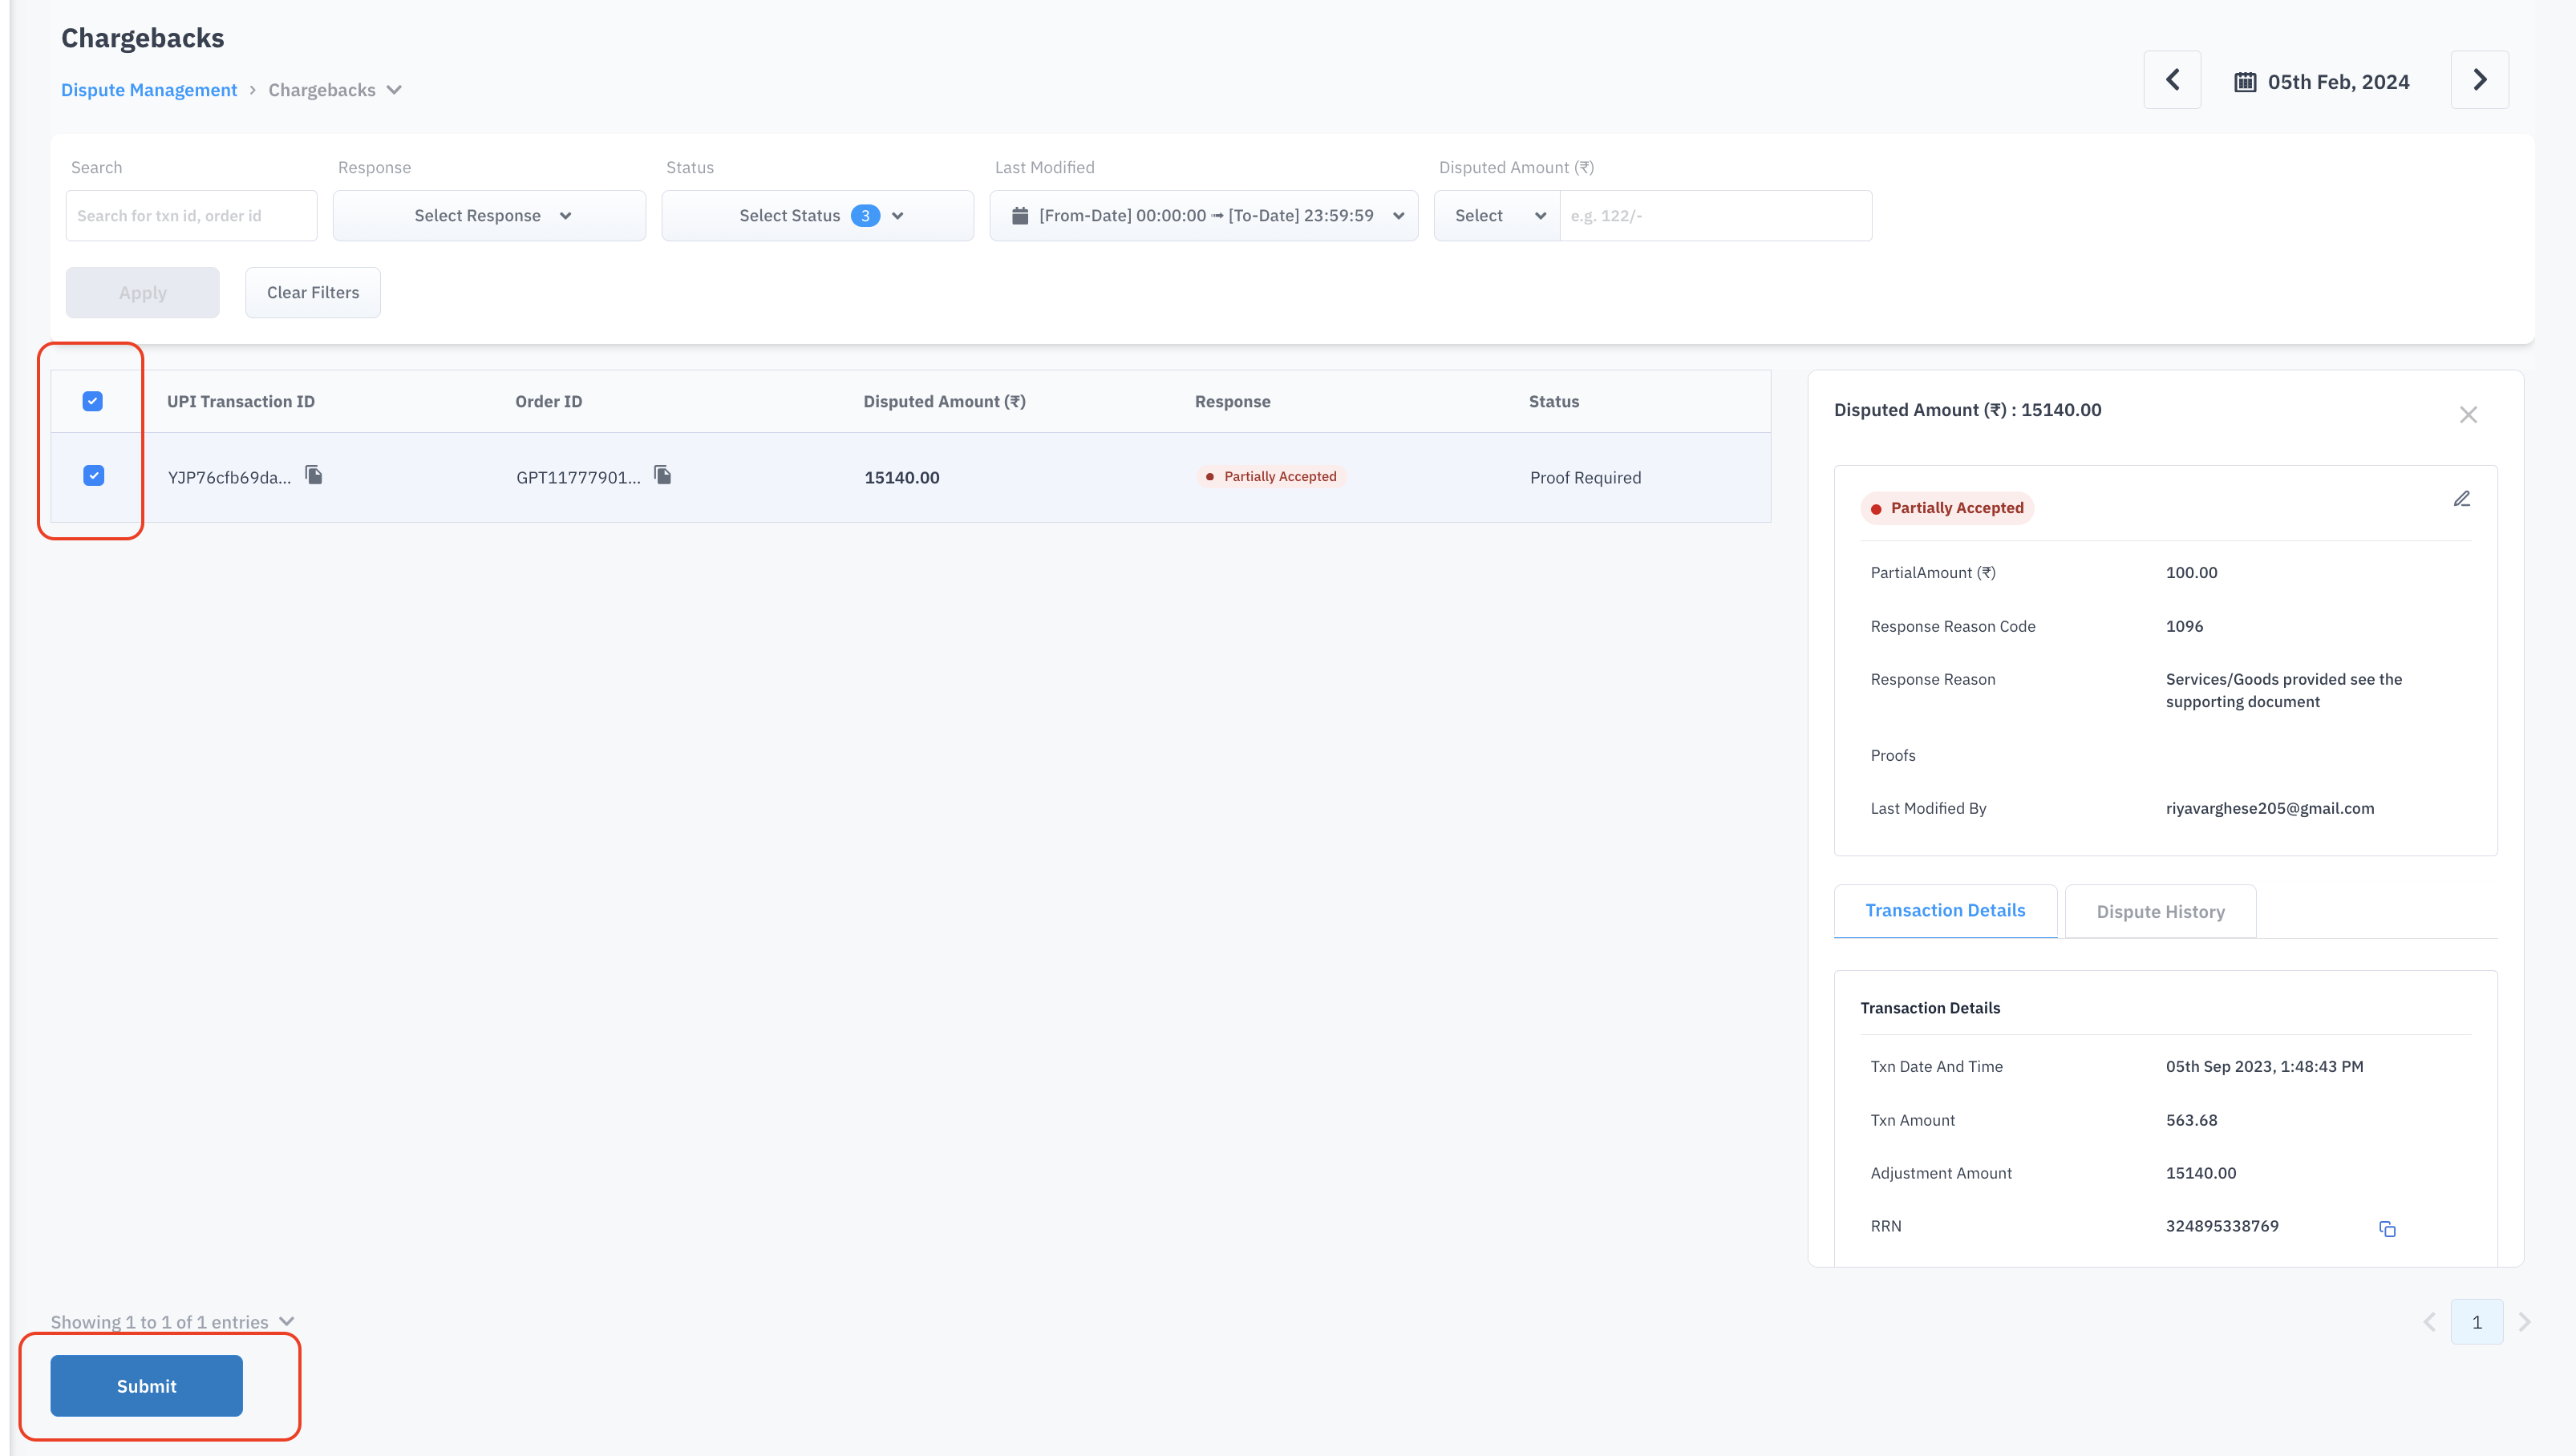
Option to Submit 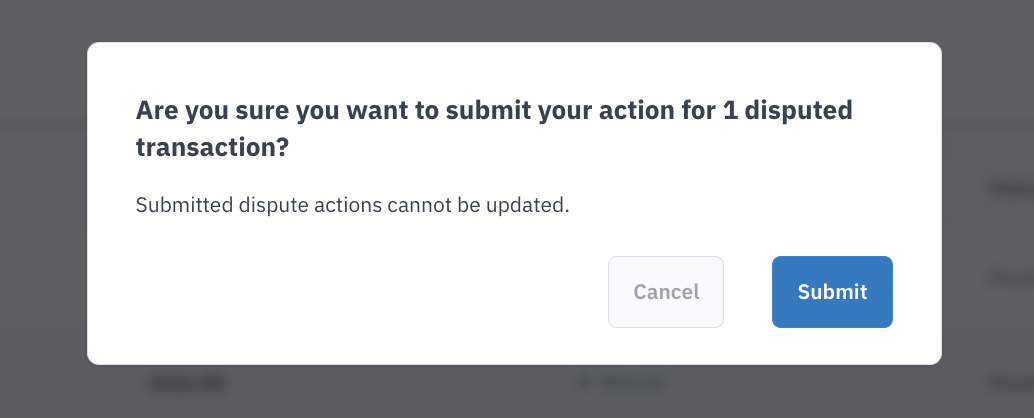
Confirmation Following the submission, a comprehensive summary will be presented with both successfully submitted and failed disputes.. The ones that are failed need to be rechecked and responded to again. Here the status will be changed from ‘Saved’ to ‘Submitted’
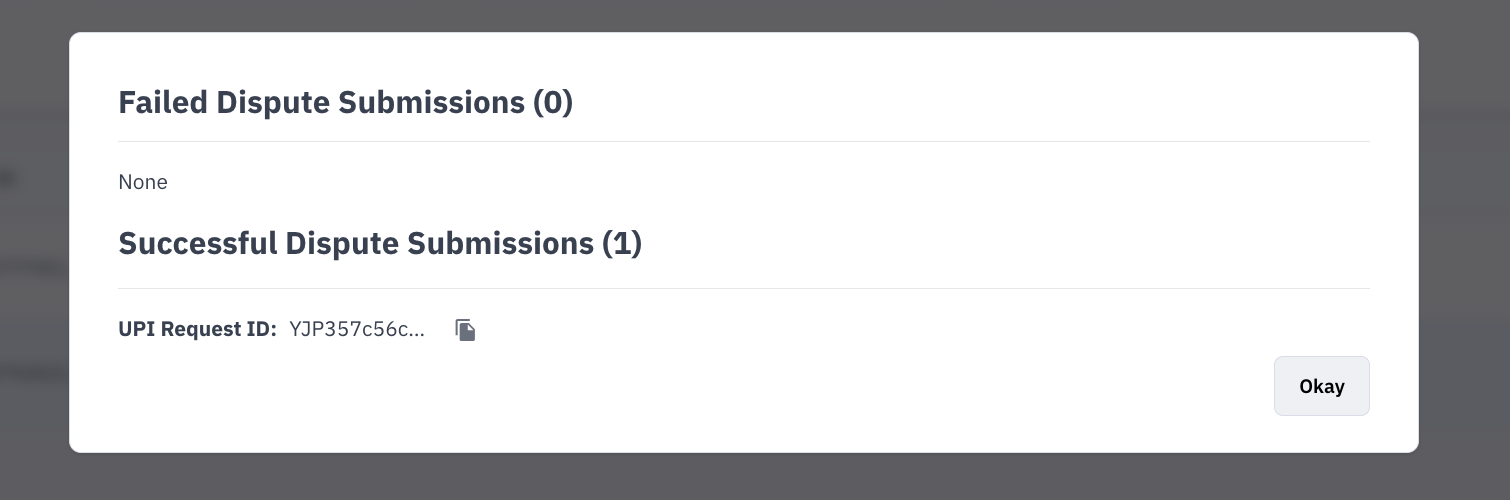
Summary after Submission TAT
Merchants have to make sure to respond before the mentioned TAT. If not done, the dispute will be auto accepted at URCS and the amount will be recovered from the merchant. TAT across different categories are:
Scroll inside to view moreDispute CategoryTATChargeback13Pre Arbitration5Arbitration5Fraud Chargeback33Differed Chargeback13Differed Pre Arbitration5Differed Arbitration5Complaints10The Juspay team will close the dispute in URCS only when it is in the ‘Submitted’ state.
Once this is closed by the Juspay team in the NPCI portal, the status will be changed from ‘Submitted’ to ‘Closed’ which is the final status.

Dispute Status - Closed If the Juspay team finds that the response received is incorrect or the proof does not match with the disputed amount, the dispute will be reopened to the merchant with the status being changed to ‘Reopened’ The action has to be taken before the original TAT of that dispute.
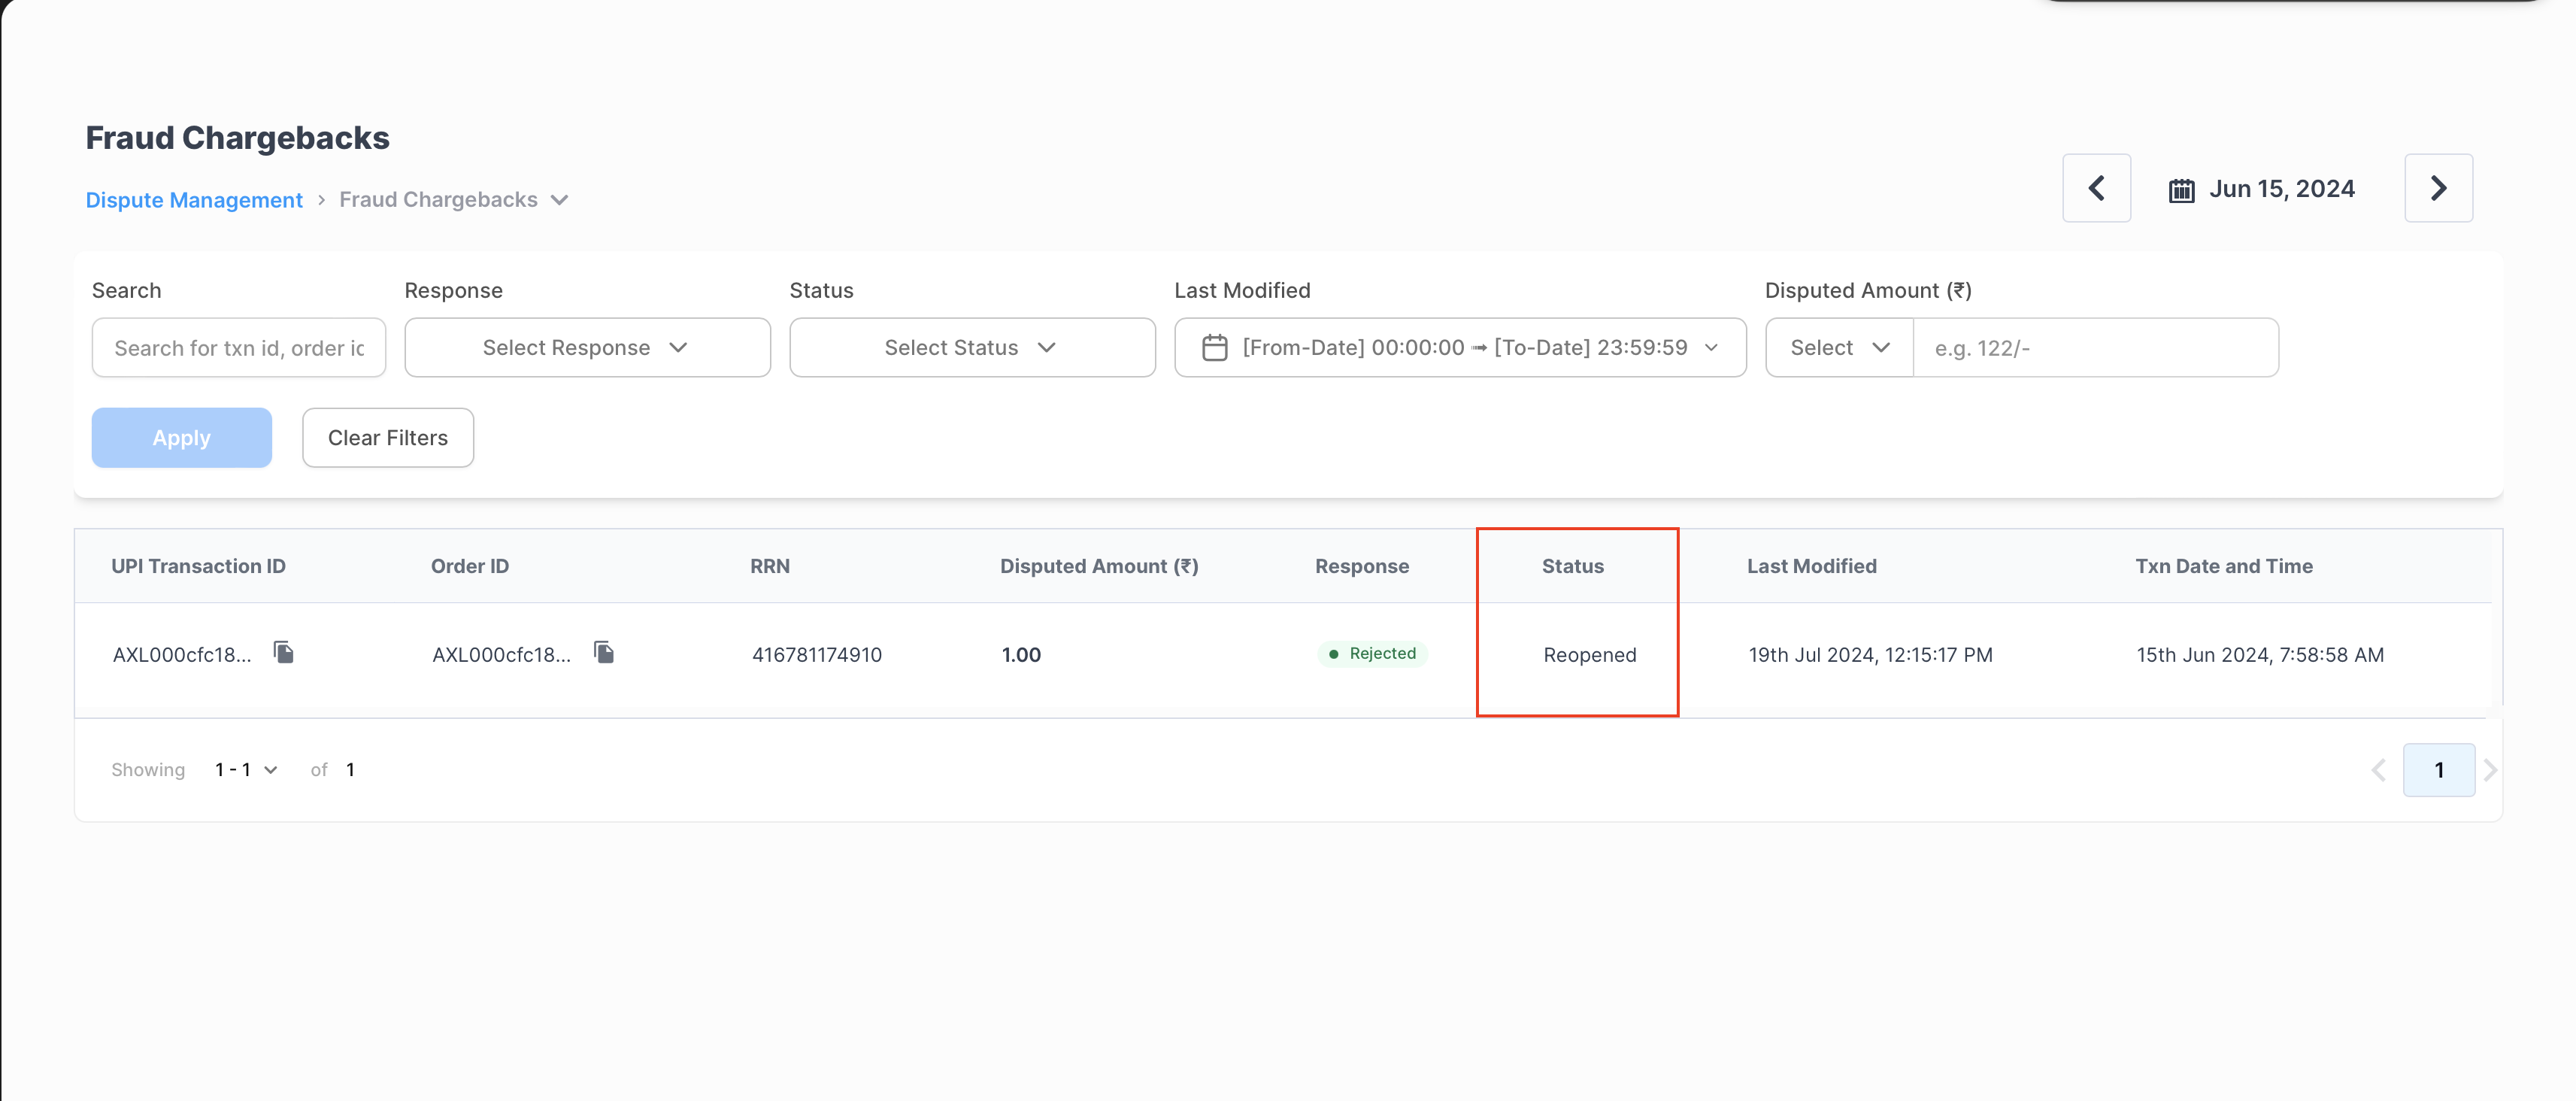
Dispute Status - Reopened Bulk Operation
Apart from the above method, merchants can also respond to disputes in a bulk file. This can be useful in case of a large number of disputes to be responded to.
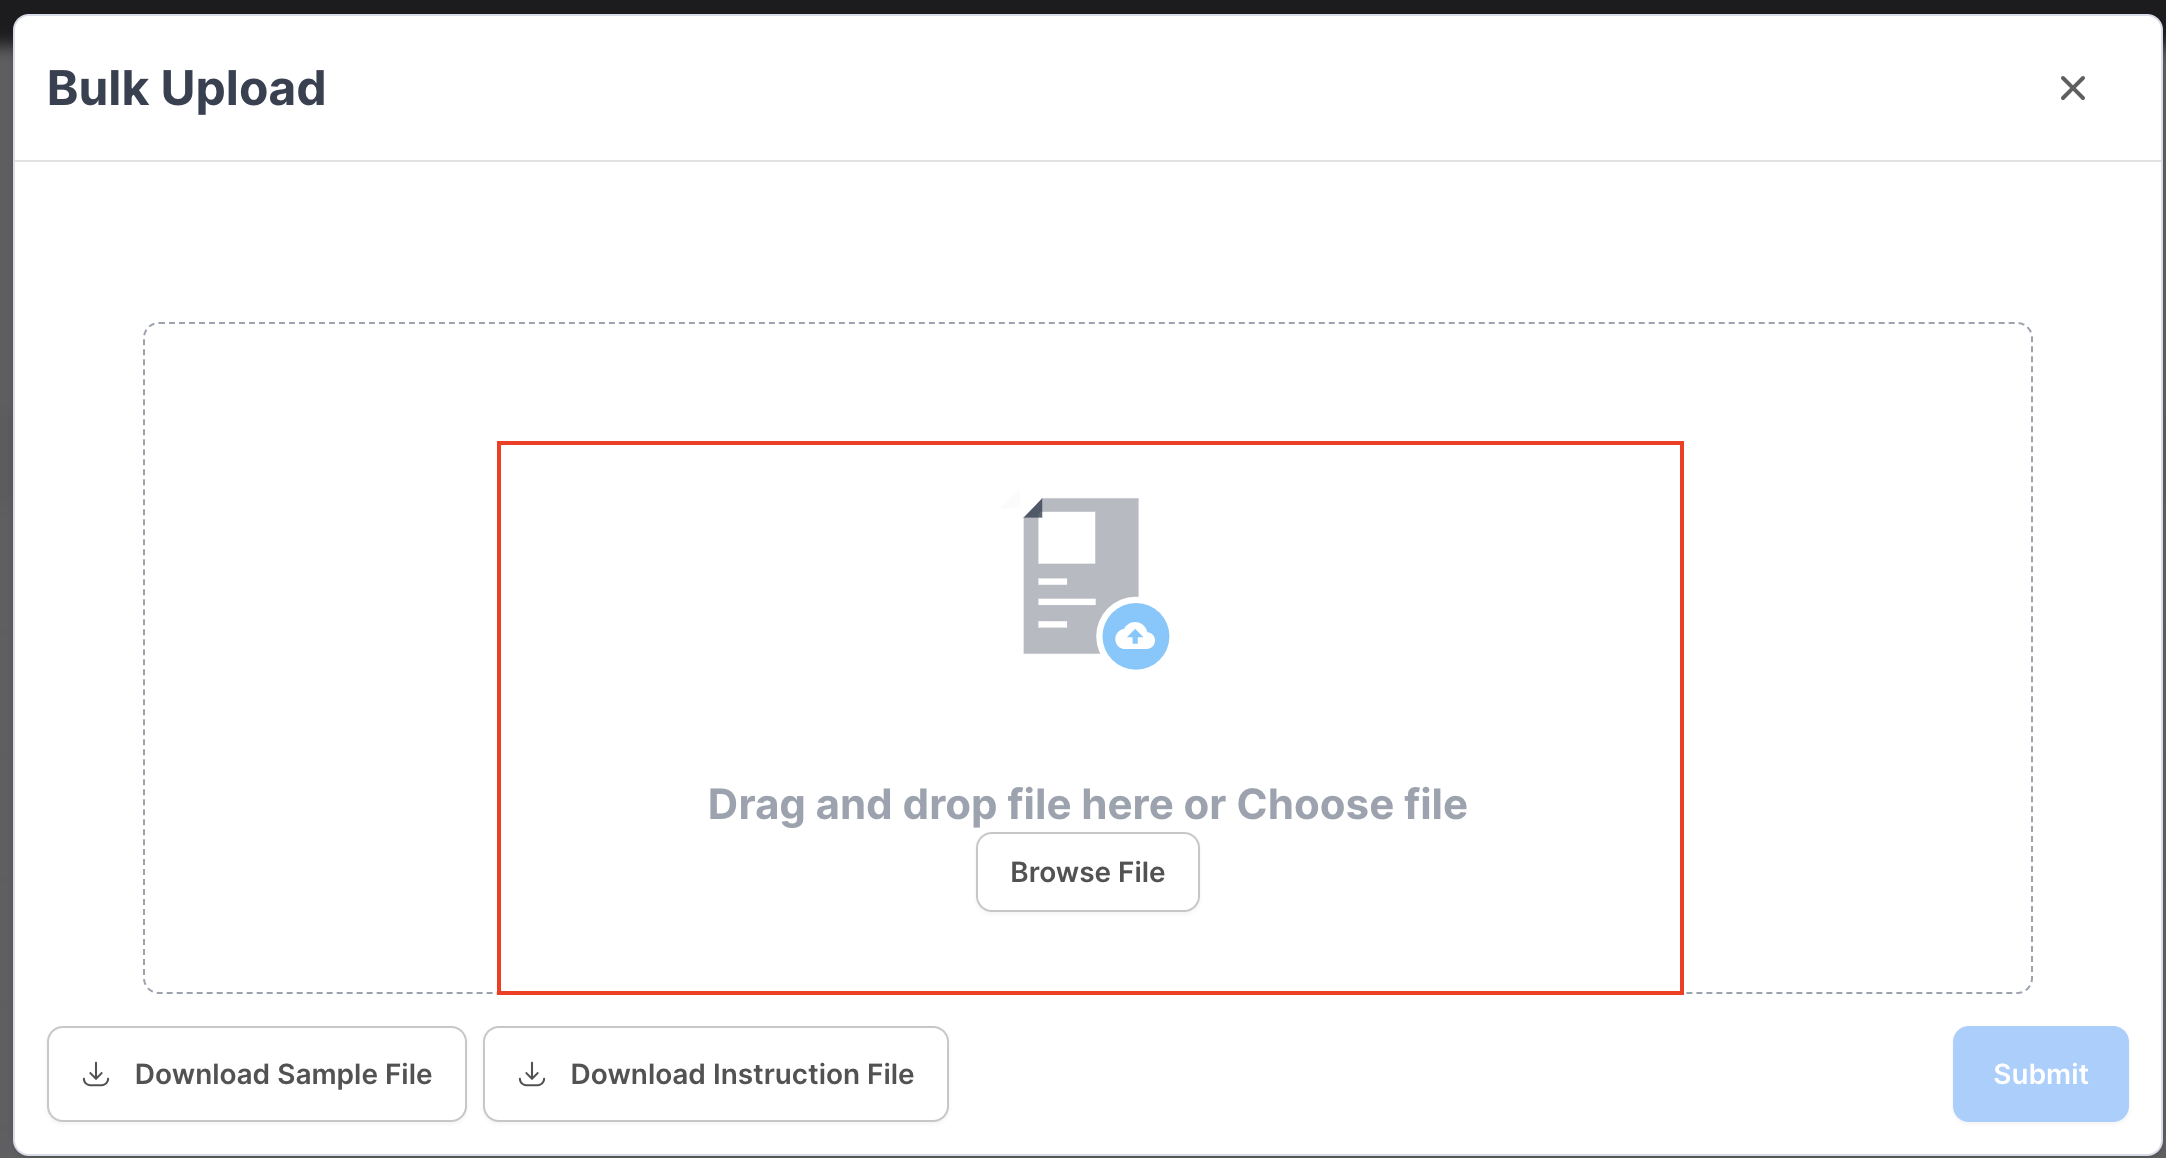
When clicked on the Upload Bulk option, merchants can download a Sample file format in which the file has to be uploaded and an Instruction file with all basic information on what is to be updated as response action, reason code, amount, etc. in the bulk upload file.
Bulk Upload Option Following are the steps to be taken for Bulk Operation:
Merchants can download the data from the ‘Download all data’ option.
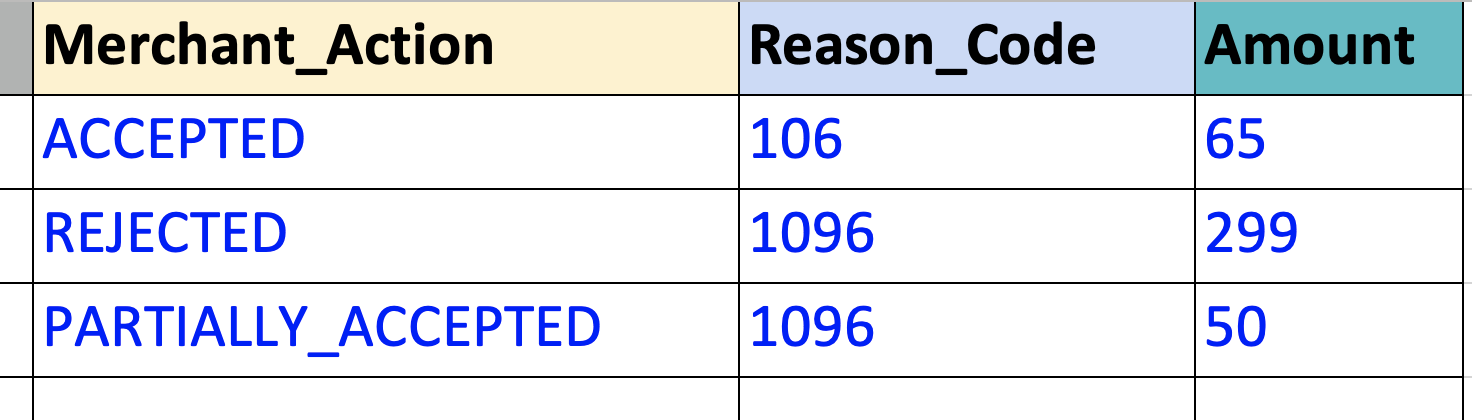
Fill in the last 3 columns with the required action to be taken. This column has to be filled in the format mentioned in the instruction file only. Failing to do so will lead to the file being rejected.
Note: Please do not edit any values apart from the last three columns present on the extreme right of the sample above with headers (Merchant_Action, Reason_Code, Amount)
Validate and upload the file back to the dashboard through the ‘Upload Bulk’ option.
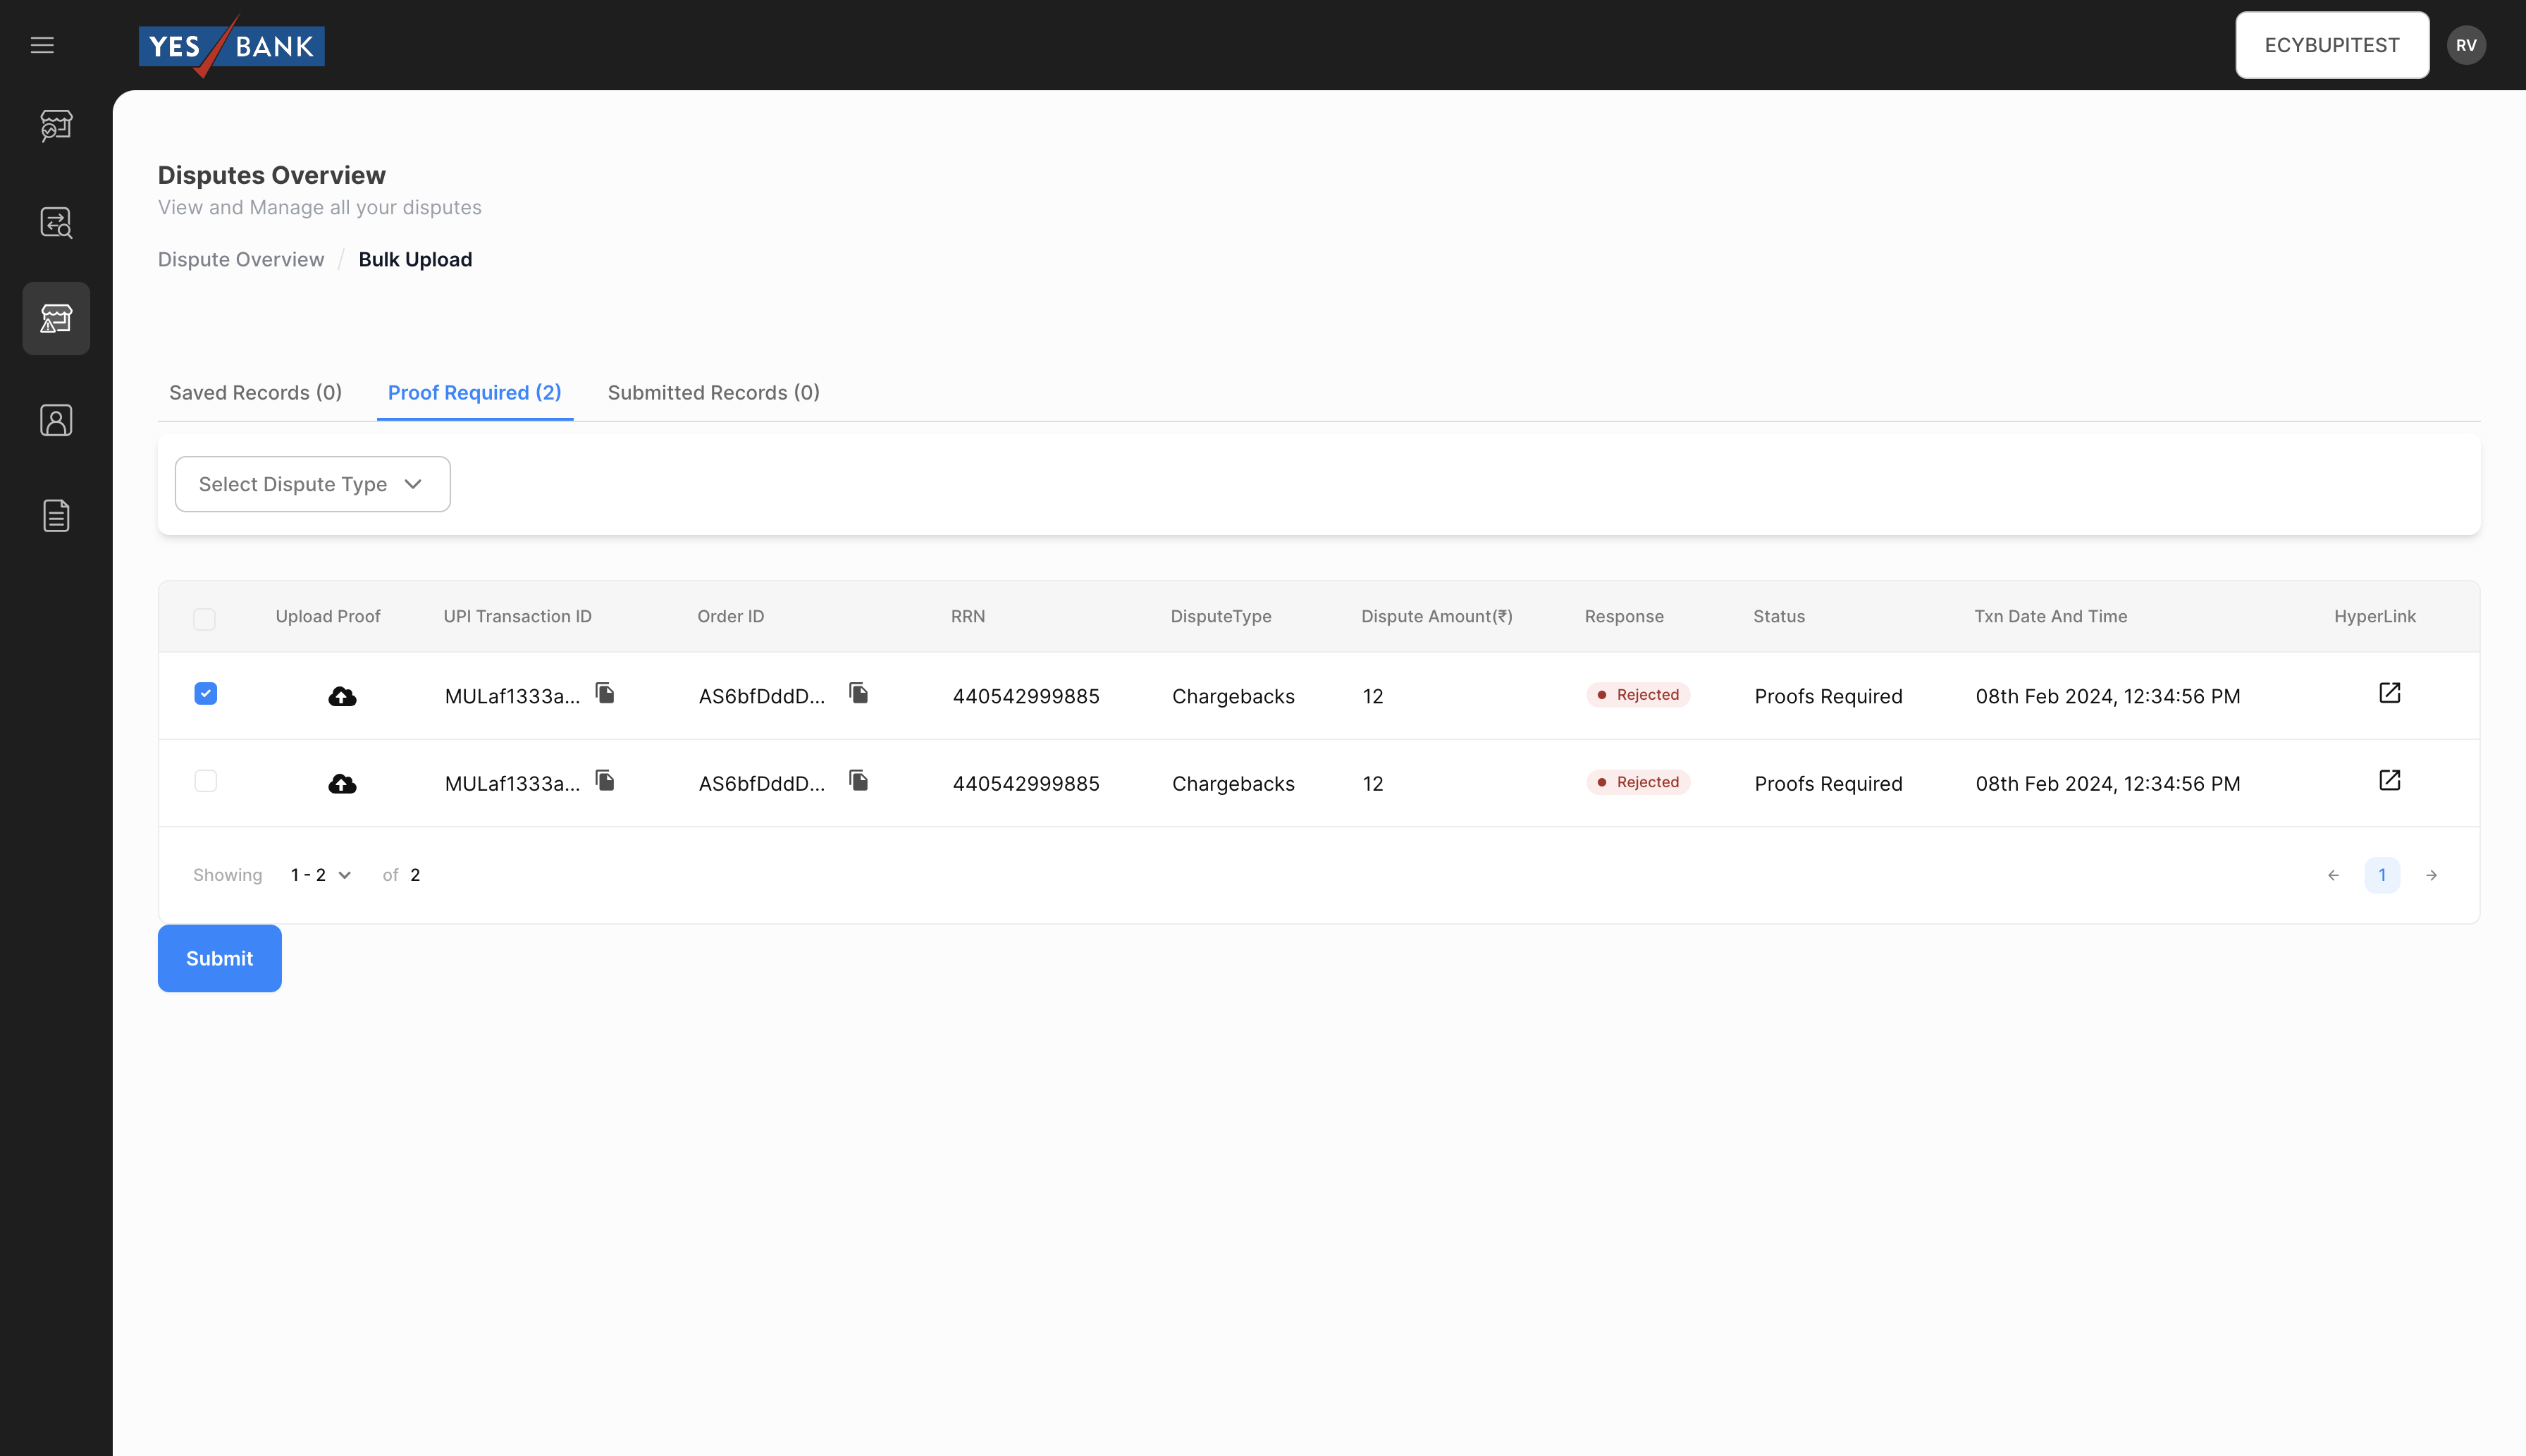
Bulk upload option Once uploaded successfully, all transaction details will be listed in the ‘Proof Required’ tab. Here merchants can upload proof for transactions where required and then ‘Save’. If there is no proof, merchants can select all and ‘Submit’ at once. Once submitted, merchants can make no further changes
Bulk Upload - Proof Required After saving, the transactions will be listed in the ‘Saved Records’ option. Here Merchants will have to select the transactions that they wish to submit and click on ‘Submit’. Once submitted, merchants can make no further changes. A pop up message will appear asking for confirmation.
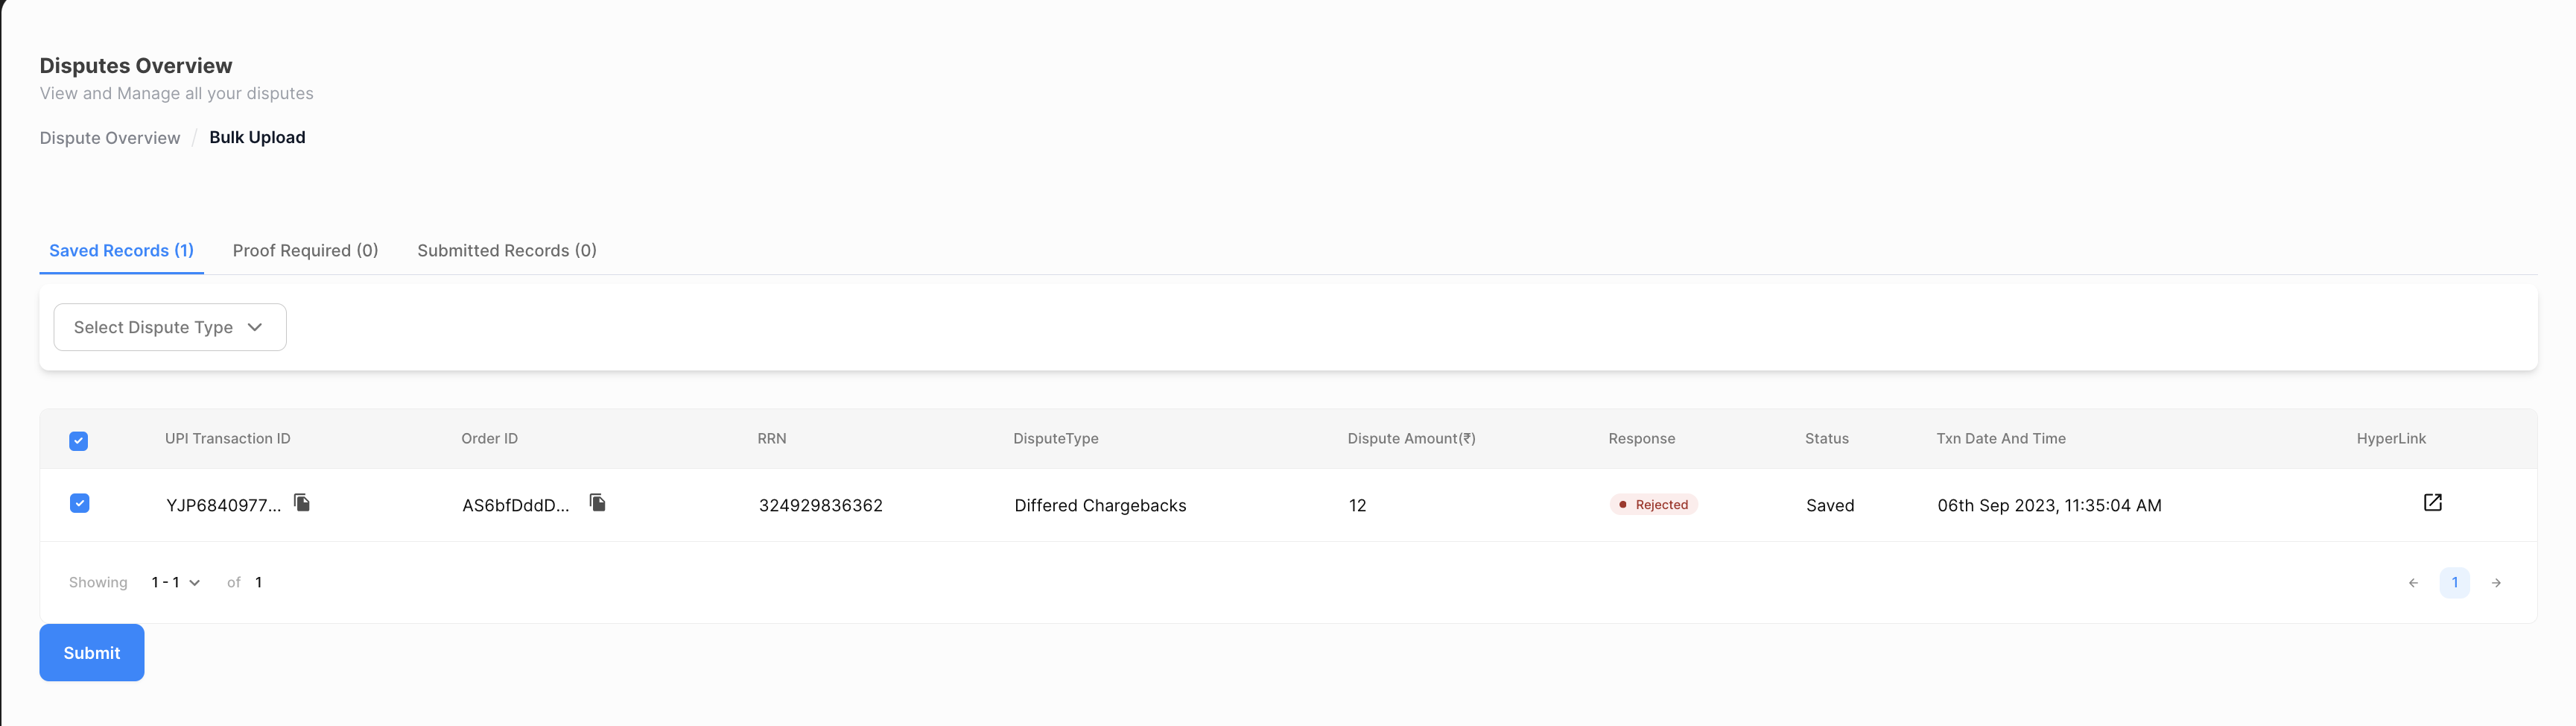
Bulk Upload - Saved 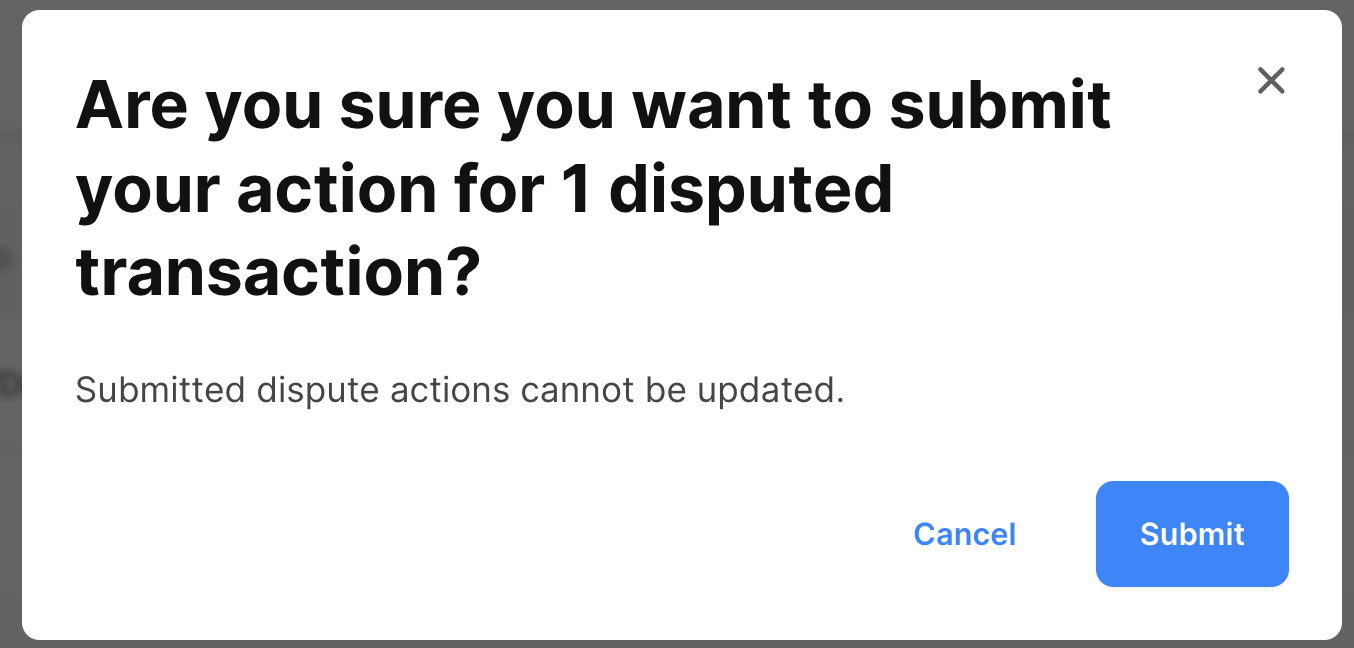
Submission Confirmation Once confirmed, a summary of results will be displayed for the submitted records.
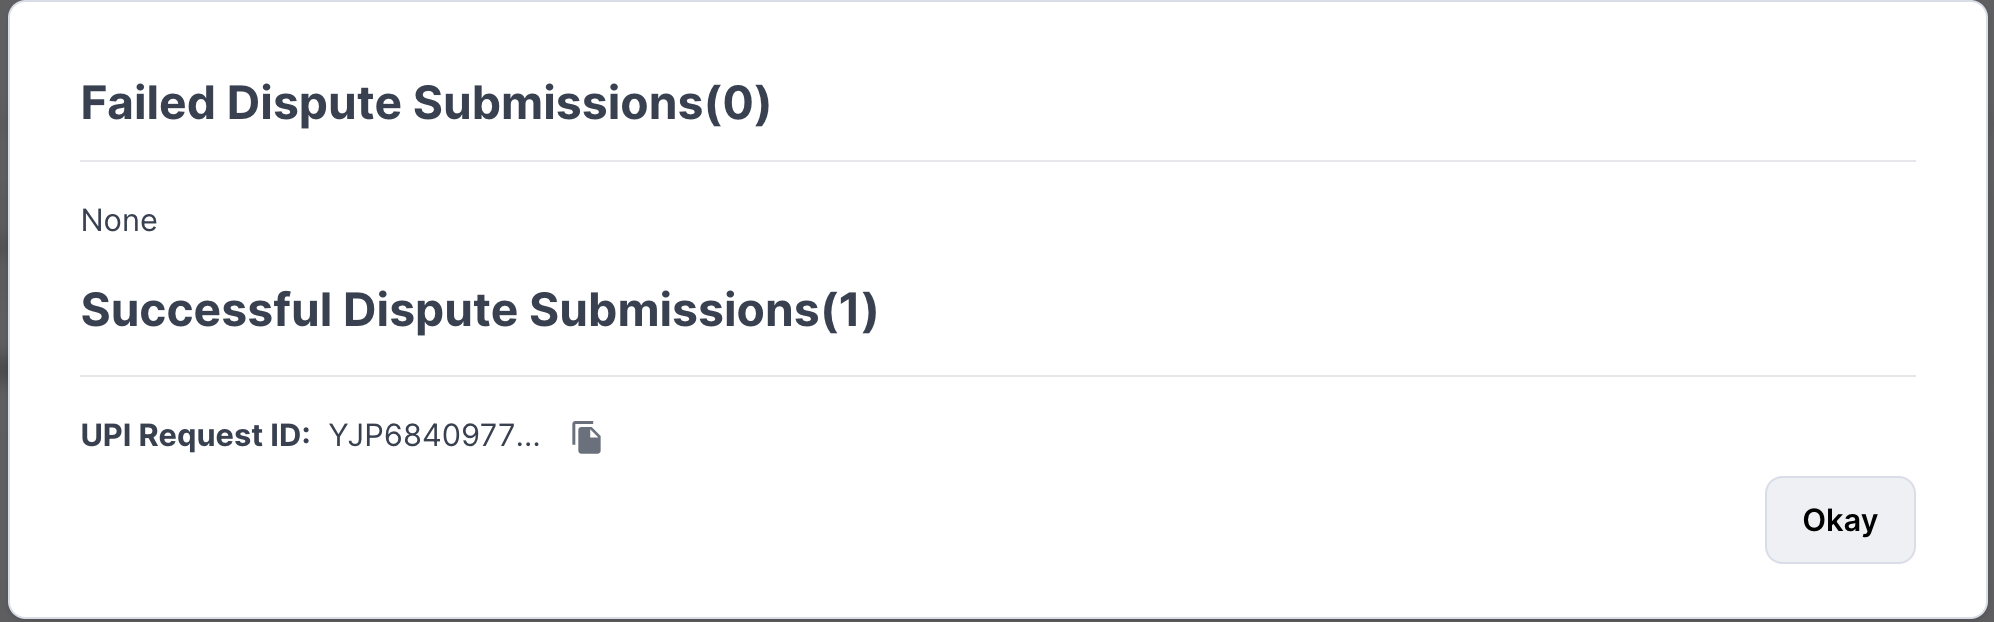
Submission Summary The transactions will then be listed under ‘Submitted Records’.
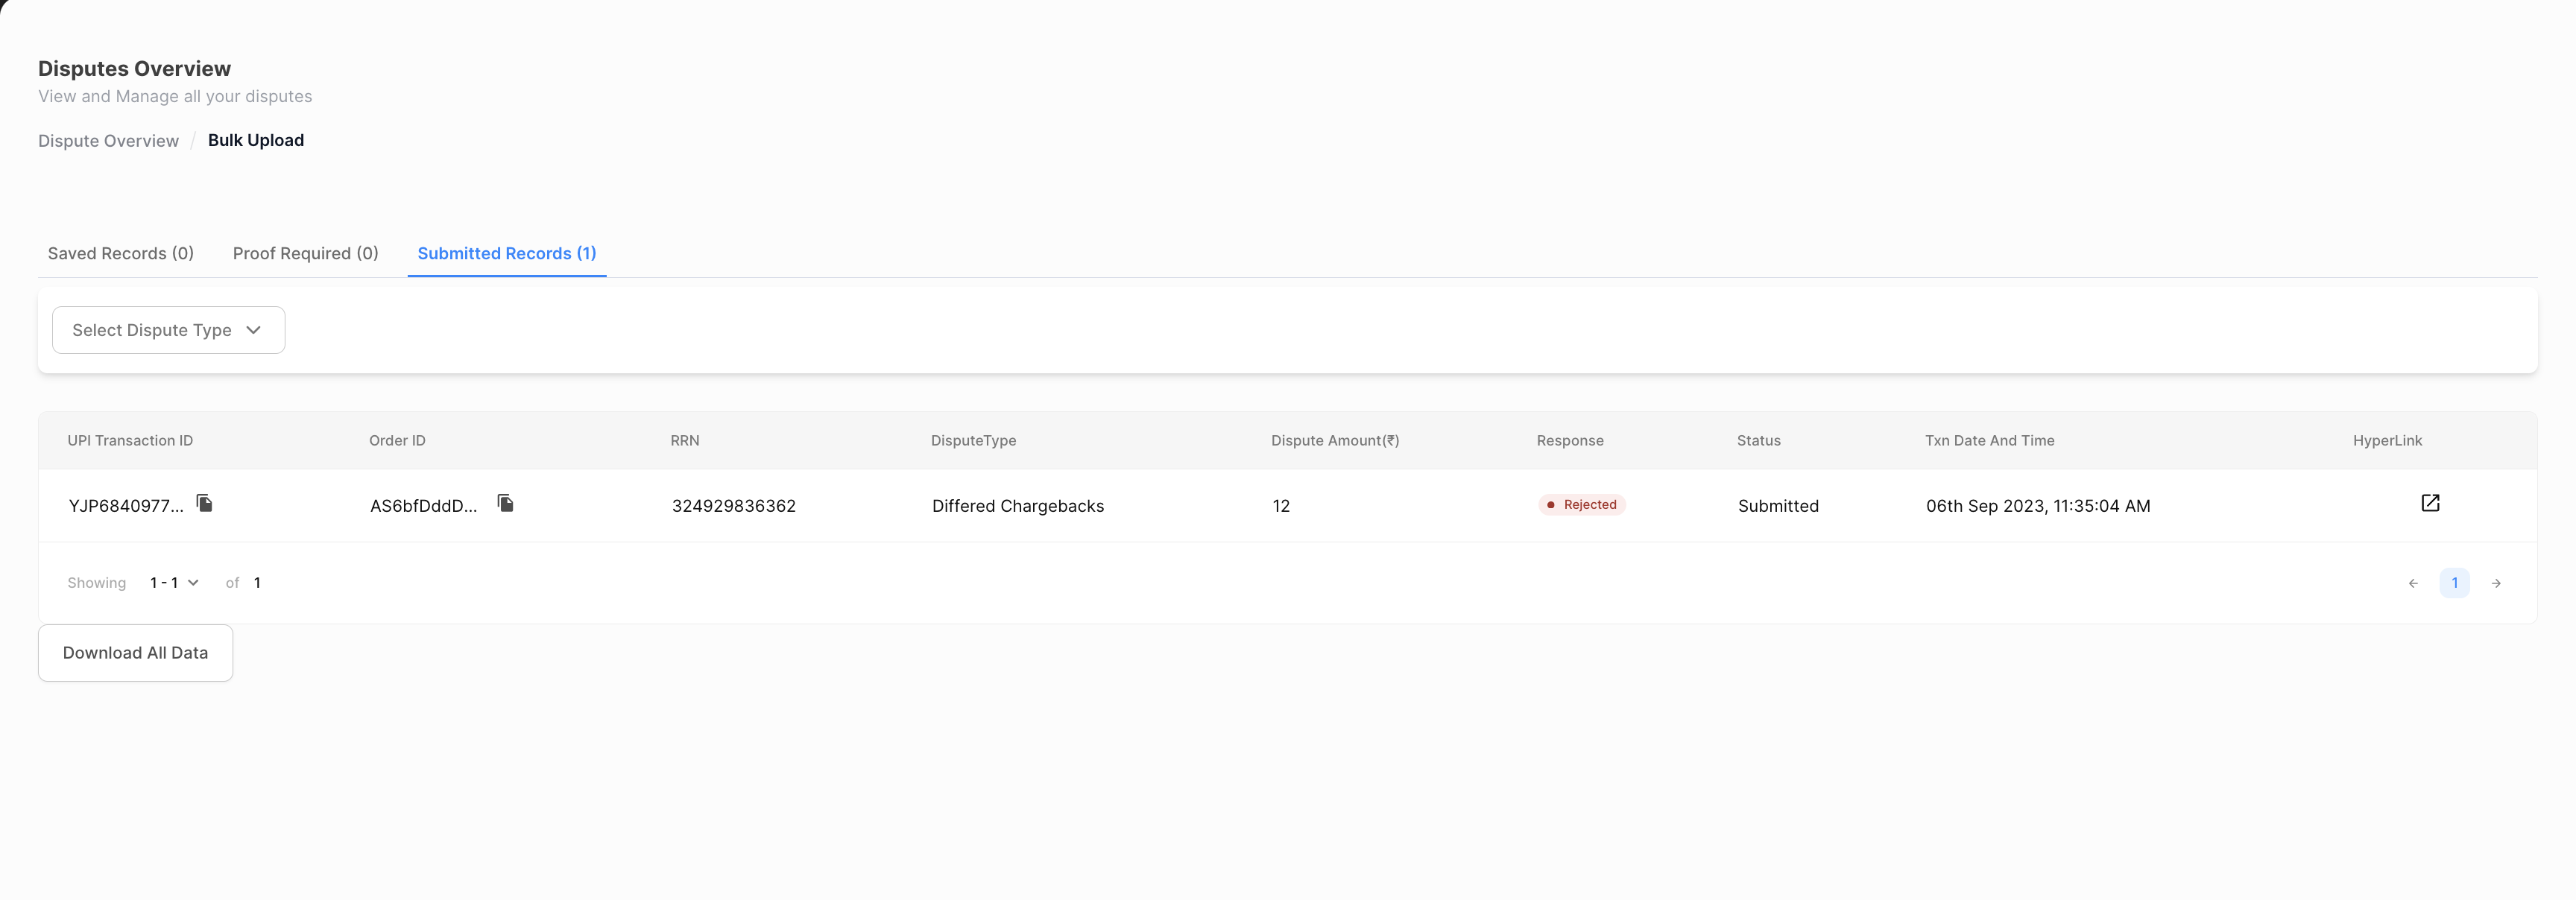
Bulk Upload - Submitted records The Juspay team will close the dispute in URCS only when it is in the ‘Submitted’ state.
Once this is closed by the Juspay team in the NPCI portal, the status will be changed from ‘Submitted’ to ‘Closed’ which is the final status of the Dispute.
If the Juspay team finds that the response received is incorrect or the proof does not match with the disputed amount, the dispute will be reopened to the merchant with the status being changed to ‘Reopened’ The action has to be taken before the original TAT of that dispute.
Important Note: If Merchant fails to provide the response before TAT, Juspay will not be able to respond to NPCI within TAT so the dispute will be auto accepted and the same will be deducted from the daily settlement of Merchant. A penalty can also be levied on the merchant for the same.